

Celebrate the cozy charm of autumn in your art journal with these 25 simple watercolor ideas! Perfect for capturing the warmth and colors of fall, these ideas are great for artists of all levels. From colorful leaves and rustic pumpkins to misty forests and cozy mugs, each concept offers a relaxing way to enjoy watercolor painting and welcome the beauty of the season. So grab your watercolors, embrace the spirit of autumn, and let these ideas fill your journal with fall-inspired creativity!
All artwork provided is original and can be used as a reference for your own drawings.
Table of Contents
Wheat Field At Sunset
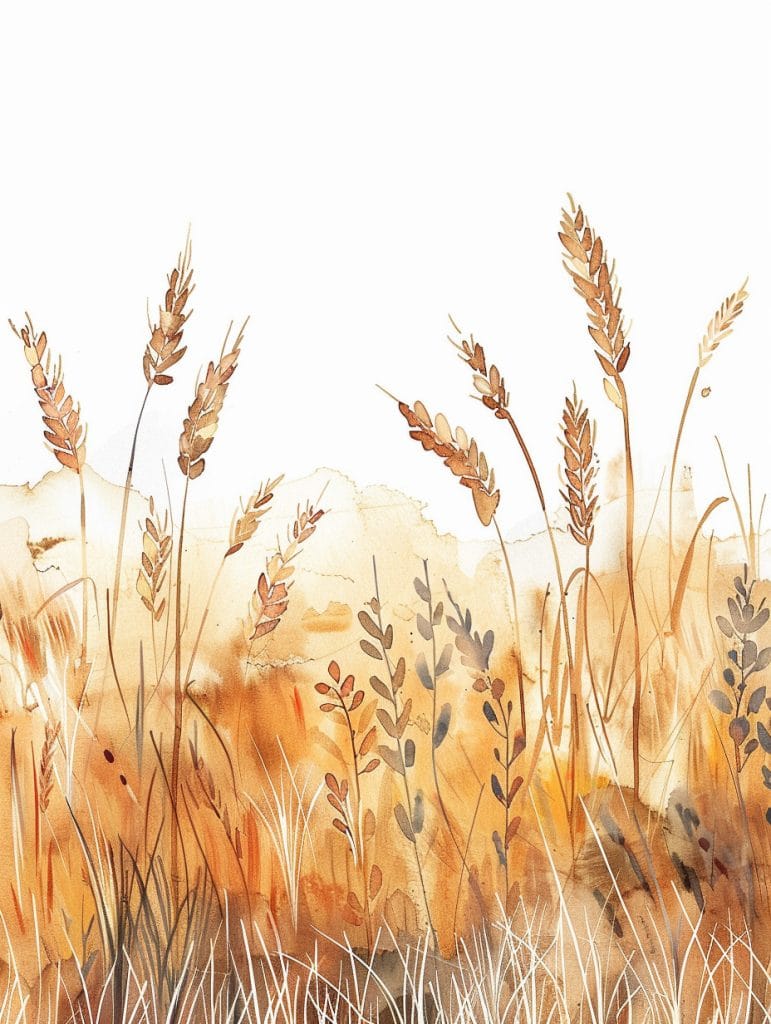
The first thing that catches my eye in this image is the beautiful, delicate rendering of the wheat stalks against that soft, warm background. It’s pretty impressive how the artist managed to capture the essence of a wheat field with such a limited palette.
From a technical standpoint, what’s really interesting here is the way they’ve used transparency to create depth. You can see how the foreground stalks are more opaque and detailed, while the background fades into a wash of warm tones. This is a technique I’ve struggled with for years – getting that balance between detail and suggestion just right.
I remember when I was first learning to paint wheat fields, I kept overworking everything. I’d get so caught up in trying to paint every individual stalk that I’d lose the overall feeling of the scene. It took me a long time to learn to let go and trust the water to do some of the work for me.
Speaking of water control, this artist has clearly mastered the wet-on-wet technique for the background. See how the colors blend seamlessly? That’s not easy to achieve. You’ve got to get the paper wet enough for the pigments to flow, but not so wet that everything turns to mud. I still struggle with this sometimes, especially on humid days when the paper doesn’t dry as quickly.
One thing I really, really love about this piece is the use of negative space. The artist hasn’t felt the need to fill every inch of the paper, which allows the wheat stalks to really stand out. This is something I always try to emphasize in my workshops – sometimes what you don’t paint is just as important as what you do.
If I were to offer any suggestions for refinement, I might consider adding a bit more contrast in the foreground. A few darker stalks could really make the composition pop. But that’s just my personal preference – from what I’ve seen, every artist has their own way of handling these delicate balances.
Oh, and while we’re on the subject of wheat fields, did you know that Van Gogh painted over 30 wheat field paintings? I always found that fascinating. It just goes to show how much depth there can be in a seemingly simple subject.
Anyway, back to the techniques – the dry brush work on some of the individual wheat kernels is really well done. It’s a great way to
Weathered Post With Ivy
Honestly, if I were sketching this quickly, I’d prob start with the wooden fence posts. They’re the backbone of the composition and def set the tone for the whole piece. The way the artist captured the texture and grain of the wood is just *chef’s kiss*.
From a technical standpoint, what’s really interesting here is the transparency in the ivy leaves. Getting that right balance of pigment and water to achieve that translucent effect is tricky as heck. I’m not gonna lie, I struggled with that for years in my own work.
One technique I’d use here is wet-on-wet for the initial washes on the wood, letting the colors blend and create that weathered look. Then I’d go in with some dry brush strokes to add texture and detail. And for those ivy leaves? Glazing all the way, baby. Layer after layer of thin washes to build up that depth and richness.
But let me tell you a quick story – when I first started teaching workshops, I had this student who just couldn’t get the hang of glazing. She kept putting on too much pigment at once and it was driving her nuts. So I showed her this trick where you test your glaze on a scrap piece of paper first to check the consistency. Game changer! Now I always keep a test sheet next to my palette.
And speaking of palettes, I’m actually reorganizing mine right now as I’m writing this. It’s a disaster area, I swear. But anyway, back to the painting…
The other thing that really stands out to me is the water control in those ivy tendrils. They’re so delicate and precise. That takes a really steady hand and a lot of practice. I’d probably use a rigger brush for those fine lines, maybe even one of those teeny tiny 000 brushes if I was feeling fancy.
Oh, and can we talk about the color choices for a sec? The muted greens and browns are just perfect for creating that natural, organic feel. I’d probably start with a mix of sap green and burnt umber for the base of the leaves, then glaze with some quinacridone gold for warmth.
Honestly though, the trickiest part of this whole piece would be getting the balance right between the detailed elements and the more loosely painted areas
Stack Of Firewood
Wow, this watercolor really catches the eye with its stunning use of texture and color layering. The artist has done an amazing job capturing the rough, woody surfaces of the logs while still maintaining a sense of delicacy in the fall leaves.
One technique that really stands out to me is the way they’ve used a dry brush technique to create those weathered, grainy textures on the logs. It’s not easy to get that level of detail without muddying up your colors – I remember struggling with this when I first started painting landscapes years ago. I’d always end up with a muddy mess instead of those crisp, defined edges.
The contrast between the soft, wet-in-wet background and the more defined foreground elements is really striking too. It creates this nice sense of depth that pulls you into the scene. I’m guessing they probably did multiple layers of glazing to build up those rich autumn colors in the leaves – that’s a technique I’m still perfecting myself, though. Sometimes I get a bit heavy-handed and lose some of the transparency.
You know what’s really cool about this piece? The way they’ve incorporated some white space within the log pile to suggest light hitting certain areas. It’s such a simple thing, but it adds so much dimension. I actually use this technique a lot in my own work – I’ll often leave bits of the paper showing through to create highlights. It’s way more effective than trying to add white paint later, trust me.
One thing I’m not quite sure about is how they achieved that soft, misty quality around the edges of the pile. Maybe some careful splattering or salt texturing? I’d have to take a closer look to be sure.
Oh man, speaking of splattering – I gotta tell you about this one time in a workshop I was teaching. We were working on creating leaf textures, and I got a little too enthusiastic with my demonstration. Let’s just say the front row got an unexpected lesson in dodging paint splatters! But hey, sometimes the best techniques come from happy accidents, right?
Anyways, if I was gonna give some advice to someone trying to recreate this style, I’d say start by really nailing your water control. You wanna have areas that are super wet for those soft edges, but also be able to work with a nearly dry brush for those
Bird On Branch
Wow, this watercolor bird is really something! As a watercolor artist, I can tell you that there are quite a few challenging aspects here for beginners to tackle.
First off, the transparency and layering in this piece is just beautiful. Getting that luminous quality in the orange breast feathers would be tricky – it looks like the artist used wet-on-wet technique to let the colors blend seamlessly. I remember struggling with this myself when I first started out. I’d always end up with muddy colors instead of that gorgeous glow.
The way the artist handled teh bird’s eye is particularly impressive. Getting that glassy, reflective quality takes some serious skill with controlling water and pigment ratios. I’ve found that using a tiny brush and building up layers of very diluted paint works well for eyes, but it took me years to really nail it down.
Anyways, one thing that might trip up beginners is the subtle color variations in the leaves. It’s not just one flat brown – there are hints of green, orange, and even some blue-gray tones in there. Mixing those muted natural colors can be really tricky. I remember spending hours in my studio trying to get leaf colors just right, flipping through field guides for reference.
The bird’s beak is another challenging area. Getting that shiny, hard edge while still maintaining a painterly feel isn’t easy. I’d probably recommend masking fluid for beginners to preserve the highlight, then building up layers of dark pigment around it.
Oh! And don’t even get me started on on the fine details in the feet and claws. That level of precision with a brush takes tons of practice. I still struggle with really delicate lines sometimes, especially if my caffeine intake isn’t quite right that day.
For beginners attempting this, I’d suggest starting with teh basic shapes and working from light to dark. Get the overall form of the bird down first, then slowly build up layers of detail. And don’t be afraid to use some dry brush technique for texture in the feathers – it can really bring them to life.
One thing I’m not totally sure about is how the artist achieved the soft edges on some of the leaves. It almost looks like they might have used salt to create some interesting texture, but I’d need to see it up close to be certain.
Simple Autumn Wreath
Alright, so this watercolor is really gorgeous – I’m not gonna lie, it’s the kind of autumn piece that always makes me wanna break out my paints and get messy. The transparency on those leaves is killer, and the way the artist handled the berries with that perfect balance of detail and looseness? *chef’s kiss*
For a simple exercise to practice elements from this, I’d suggest focusing on those beautifully layered leaves. The interplay of warm and cool tones is what really makes them pop.
Here’s a quick exercise I like to use in my workshops:
1. Start with a light yellow wash as your base layer. Let it dry completely.
2. Add some oranges and reds using a wet-on-dry technique to create leaf shapes. Don’t worry about perfect edges – embrace the organic feel.
3. Once that’s dry, go in with some darker brown or burgundy to add veins and shadows. This is where you can play with dry brush to get those crisp details.
And here’s where I always trip up my students (in a good way!) – add some cool tones like purples or blues in the shadows. It seems counterintuitive, but trust me, it’ll make those warm colors sing.
I remember struggling with this concept myself early on. I was working on a similar autumn scene and couldn’t figure out why my leaves looked flat. My instructor at the time – shout out to old Mrs. Peabody, she was a trip – told me to add some blue. I thought she was nuts, but it totally transformed the piece.
Oh, and don’t forget about masking fluid! It’s great for preserving those tiny white highlights on the berries. Just be careful not to leave it on too long or it’ll be a pain to remove. Ask me how I know… let’s just say I ruined more than one paintbrush before I learned that lesson.
But back to the exercise – once you’ve got your leaves down, you can practice adding those delicate branches. This is where brush control comes in clutch. I like to use a rigger brush for this, but honestly, any small round brush will do the trick. The key is to vary your pressure as you go – light touch for thin branches, more pressure for thicker ones.
And you
Steam Rising From Tea
Wow, this watercolor of a steaming cup of tea is pretty impressive! The transparency and luminosity of the liquid is def one of the standout aspects. It’s not easy to capture that translucent quality of tea, especially with the warm amber tones.
The artist has clearly mastered the wet-on-wet technique here, allowing the pigments to bloom and blend naturally in the cup. I remember struggling with this myself when I first started… would always end up with muddy messes instead of clear tea. Took me ages to get the timing right.
The steam rising from the cup is beautifully rendered using a dry brush technique. It’s subtle but effective in conveying the warmth and aroma. Speaking of which, I should prob put the kettle on…
Anyway, the use of loose, fluid brushstrokes around the edges creates a sense of movement and atmosphere. It’s a technique I often teach in my workshops – letting the water do some of the work for you. Though some students have a hard time letting go of control.
One thing that stands out to me is the handling of the tea leaves at the bottom of the cup. The artist has used a combination of negative painting and glazing to create depth and texture. It’s a tricky balance to achieve, and I’m still perfecting my own approach to rendering small details like that.
If I were to offer any suggestions for refinement, I might consider intensifying the shadows under the cup slightly to ground it more firmly. But that’s just personal preference.
The color palette is warm and inviting, with those deep oranges and reds… reminds me of a painting I did last autumn of a spice market. Got so caught up in the rich hues that I completely lost track of time and missed a dinner date. Oops.
Overall, this piece demonstrates excellent water control and pigment behavior. The way the colors have been allowed to granulate in certain areas adds a lovely textural quality.
I’m curious about the paper used here – it looks like it might be cold press, but it’s hard to say for sure from the image. The texture definitely contributes to the overall effect though.
In my workshops, I always emphasize the importance of… hang on, where did I put that new brush set? Oh right, under the stack of half-finished sketches.
Door With Climbing Vines
Wow, this watercolor piece is really impressive! The way the artist has captured the textures and weathered appearance of the old wooden door is fantastic. The transparency in the autumn leaves and the subtle color variations in the wood grain show some serious skill.
Honestly, if I were to add one element to enhance this drawing, I might consider introducing a bit more contrast in the shadows. But let me back up a sec and talk about what’s working so well here.
The pigment choices are spot-on for creating that weathered, autumnal mood. I’m seeing some great granulation effects in the wood texture – probably from using something like Burnt Sienna or Raw Umber. And the way the artist has layered washes to build up depth… that’s not easy to pull off!
One technique that’s really shining here is the controlled wet-on-wet work in the background. It creates this soft, atmospheric effect that contrasts beautifully with the more defined elements. I remember struggling with this myself when I first started out. I’d always end up with these big blooms and backruns that ruined the effect. It took me ages to figure out the right water-to-pigment ratio!
But anyway, back to enhancing the piece. I think a touch more contrast could really make it pop. Maybe using a dry brush technique with a darker value in some of the deepest shadows of the door. Or… oh! You know what could be cool? Adding a subtle cast shadow on the ground in front of the door. That would give it a bit more dimension and really anchor it in the space.
And speaking of shadows, this reminds me of a workshop I taught last fall where we focused on painting autumn scenes. One student was having the hardest time getting her leaves to look translucent. We ended up doing this whole exercise on glazing techniques – laying down a base wash of yellow, letting it dry completely, then going over with thin layers of orange and red. It was like a lightbulb moment for her!
Honestly though, the more I look at this piece, the more I appreciate the restraint. Sometimes less really is more in watercolor. It’s so tempting to keep adding and adding, but knowing when to stop is an art in itself.
Oh, and I almost forgot to mention – the way the artist
Basket Filled With Apples
Wow, this apple basket watercolor is really impressive! The transparency and luminosity of the apples is def a standout feature. It’s prob one of the trickier aspects to nail when painting fruit.
A common pitfall to avoid here would be overworking the highlights on the apples. It’s so tempting to keep adding more and more detail, but that can kill the fresh, translucent quality that makes watercolor special. I remember when I first started out, I’d layer on way too many glazes trying to get that perfect shine…
The artist here has done a great job with their pigment choices – those rich reds balanced with softer pink and yellow tones give the apples depth without losing their glow. Mastering that wet-on-wet technique for the initial apple shapes is key. You want to drop in those colors while the paper’s still damp, but not soaking. It’s a tricky balance.
Speaking of balance, the basket itself is a real testament to brush control. Those woven textures are all about knowing when to use a dry brush technique versus when to let the paint flow more freely. I still struggle sometimes with getting the right amount of water for that perfect dry brush effect, though…
One thing that’s interesting here is how they’ve handled the shadows. It looks like they might’ve used a bit of negative painting to define some of the apple shapes. That’s a technique I love teaching in my workshops – it really helps students think about the whole composition, not just individual objects.
Oh, and don’t even get me started on the challenge of painting that basket handle! Getting the curve just right while maintaining the woven texture? That’s the kind of thing that separates the pros from the amateurs.
You know, this reminds me of a still life demo I did last year where I totally messed up the basket weave. I tried to fix it by adding more and more lines, and it just turned into a muddy mess. Sometimes you gotta know when to step back and let the painting breathe, you know?
Anyway, if I was giving advice to someone tackling a similar subject, I’d say focus on preserving those white highlights from the start. Use masking fluid if you need to, or just be really careful about planning your layers. And don’t be afraid to let some areas
Quiet Lake Reflection
Wow, this watercolor really catches the eye with its beautiful autumn colors and reflections. The transparency and flow of the pigments is something that can be tricky for beginners to master, especially when you’re trying to capture that delicate balance between control and spontaneity.
One key skill I’d highlight for beginners tackling a scene like this is learning to work with wet-on-wet technique to create those soft, diffused edges in the foliage and reflections. It’s all about timing and water control – something I struggled with for years, honestly. I remember one workshop where I was demonstrating this technique and completely overloaded my paper with water… ended up with a big orange puddle instead of trees! But that’s how you learn, right?
Anyway, to get those beautiful color transitions, you want to lay down a light wash of clean water first, then drop in your pigments and let them bloom and mingle on the paper. It’s kind of like… conducting an orchestra of colors, if that makes sense? You’re guiding them, but also letting them do their own thing a bit.
Oh, and speaking of colors – the pigment choices here are really interesting. Looks like they’ve used a mix of transparent and opaque pigments to create depth. I’m guessing maybe some quinacridone gold, burnt sienna, and possibly a touch of indigo for those cooler shadows? Though I could be totally off base there.
One thing I always tell my students is to pay attention to the white of the paper – see how it’s used here to create highlights and define the edges of some of the trees? That negative space painting can be super powerful, but it takes practice to know when to leave areas untouched.
Glazing is another technique that would come in handy for a piece like this. It’s where you build up layers of transparent color to create depth and richness. I’m still perfecting my glazing skills, to be honest – it’s easy to overdo it and end up with muddy colors if you’re not careful.
Oh, and don’t even get me started on mastering those reflections! That’s a whole other ball game. You’ve gotta kind of… flip your brain upside down to paint them convincingly. I once spent an entire summer just painting reflections in different bodies of
Garden Corner
Wow, this watercolor is gorgeous – so vibrant and alive! The way the artist captured all those delicate florals and foliage is really impressive. As someone who’s been painting for years, I can tell you this level of detail and color control isn’t easy to achieve.
For a beginner, I’d suggest simplifying this scene quite a bit. Let’s break it down:
The transparency in those leaves and petals is super challenging. It took me ages to get that technique down! I remember struggling with overworking my washes and ending up with muddy colors. The key is to embrace the white of the paper and use diluted pigments in layers.
For a simpler version, I’d focus on just 2-3 main flower shapes and some basic foliage. Start with loose, wet-on-wet washes for the background – that’ll give you those soft, blended colors. Then add in your main shapes with slightly more saturated pigment. Don’t worry about getting every little detail!
One technique that really helped me when I was starting out was practicing “negative painting” – where you paint around shapes to define them. It’s great for creating depth without overworking things.
Oh! Speaking of overworking – I once ruined an entire painting of peonies because I kept fussing with the petals. Sometimes you gotta know when to put the brush down, you know?
Anyway, back to simplifying this scene… I’d suggest limiting your palette to maybe 5-6 colors max. That’ll help keep things cohesive while you’re learning. And don’t be afraid to let some areas stay loose and undefined – that’s part of the charm of watercolor!
For the pots and rocks, a dry brush technique would work well. Just make sure your paper is completely dry first, or you’ll end up with those dreaded “cauliflowers” – though honestly, sometimes those happy accidents can add character!
One thing I’m not totally sure about is how they achieved those super fine lines in the grasses. Might be a rigger brush? Or possibly some ink work? That’s something I’m still perfecting myself.
Anyway, remember that watercolor is all about embracing the flow of the medium. Don’t try to control it too much – let it do its
Pumpkin Patch
Honestly, the first thing that jumps out at me about this watercolor is the beautiful transparency achieved in those pumpkins. Getting that luminous quality while maintaining form is no small feat – it took me years to really nail that technique!
One subtle detail I find particularly impactful is the way the artist has incorporated tiny flecks of dark pigment within the pumpkin flesh. It adds depth and texture without overwhelming the overall glow. I remember struggling with this balance in my early days – I’d either end up with flat, boring pumpkins or ones that looked like they were covered in dirt!
The wet-on-wet technique used for the leaves is pretty masterful too. See how the edges are soft in some places but crisp in others? That’s all about timing and water control. (Speaking of water control, I spilled my coffe all over my sketchbook just last week – what a mess!)
A tip I always give my workshop students for achieving this effect is to…hang on, there’s a cute dog walking by outside. Where was I? Oh right, the wet-on-wet leaves. I tell them to load their brush with pigment, touch it to the paper, and then quickly tilt the paper to let the color flow naturally. It creates these gorgeous organic shapes that you just can’t get any other way.
The use of negative space around the elements is really interesting too. I’m not entirely sure, but it looks like the artist might have used masking fluid to preserve some of those crisp white areas. That’s a technique I’m still perfecting myself – it can be a bit finicky.
Honestly though, the thing that really makes this piece sing is the color harmony. The warm oranges and cool blue-greens play off each other beautifully. It reminds me of a fall scene I painted years ago during a plein air session in Vermont. I was so focused on capturing the individual leaves that I completely lost sight of the overall composition. It was a good lesson in stepping back and considering the big picture.
One thing I might suggest to push this piece even further would be to vary the intensity of the washes a bit more. Maybe deepen the shadows in a few strategic spots to really make those highlights pop. But that’s just my personal preference – watercolor is all about finding your own style and voice.
Maple Leaves And Pinecones
Alright, let’s dive into this autumn watercolor scene! Honestly, the first thing that jumps out at me is the beautiful transparency in those maple leaves. Getting that delicate balance of pigment and water is gonna be key for someone trying this for the first time.
For the maple leaves, I’d recommend starting with a wet-on-wet technique to create those soft, diffused edges. Lay down a light wash of yellow or pale orange, then while it’s still damp, drop in some deeper reds and oranges. Let the colors blend naturally – don’t overwork it! I remember struggling with this when I first started out. I’d get impatient and keep fiddling with the paint, ending up with muddy colors instead of that gorgeous translucent effect.
For the pine cones, you’ll wanna switch gears and use more of a dry brush technique. Build up layers of browns and deep reds, leaving some white of the paper showing through for texture. Honestly though, pine cones can be tricky – I still sometimes struggle to get the right balance of detail and looseness.
One thing I’m not entirely sure about is how they achieved that really fine, delicate line work on some of the leaf veins. My best guess would be using a rigger brush with a very light touch, but it could also be some subtle masking fluid work.
Oh! Speaking of masking fluid, here’s a little trick I picked up years ago at a workshop in Vermont: instead of using a brush to apply it, try using a toothpick or the wrong end of a paintbrush for really fine lines. It gives you way more control.
When it comes to pigment choices, I’m seeing a lot of warm earth tones here – burnt sienna, raw umber, maybe some quinacridone gold for those vibrant yellows. But don’t be afraid to throw in some unexpected colors! A touch of purple or blue in the shadows can really make things pop.
Honestly, the hardest part about a piece like this is knowing when to stop. It’s so tempting to keep adding more and more detail, but sometimes less is more, ya know? I once completely overworked a similar autumn scene and ended up with a muddy mess. Now I try to take frequent breaks and step back from my
Night Sky Over Bare Branches
Wow, this piece really caught my eye! The most striking stylistic choice here is the artist’s masterful use of negative space and color gradation to create a snowy, ethereal winter scene.
Honestly, the way they’ve handled the transparency of the watercolors is quite impressive. The deep blue sky fading into a lighter wash towards the bottom creates such a beautiful atmospheric effect. I’m always telling my students that controlling water and pigment ratios is key to achieving those smooth gradients, and this artist has nailed it.
One technique that really stands out to me is the wet-on-wet application for the sky. It looks like they’ve allowed the initial wash to dry just slightly before adding in those delicate snowflakes – probably using a fine brush or even a splatter technique. I remember struggling with this timing myself when I first started out. Honestly though, I once completely ruined a painting by adding the snow too soon and watching all my careful work bleed together into a muddy mess. It was so frustrating!
The use of negative space for the tree branches is really effective too. It’s a technique I really, really love teaching in my workshops because it forces students to think about what they’re not painting as much as what they are. The contrast between the stark white branches and the deep blue sky creates such a striking visual.
I’m curious about how they achieved that warm, golden tone on some of the upper branches. It almost looks like they might have used a bit of masking fluid to preserve the white of the paper and then glazed over it with a transparent yellow or ochre. Or maybe… hmm, could it be a dry brush technique with a more opaque paint? It’s hard to say for sure without seeing it in person.
One tip I’d give to someone trying to recreate this style would be to practice your water control. Start with a really wet wash for the sky, then gradually use less water as you work your way down the paper. This’ll help create that fading effect from dark to light.
Oh! And don’t forget to let each layer dry completely before adding the next. I can’t tell you how many times I’ve gotten impatient and ended up with unwanted bleeding between layers. It’s a rookie mistake, but even after years of painting, I still catch myself doing it sometimes when I’m in a
Spiderwebs Catching Dew
Wow, this piece is really fascinating from a technical standpoint. The artist has created such a beautiful sense of depth through their masterful use of transparency and layering. It’s pretty impressive how they’ve managed to build up those rich, warm autumn tones while still maintaining a delicate, airy feel.
One of the key techniques I’m seeing here is definitely wet-on-wet application, especially in those leaf clusters. It’s a tricky method to get right – I remember struggling with it for ages when I first started out. You gotta nail the timing just right, y’know? Too wet and everything turns to mush, too dry and you lose that gorgeous blending.
The way they’ve handled the spiderweb is super interesting too. It looks like they might’ve used a masking fluid or maybe even a white gel pen for those fine lines. I’m still perfecting my own technique for delicate white details like that – it’s one of those skills that takes forever to really master.
Oh, and speaking of spiderwebs, I just remembered this hilarious disaster from one of my early workshops. I was trying to demo this exact kind of autumn scene with a web, and somehow managed to knock over my entire water cup right as I was adding the final touches. Talk about a happy little accident, as Bob Ross would say! The students got a good laugh out of it at least.
Anyway, back to the painting – the artist has done a great job creating depth through their use of value contrast. See how the darker, more saturated leaves are in the foreground, while the background fades into softer, lighter tones? That’s a classic technique for creating atmospheric perspective in watercolor.
I’m really impressed with the loose, gestural quality of the branches. It takes a lot of confidence and control to achieve that kind of spontaneous look. Prob used a combination of wet and dry brush techniques there.
One thing I’m not totally sure about is how they achieved that speckled texture in the background. Could be spattering, could be salt – hard to tell from just the image. That’s def something I’d love to ask the artist about if I ever met them.
If I was gonna give any advice for improving this piece (not that it really needs it!), I might suggest pushing the contrast just a tad more in the focal
Morning Mist Over Fields
So, this watercolor really captures that ethereal quality of a misty landscape – it’s got some lovely transparent washes going on that create a sense of depth and atmosphere. The way the artist has handled the edges between the field and the treeline is particularly interesting.
To practice capturing the proportions of this subject, I’d suggest starting with a light pencil sketch to establish the basic shapes and horizon line. Then you could use masking fluid to preserve the lightest areas before laying down your first washes.
One technique that I’ve found really helpful for scenes like this is wet-on-wet. You dampen the paper first, then drop in pigment and let it bloom and spread naturally. It’s great for creating those soft, misty edges we see in the background hills. Of course, getting the right amount of water can be tricky – I remember one workshop where I completely flooded my paper and ended up with a total mess! But hey, that’s how we learn, right?
For the foreground grasses, a dry brush technique would work well to create texture. Load your brush with pigment but wipe most of it off, then drag it lightly across the paper. It takes some practice to get the right pressure – too light and you won’t see anything, too heavy and you’ll lose that delicate feel.
What really makes this piece sing is the color harmony. The artist has used a limited palette of warm earth tones with just a hint of cool colors in the shadows. It’s something I’m still working on perfecting in my own work – how do you keep things cohesive without becoming boring?
One thing I’m not entirely sure about is how they’ve achieved that soft glow in the distance. Maybe it’s a combination of lifting out color and glazing over with a very dilute wash? That’s definitely something I’d want to experiment with.
When it comes to refining your work, don’t be afraid to go back in and adjust values once everything’s dry. A touch of darker pigment here and there can really make the composition pop.
Oh! And speaking of composition – notice how the artist has used the rule of thirds here? The horizon line is roughly a third of the way up the page, and there’s a nice balance between the open field and the more detailed areas.
So yeah, to sum up: start with a solid sketch
Geese Against Cloudy Skies
Wow, this piece really draws you in with its sense of movement and atmosphere. The way the artist has handled the flock of birds against that misty, ethereal background is just stunning.
From a technical standpoint, what’s really interesting here is the delicate balance between loose, fluid washes and more precise details. The background appears to use a wet-on-wet technique to create those soft, blended edges that give the impression of fog or mist. I remember struggling with this myself when I first started – getting the right amount of water on the paper is tricky! Honestly, I still sometimes overdo it and end up with a muddy mess.
The birds are where the real mastery shines through. The artist has used a combination of techniques to create depth and variation. Some birds appear to be painted with a dry brush technique, giving them crisp edges and more definition. Others are softer, almost blending into the background. This creates a sense of depth and movement that really brings the piece to life.
One thing that’s particularly challenging (and I’m still perfecting this myself) is achieving that perfect balance between control and spontaneity. You want some areas to be precise, while others need to have that loose, fluid quality that makes watercolor so captivating.
Anyways, in terms of composition, the artist has done a brilliant job of guiding the viewer’s eye. The larger birds in the foreground draw your attention immediately, then your gaze naturally follows the flock as it curves upward and to the right. It’s a classic S-curve composition, which… oh, sorry, I got distracted by someone’s adorable dog walking by the café window. Where was I?
Right, composition. The way the birds are arranged creates a sense of depth, with smaller birds in the distance giving the illusion of a vast sky. The misty landscape at the bottom anchors the piece and provides a nice contrast to the open sky above.
One technique I often teach in my workshops is how to create atmospheric perspective using value changes. In this piece, you can see how the distant birds and landscape are lighter and less detailed, while the foreground elements have more contrast and definition. It’s a subtle but effective way to create depth.
Honestly though, what really makes this piece sing is the artist’s control of edges. Some of the birds
Coffee Corner
So, this watercolor really catches the eye with its delicate balance of soft washes and crisp details. The transparency in the window panes is particularly striking – that’s always a tricky technique to master. From what I’ve seen, the artist has done a great job with controlled wet-on-wet for the background, while using drier brush strokes for the wood textures.
To propose a creative variation, I’d suggest playing with the mood by shifting the color palette and time of day. Instead of the bright, cheerful autumn scene, imagine transforming this into a moody twilight view. You could use cooler blues and purples for the sky, with maybe a touch of deep orange on the horizon to hint at the setting sun.
Speaking of challenging techniques, I remember struggling for weeks to get the right balance of water and pigment for twilight scenes. I kept ending up with muddy washes until I finally figured out the importance of patience and layering. Letting each glaze dry completely before adding the next made all the difference.
For this variation, I’d start with a light wash of cool blues across the entire paper, preserving some white highlights. Then, once that’s dry, I’d build up layers of deeper purples and indigos, using wet-on-dry techniques to create soft edges around the window frame. The leaves outside could be silhouetted against the sky, using negative painting to define their shapes.
Oh, and here’s a little trick I picked up from a workshop I attended years ago – try using a bit of salt on the wet washes to create a starry effect in the sky. It adds this lovely texture that really enhances the dreamy quality of twilight scenes.
Inside the room, you could create a warm glow using yellows and soft oranges, as if there’s a lamp just out of view. This contrast between the cool exterior and warm interior can create a really cozy, inviting atmosphere. It’s def one of my favorite effects to teach in my workshops.
One thing I’m not totally sure about is the best way to handle the flowers in this variation. You could either keep them as a silhouette or maybe suggest their forms with just a few highlights, as if they’re catching the last bits of daylight.
While we’re on the topic of flowers, I should probably mention that I’m still
Falling Leaves
Alright, let’s dive into this gorgeous autumn-inspired watercolor! I’m not gonna lie, the first thing that jumps out at me is the incredible transparency and delicacy of those falling leaves. The artist has really nailed the wet-on-wet technique here, allowing the pigments to bloom and bleed into each other in such a natural way.
You know, this reminds me of a workshop I taught last fall where we focused on capturing the essence of seasonal change. One student was really struggling with getting the leaves to look weightless – they kept ending up heavy and blob-like. We worked on building up layers of transparent washes, letting each one dry before adding the next. It’s all about patience and water control!
But anyway, back to this piece. The color choices are spot-on for autumn foliage – lots of warm reds, oranges, and yellows with just a hint of brown for depth. I’m particularly impressed with how the artist has used negative space to create the illusion of movement. It’s like you can almost feel the breeze!
So how could we apply this style to a completely different subject? Hmm… What if we took this same approach but used it for, say, a flock of butterflies? Or maybe even something totally unexpected like falling confetti at a parade? The key techniques to focus on would be:
1. Mastering those wet-on-wet washes for soft, blended edges
2. Building up layers of transparent color to create depth
3. Using negative space to imply movement and flow
4. Varying the size and shape of your subjects for visual interest
One thing I’m still perfecting myself is getting that perfect balance of water to pigment ratio for consistent transparency. It’s trickier than it looks! Sometimes I’ll think I’ve got it just right, and then bam – a big old bloom appears where I didn’t want it. But hey, that’s part of the charm of watercolor, right?
Oh, and speaking of challenges – don’t even get me started on the struggle of painting white subjects in watercolor. Talk about a mind-bender! But that’s a whole other can of worms…
Anyway, if you’re looking to try this technique yourself, I’d suggest starting with a limited palette of just 3-4
Morning Frost On Berries And Leaves
Wow, this watercolor really captures that crisp, frosty feeling of late autumn or early winter. The transparency in those leaves is pretty impressive – achieving that delicate balance between pigment and water control is def one of the trickier aspects of watercolor.
The mood here is contemplative and a bit melancholy, but with a spark of warmth from those golden and red tones. It’s achieved through a combination of techniques – there’s some lovely wet-on-wet work in the background creating those soft, diffused edges, while the leaves and berries have more defined shapes, prob using a dry brush technique.
And speaking of those berries – the way the artist has captured the frosted effect is really clever. It looks like they might have used salt or even a bit of white gouache to create that textured, crystalline look. I remember struggling with a similar effect years ago when I was painting winter scenes for a local gallery show. I kept overworking the paint and ending up with muddy colors instead of that crisp, icy feel. It took a lot of practice (and wasted paper!) to figure out the right balance.
But back to this piece – the color choices are really interesting. There’s a limited palette at play here, which helps create cohesion, but the artist has done a great job of mixing on the paper to create depth and variation. You can see how the yellows and reds blend in some areas to create those rich oranges and burgundies.
One thing I’m not entirely sure about is how they achieved that spattered effect in the background. It could be a masking fluid that was removed after painting, or maybe they used a toothbrush to flick paint for those tiny droplets. I’d love to know their exact technique there.
If I were teaching this in a workshop, I’d prob focus on the importance of layering to build up depth and intensity. It looks like there are several washes here, each one adding more detail and richness to the image. And don’t even get me started on the importance of letting each layer dry completely before adding the next – that’s a lesson I’m still drilling into my students (and myself, if I’m being honest).
Oh, and while we’re on the topic of workshops – remind me to tell you about the time I accidentally dipped my brush in
Misty Mountain Range
Wow, this piece really captures that ethereal mountain mist feeling! The layering of transparent washes to create depth is technically impressive. I’d say one of the bigger challenges here is maintaining that delicate balance between defined shapes and soft, hazy edges.
For an unconventional approach to recreate this, I’d actually consider using a spray bottle or even a small atomizer. You could build up those misty layers by spraying diluted pigment onto the paper, letting each layer dry partially before adding the next. It’s a technique I stumbled upon by accident years ago when I knocked over my rinse water cup onto a painting (talk about a happy accident!).
The tree shapes in the foreground got me thinking about negative painting techniques. You could mask out some of the lighter trees with rubber cement or masking fluid, then go in with darker washes for the background. Though I gotta admit, I still struggle sometimes with getting clean edges when I remove the mask. There’s always room for improvement, right?
One thing that really stands out to me is the beautiful color harmony. The artist has a great grasp on how to use a limited palette effectively. I’d probably start with a base of raw sienna and ultramarine blue, maybe with a touch of burnt umber for the darker areas. Then you could glaze some quinacridone gold over parts of the foreground trees to get that pop of autumn color.
Oh! Speaking of glazing, I remember this one workshop where a student was having the hardest time getting smooth washes. Turns out they were using student-grade paper that wasn’t sized properly. It’s amazing how much of a difference good materials can make (though I’ve definitely created some happy accidents with cheap supplies too).
For the mountains in the background, I’d probably use a combination of wet-on-wet for the softer areas and then come back with some drybrush techniques to add texture and definition. It’s all about building up those layers gradually.
You know, looking at this piece is making me want to grab my brushes and head outside. There’s something about painting landscapes on location that just can’t be beat. Though last time I tried that, I ended up with more mosquito bites than usable sketches. Maybe I’ll stick to the studio for now!
Anyway, back to the painting –
Maple Tree Losing It’s Leaves
Wow, this watercolor of an autumn tree is really stunning! The use of negative space here is masterful – it’s not just about what’s painted, but what’s left unpainted. That white background really makes the vibrant oranges and reds pop.
From a technical standpoint, I’m impressed by the transparency achieved in those leaves. Getting that luminous quality in watercolor can be tricky. It looks like the artist used a wet-on-wet technique for the foliage, letting the pigments bloom and blend naturally. I remember struggling with that when I first started out – I’d always overwork it and end up with mud.
Speaking of techniques, I’m seeing some beautiful dry brush work in the tree trunk. That’s something I’m still perfecting myself. In my last workshop, I was demonstrating it and totally flubbed it up in front of everyone! But you know, that’s how we learn.
The way the leaves are scattered across the page is really effective. It creates movement and depth. I bet the artist used masking fluid to preserve some of those white spaces for the smaller leaves. That’s a technique I love teaching because it’s like, you’re painting in reverse, you know?
Oh, and the color choices are spot-on for capturing that autumn feel. Looks like they used a mix of cadmium orange, quinacridone red, and maybe some yellow ochre? I’m always telling my students to experiment with pigment combinations to get those rich, glowing hues.
One thing I’m curious about – and I could be wrong here – is whether they used any salt technique for texture in the background. It’s hard to tell from the image, but there’s a subtle variation that makes me wonder…
Anyway, if I was giving feedback in a workshop, I might suggest pushing the values a bit more in the tree trunk to ground it. But honestly, that’s just nitpicking. This piece is gorgeous as is.
Oh! Before I forget – this reminds me of a painting I did last fall. I was out in the woods and the wind kicked up, sending leaves everywhere. I tried to capture that sense of movement but ended up with a mess. It took me ages to figure out how to simplify and suggest rather than paint every single leaf. This artist has nailed that concept.
You know,
Harvest Moon Rising Through Cloud Wisp
Oh wow, this piece is pretty mesmerizing! The way the artist has captured that full moon is just gorgeous. You can really see the attention to detail in how they’ve built up the texture and depth of the lunar surface.
From a technical standpoint, what’s really interesting here is the contrast between the crisp, detailed moon and the looser, more fluid cloudscape below. It’s a great example of how to balance tight control with more expressive techniques in the same piece.
The moon itself looks like it was prob done with a combination of wet-on-wet and dry brush techniques. I remember struggling with getting that kind of lunar texture when I first started out… spent weeks trying to nail it for a night sky series I was working on. The breakthrough came when I realized I needed to let each layer dry completely before adding the next – seems obvious now, but it was a game-changer at the time!
As for the clouds, they’ve got this beautiful ethereal quality that comes from really masterful water control. You can see how the artist has allowed the pigments to bloom and disperse naturally in some areas, while defining edges more precisely in others. It’s a tricky balance to strike, and it takes a lot of practice to get it right.
One thing I’m not totally sure about is whether they used masking fluid for the lighter areas of the moon or if that’s just really precise brush control. Either way, it’s impressive work.
If I was giving feedback in one of my workshops, I might suggest experimenting with even more variation in the cloud edges – maybe pushing some areas to be even softer and others to be more defined. But that’s just personal preference… this piece is already pretty darn stunning as is.
Oh, and speaking of workshops, I was teaching one last month where we focused on celestial subjects, and…
Oops, got a bit off track there! Anyway, back to this piece – the color choices are really striking. That warm orange glow of the moon contrasting with the cooler tones in the clouds creates such a dramatic mood. It’s def making me want to break out my paints and try something similar!
Foggy Forest Path
Wow, this piece really captures that ethereal, misty forest feeling. The way the artist has handled the light filtering through the trees is super impressive – it’s not easy to achieve that kind of luminous quality in watercolor.
One thing that stands out to me is the beautiful transparency in the background trees. It looks like they’ve used a wet-on-wet technique to get that soft, diffused effect. I remember struggling with this myself when I first started painting forests. I’d always end up with hard edges everywhere and it drove me nuts!
Anyways, to add some extra texture, I’d suggest trying out some dry brush work on the foreground path. You could use a fan brush with just a tiny bit of pigment to create some subtle streaks and roughness. It’d give a nice contrast to the softer, mistier areas.
Oh! Another idea – and this is something I’m still perfecting myself – is using salt to create interesting textures in the foggy areas. Sprinkle a bit of coarse salt on while the paint is still wet, and it’ll push the pigment away in cool patterns. Just be careful not to overdo it – I once ruined a whole painting by going salt-crazy, haha.
The warm, orangey tones in this piece are really lovely. It makes me think of an early autumn morning. I taught a workshop on autumn landscapes last year, and we spent a lot of time mixing different warm neutrals. It’s trickier than you’d think to get those subtle variations!
One thing I’m not quite sure about is how they’ve handled the very foreground. It’s a bit… fuzzy? Maybe intentional, but I might be tempted to add a few more defined grasses or leaves there for depth.
Oh, speaking of depth – this piece does a great job with atmospheric perspective. See how the trees get lighter and less distinct as they recede? That’s a key technique for creating depth in landscape paintings. I remember having a lightbulb moment with this concept during a plein air session years ago. Suddenly everything clicked and my forests stopped looking like flat cutouts!
Back to textures though – you could also try lifting out some lighter areas with a damp brush or tissue to create highlights on the tree trunks. It’s a great way to add dimension
Cluster Of Wild Mushrooms
Wow, this mushroom watercolor is super impressive! The transparency and luminosity achieved in those golden caps is really striking. It’s got me thinking about all the ways perspective could shake things up.
From a technical standpoint, the artist has done a fantastic job with pigment control. The way the warm ochres and oranges blend into each other while maintaining distinct forms shows real mastery. And those little splatters? Chef’s kiss. I remember struggling for months to get that organic, spontaneous look without overdoing it.
But let’s talk perspective. Changing the viewpoint could totally transform this piece. Imagine if we got down to mushroom-level – you’d get this epic forest feel, with the caps looming overhead like a canopy. The stems would become these towering pillars. It’d give a whole new sense of scale and drama.
Or what if we went for a bird’s eye view? That could create some really interesting negative space between the caps, almost like a abstract pattern. You’d lose some of the dimensional quality, but gain this cool graphic element.
Speaking of negative space, one technique I’ve been playing around with lately is using masking fluid to preserve highlights. It can be a bit finicky (I’ve definitely ruined a few brushes in my day), but when it works, it’s magic. For these mushrooms, you could use it to create these crisp, glowing edges on the caps.
And – oh! This reminds me. I was teaching a workshop last summer and we were doing a whole fungi series. One student was really struggling with getting the texture right on the underside of the caps. We ended up experimenting with salt techniques, and it was a total game-changer. Sprinkle some chunky sea salt while the paint is still wet, let it dry, then brush it off. Instant texture!
But back to perspective. Another cool option would be to zoom wayyy in on just one mushroom. Really capture all those delicate gills and the subtle color shifts in the stem. It’d be a challenge to maintain that loose, watercolor feel at that scale, but I think it could be super impactful.
One thing I’m not totally sure about is the ground cover. It’s beautifully done, don’t get me wrong. But I wonder if pushing the contrast there might
Cluster Of Acorns And Oak Leaves
So, looking at this autumn-themed watercolor, what really jumps out at me is the artist’s masterful use of transparency and pigment control. The way they’ve layered those warm, earthy tones to create depth in the leaves and acorns is just *chef’s kiss*.
One of the trickiest things about watercolor is nailing that balance between contrast and cohesion, and this piece does it beautifully. The artist has used wet-on-wet techniques for those softer, blended areas in the leaves, while employing more controlled dry brush strokes for the acorn details. It reminds me of when I was first struggling with dry brush – I kept overloading my brush and ruining the effect. Took me ages to get it right!
And can we talk about that gorgeous splatter effect? It adds such a dynamic quality to the composition. I’ve found that getting the right consistency for splatters is crucial – too watery and you lose definition, too thick and it looks forced. I actually teach a whole workshop on splatter techniques now, but I’m still perfecting my own method for larger pieces.
The contrast here is really effective in a few key ways:
1. Value contrast: Those deep, rich browns against the lighter yellows and oranges create a strong focal point.
2. Edge contrast: Sharp, defined edges on some leaves transition beautifully into softer, more ethereal shapes.
3. Temperature contrast: While predominantly warm, there are touches of cooler tones (like that hint of blue-gray) that add depth.
But what I’m really impressed by is the artist’s water control. See how some areas have that lovely blooming effect where the pigment has spread naturally? That takes serious patience and practice to achieve without muddying your colors.
If I were giving feedback in a workshop, I might suggest pushing the darks even further in a few spots to really make those highlights pop. And maybe experimenting with lifting out a few more highlights on the acorns for added dimension. But honestly, those are just nitpicks – this is a really solid piece.
Oh! This reminds me of a fall-themed series I did last year. I was trying to capture the way sunlight filters through leaves, and I ended up accidentally discovering this cool technique where I… actually
These 25 simple watercolor ideas are a perfect addition to your fall art journal, helping you capture the season’s charm in every brushstroke. Whether you’re sketching for relaxation or looking to add some autumn inspiration to your artwork, these themes bring the warm hues and cozy vibes of fall right to your pages. Enjoy the process and let your journal become a celebration of all things autumn!


