

Eyes can be difficult to draw well, but you can make it easier. As with any piece of detailed drawing, the key is breaking the image down into simple shapes. It can seem a huge task, but Don’t fret, it isn’t really. Just break the whole process down into simple parts.
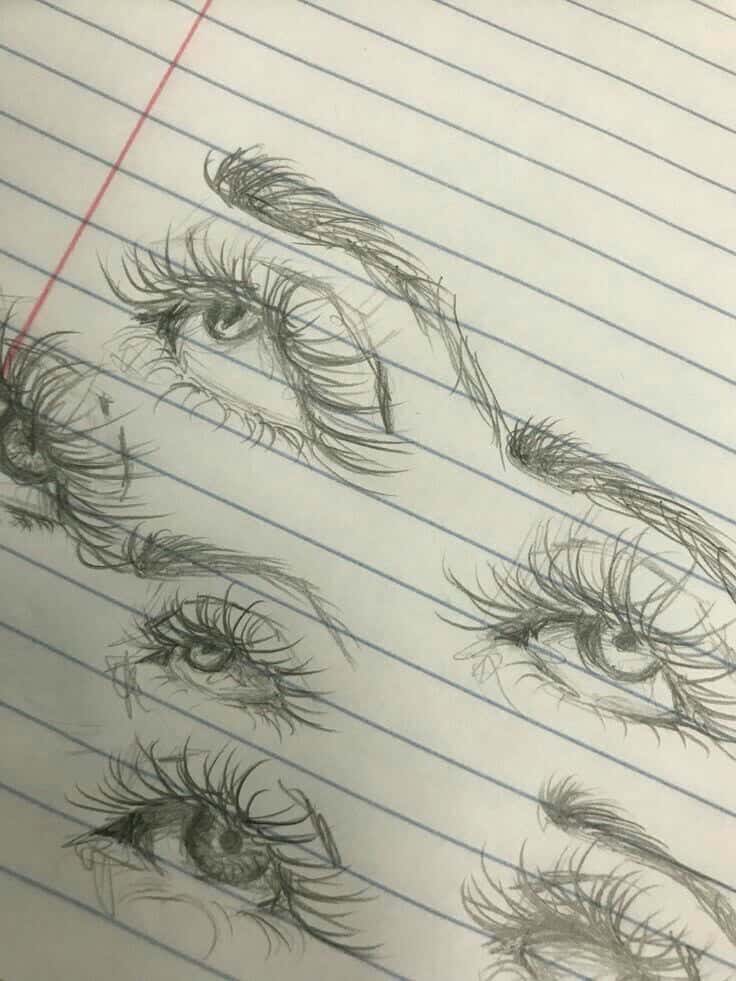
First look past the eye, try to see the shapes and tones. It is these that will create depth, realism and emotion in your drawings. All of us need inspiration at times. My first piece of advice would be to collect as many sketches and drawings of different eyes as you can. Create a scrapbook with examples and notes about the different images.
Table of Contents
Ideas And Inspiration
Here are 20 amazing eye drawing ideas for inspiration, with some ideas to try and help you and some talk of the lessons I have learnt myself. There are lots of example sketches below and you can learn lessons from all of them. Everyone approaches drawing in a slightly different way but there are lessons that will give you better results.
Practice as always is another key to improving your eye drawing. Practice drawing lots of different examples. Try altering the expression on any face simply by using the shape of the eyes.
Don’t concentrate on perfection. Focus on observation and improvement. In time you will create depth and emotion within each eye that you once found impossible.
Drawing Tips
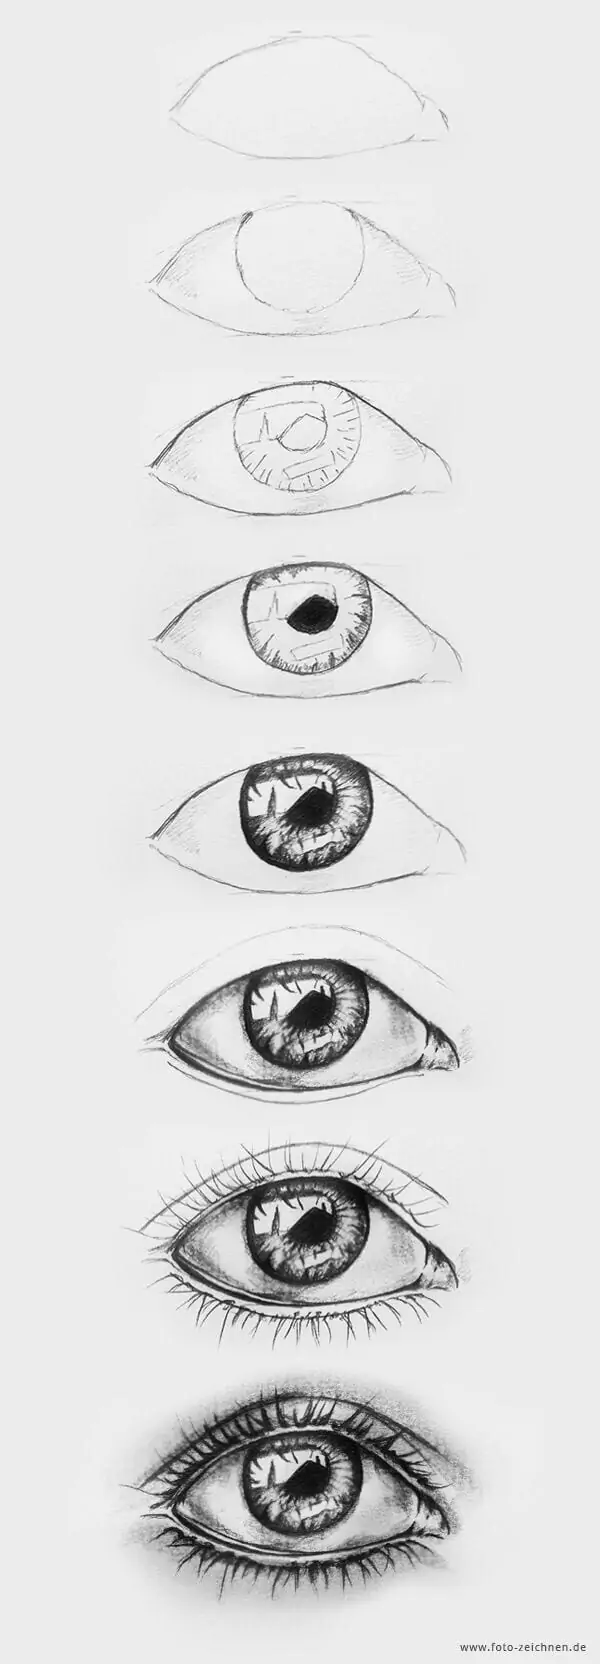
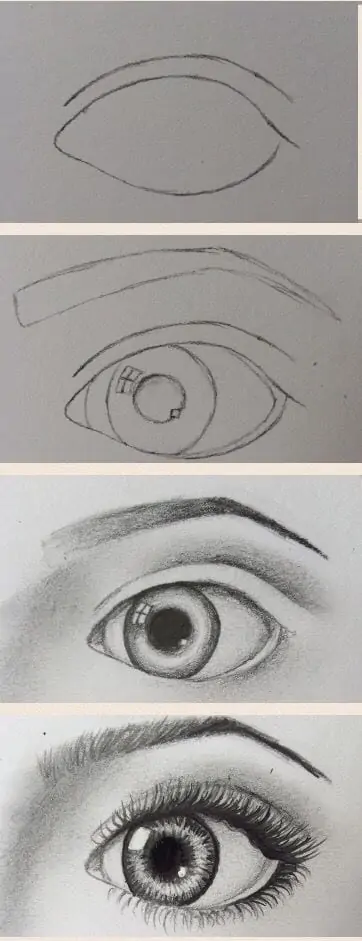
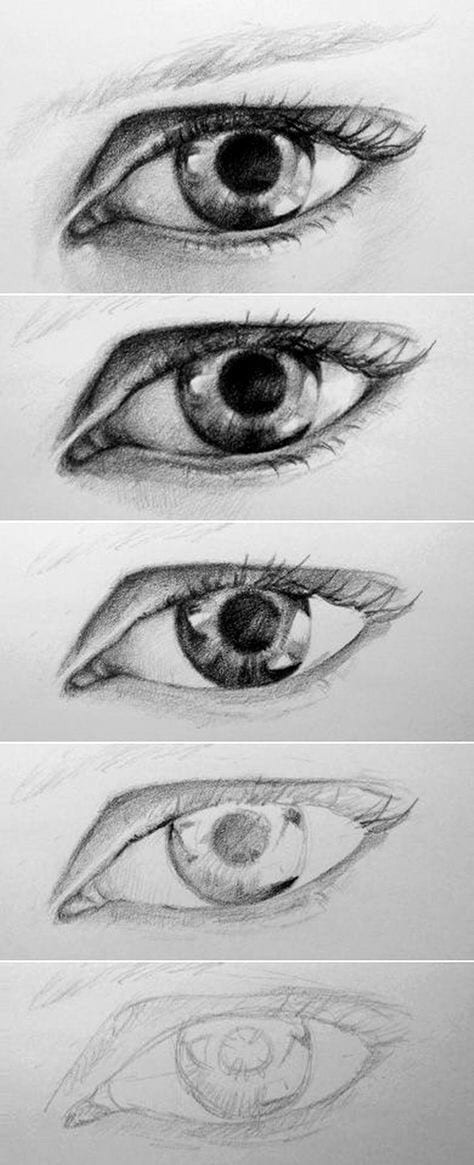
You can see from the series of sketches above that the final drawing seems complex and very detailed. Instead of looking at the whole image, start to break it down into any basic shapes you can actually see. I was once told by an old art teacher to turn the picture I was trying to paint upside down to try and see beyond the image itself. It worked remarkably well for me, it may do for you too.
$8.99
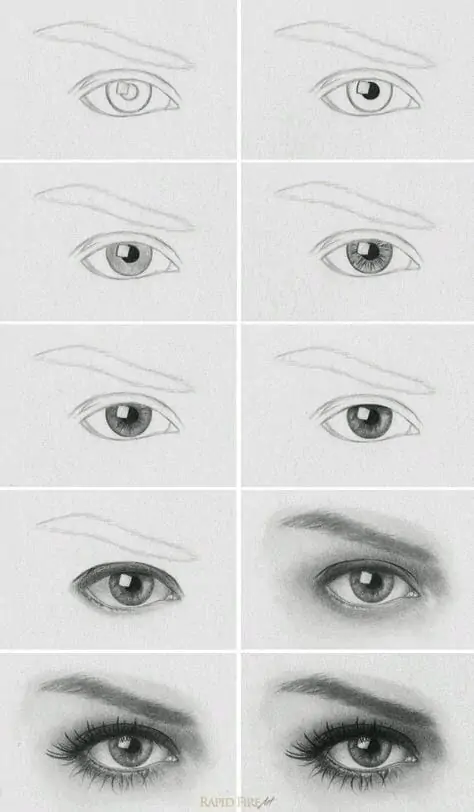
Breaking Down The Image
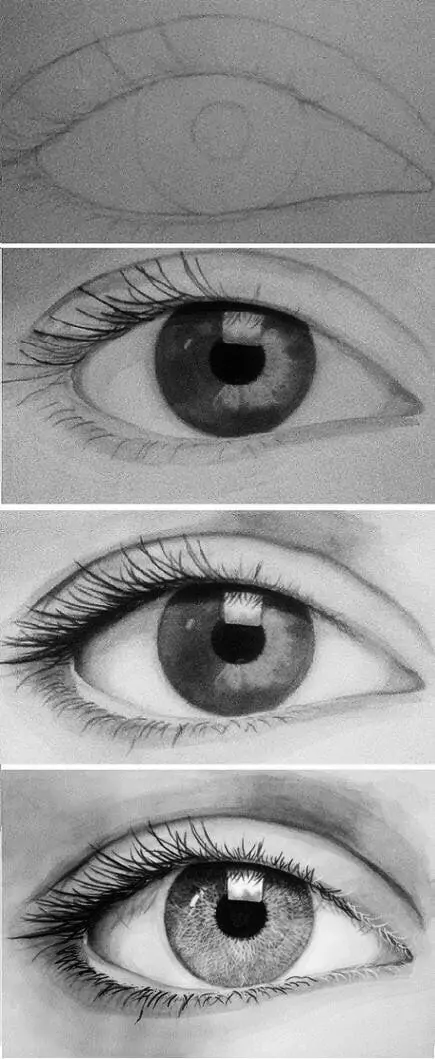
You can start to draw your eye anywhere, but here you can see the overall shape of the opening is used to begin the drawing. This is just a preparatory sketch so don’t worry about mistakes. When you are happy with the curves that form the shape of the opening, look at how the circular shape of the iris fits into those curves.
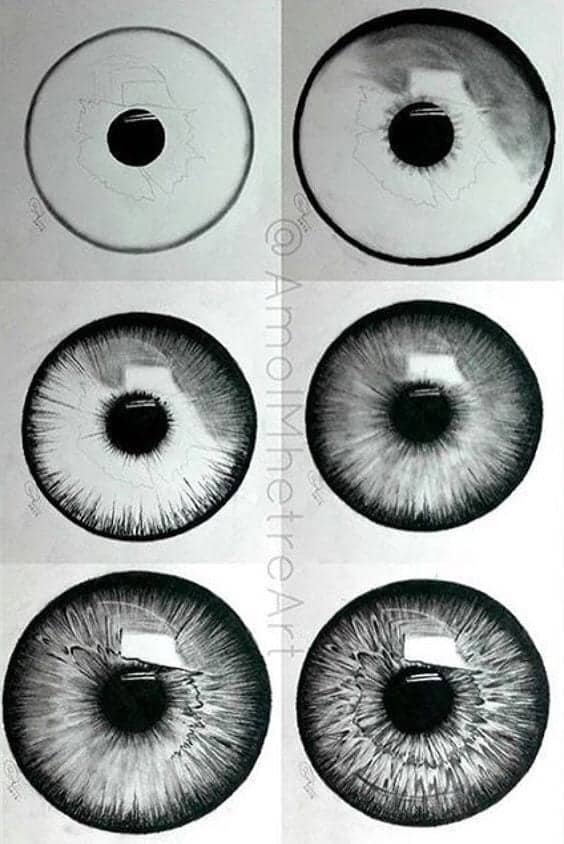
Next you can begin to create some depth by emphasizing the curvature of the eye with light shading. You may see the vague shape of the pupil. Its dark colour means that reflections will often dominate the central area. These can be quite random in shape, so pick out those shapes and look at the way the lines of colour radiate across the iris. Pick out the darkest areas first and as you work you can gradually overlay more areas of shading.
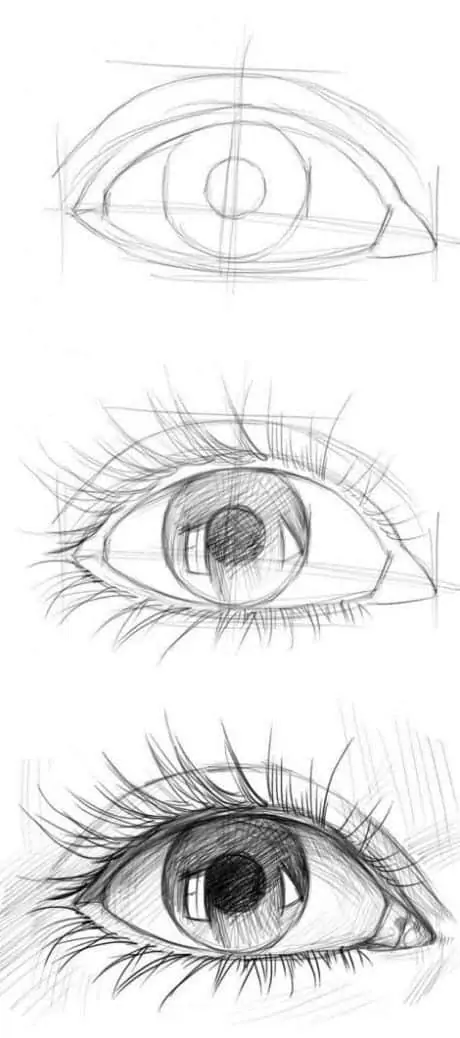
Shading
Build up the shading to create the shape of the eye. Look for shadows and any reflections, the lip of the eyelid and eyen the curvature of the eyeball itself will both add shadows. Introduce the curves and lines of any folds of skin around the eye. This will give you chance to experiment with expression too. Always look at how the light and shadow creates shape within the eye. Doing this will give you real depth of expression.
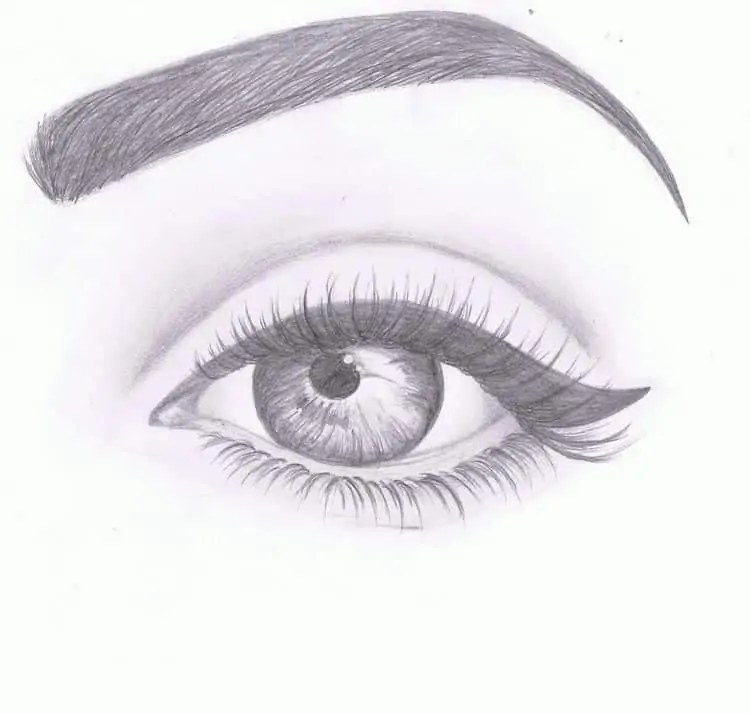
Lastly, you can add the eye-lashes. Remember that you can add any final shading around the eye. If you imagine a ball sat in a shallow hole, wherever the light source is the shape is created by the shadows. Use those shadows, they are your friends.
Detailing
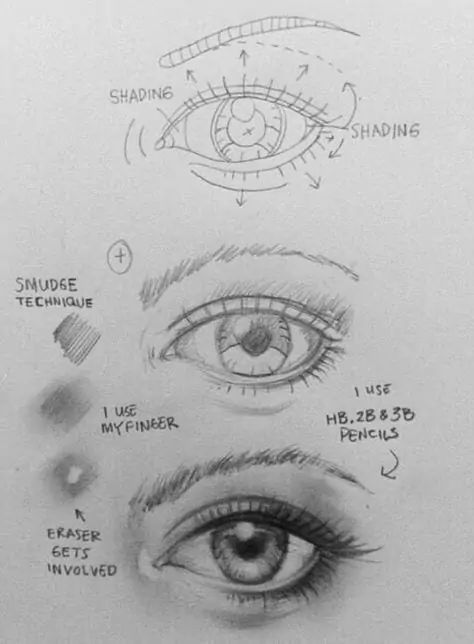
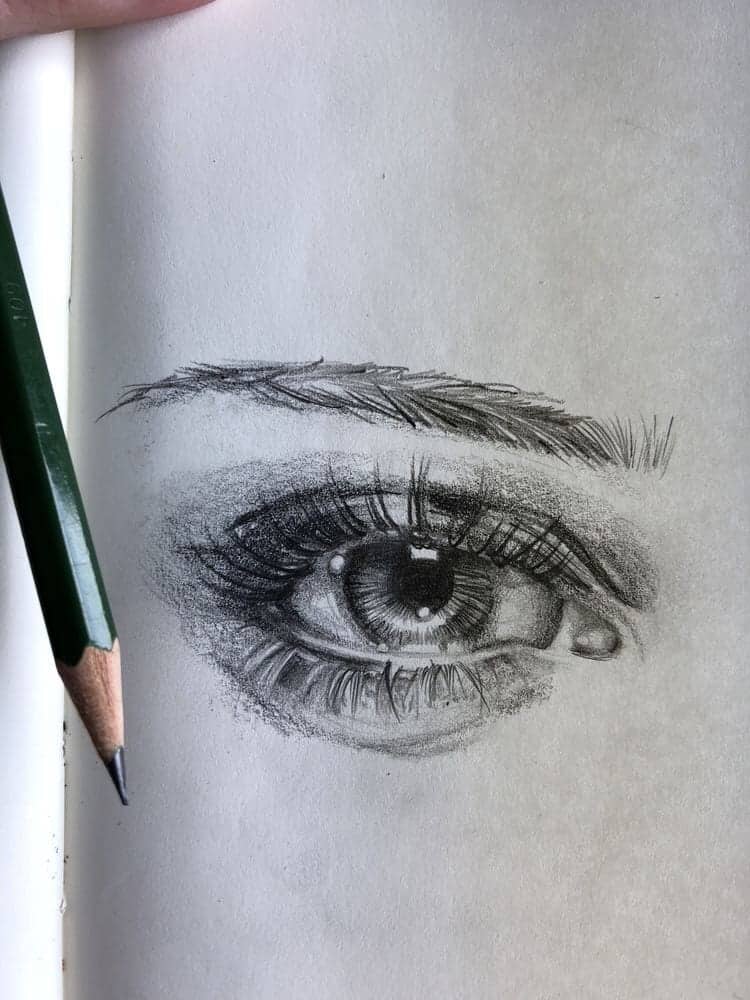
You can see that at times that I have used a very sharp pencil to emphasise the shape of certain parts of the image, like the eye-lashes. As the picture develops I often use a much rounder (more blunt) pencil tip. I do this to soften the image and create depth – using different pencil grades can help with this.
In general I start with a fairly sharp HB grade and use a 3B to emphasise the darkest areas. I would recommend using a very sharp HB for detail like the eye-lashes. Then use a much rounder tip HB and 2B to soften the image. This will help you create the gradient of tones within the shaded areas.
You will be amazed at how subtle differences in shape and tone can help you create expressive eyes.
Look at and practice drawing different eyes from all the reference material you have collected. You will begin to see how those shapes can help you create more lifelike and expressive drawings. Doing this will bring your artwork to life. The eyes are the windows to the soul, and time spent here can make any drawing a pleasure.
Dont Forget to look at our other fantastic tutorials on how to draw faces, noses, hair and more.
Scroll down for more eye drawing ideas and inspiration.
Browse our selection of art related tutorials, ideas, and inspiration.


Disclosure: Some of the links in this post are affiliate links. If you go through them to make a purchase I will earn a commission. Keep in mind that I link these companies and their products because of their quality and not because of the commission I receive from your purchases.
")

