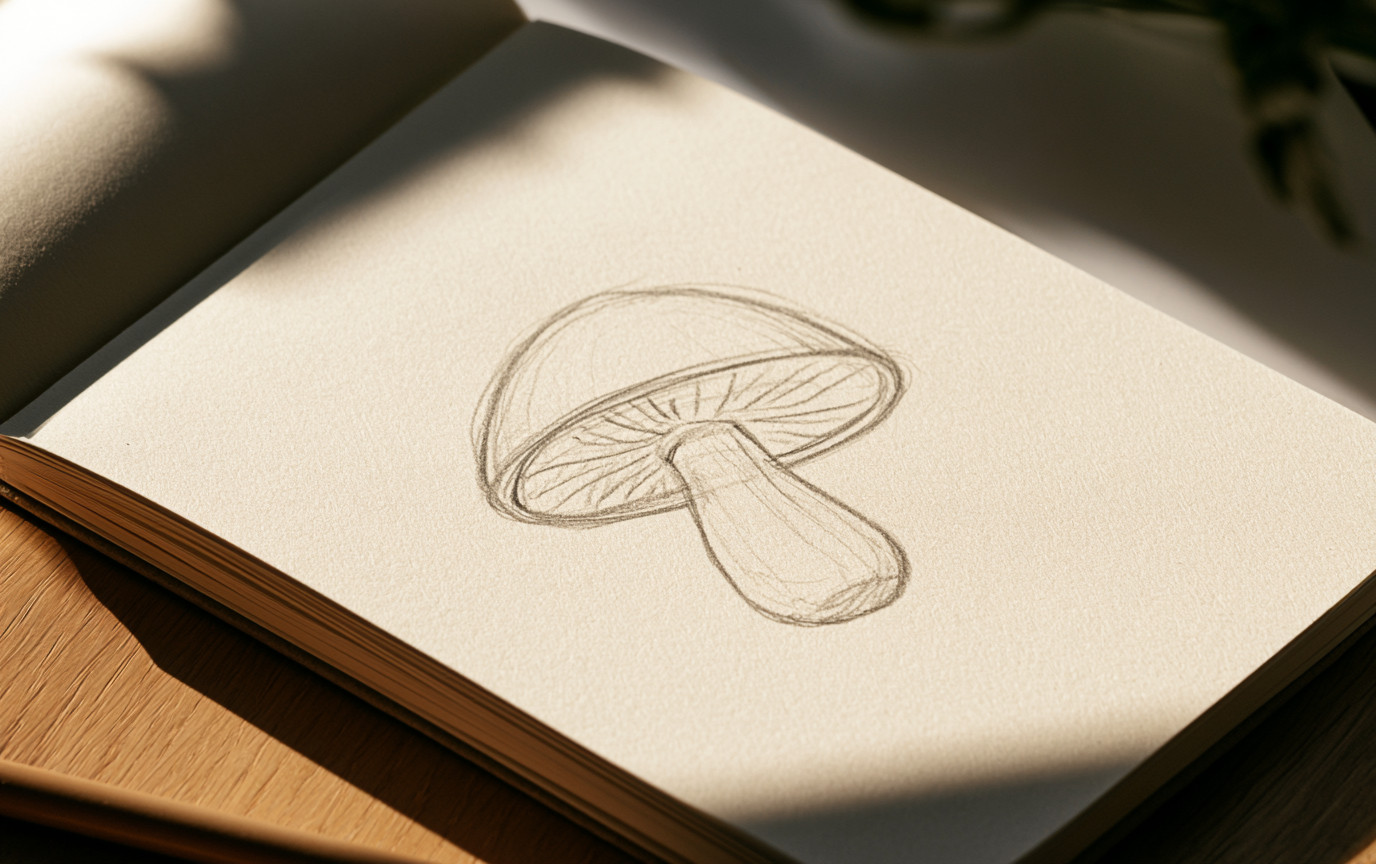
Mushrooms are one of those subjects that look more complicated than they really are. At their simplest, you are drawing a curved cap, a stem, and, if the underside is visible, a few gill lines. Once those shapes sit correctly, shading and texture do most of the work.
In this tutorial, I’ll show you how to draw a mushroom from the first light sketch to the finished details. Keep your pencil marks loose at the beginning and give yourself room to adjust the shape as you go. If basic forms still feel tricky, these simple drawing exercises for beginners are a useful warm-up before you start.
What You’ll Need
- HB pencil for the first sketch
- Eraser
- 2B pencil for deeper shadows (optional)
- Fineliner or black pen if you want a clean outline (optional)
- Colored pencils, markers, or watercolor pencils if you want to add color
- A mushroom photo or drawing reference
Choose a Mushroom Reference
Before you draw, spend a minute looking at a real mushroom or a clear photo. Notice the width of the cap, the angle of the stem, and how much of the underside you can actually see. Those three details will do more for the drawing than trying to memorize every spot or texture.
Mushrooms come in a huge range of shapes, so your drawing does not need to match a single ‘perfect’ version. If you want real forms to study, the Ohio Department of Natural Resources’ Mushrooms of Ohio field guide is a helpful visual reference.
How to Draw a Mushroom Step by Step
Getting Started
Before you start to draw mushrooms, make sure you have an idea of what you want them to look like. You can choose mushroom shapes from a book or do an online search for mushroom drawings and photographs. You will be surprised at the variety of shapes and sizes mushrooms come in.
Want more easy things to draw? This one's free
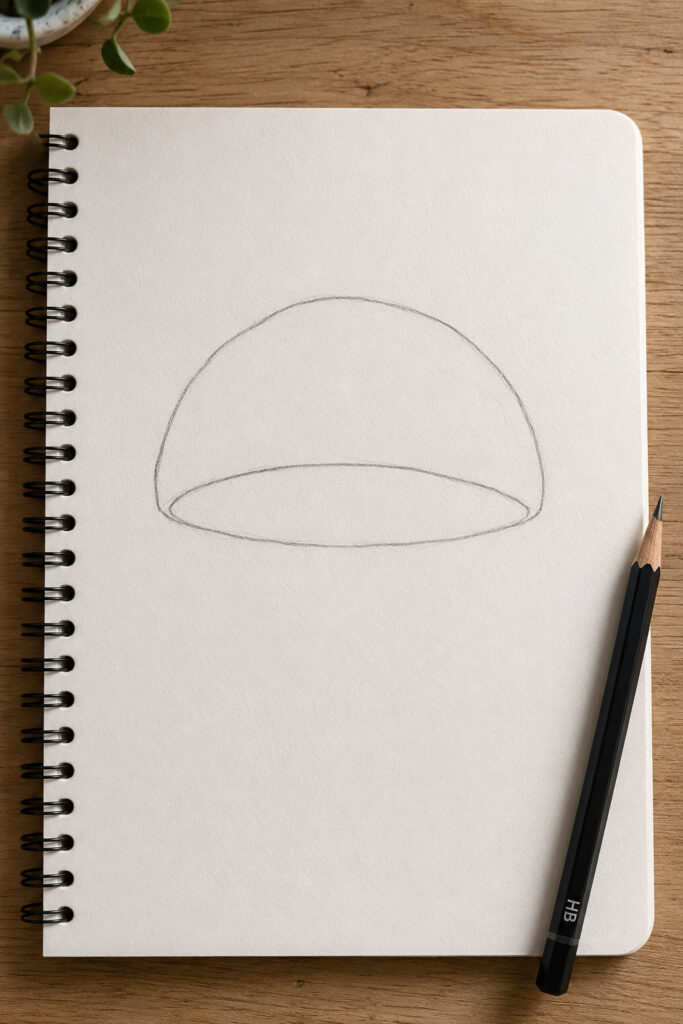
Step 1: Drawing The Mushroom Cap
Start with the cap. I like to draw it as a wide, slightly flattened dome rather than a perfect circle. Let the edge wobble a little. That tiny bit of unevenness makes the mushroom feel organic straight away.
If you want some of the underside to show, add a second curved line beneath the cap. Think of that line as a shallow oval. The more of that oval you reveal, the more it feels as though the viewer is looking up at the mushroom from below.
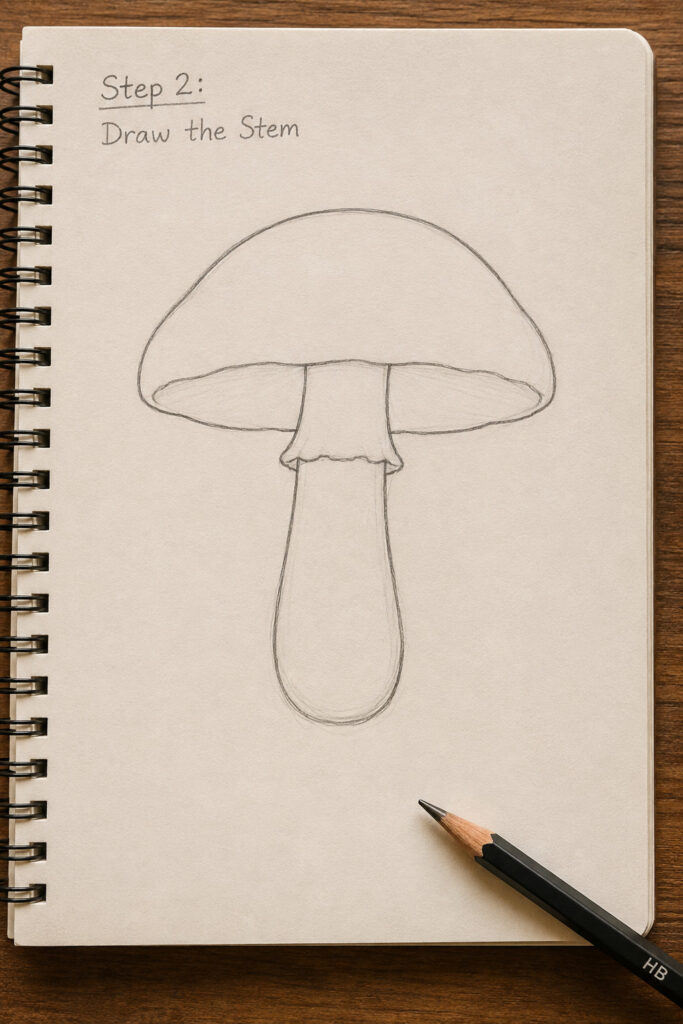
Step 2: Drawing The Stem
Bring two soft, slightly curved lines down from the underside of the cap to make the stem. Try not to make the sides perfectly parallel. A stem that narrows or widens a little usually looks more natural, especially near the base.
Some mushroom species have a ring, called an annulus, around the upper stem, while many do not. If your reference has one, add it now. If it does not, there is no need to invent one just because it looks ‘mushroom-like.’
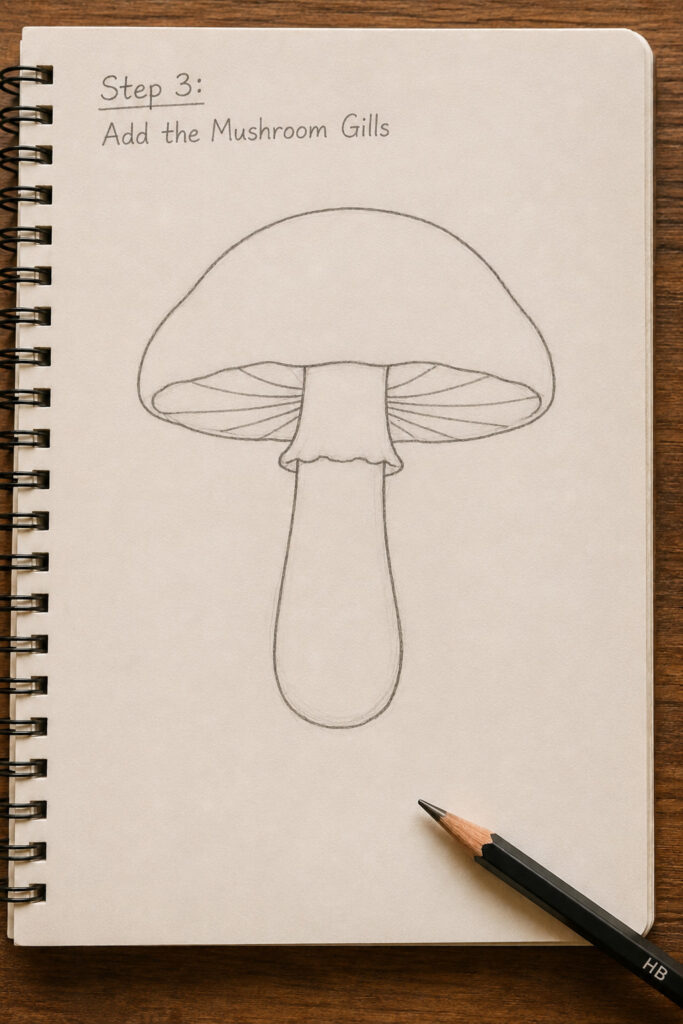
Step 3: Add the Mushroom Gills
If the underside of the cap is visible, sketch a few main gill lines from the stem out toward the rim. They should follow the curve of the underside rather than run straight across it.
Do not try to fill the whole underside with tiny lines. Start with a handful of longer gills, then tuck shorter ones between them. Slightly uneven spacing looks much more convincing than a perfect fan of identical marks
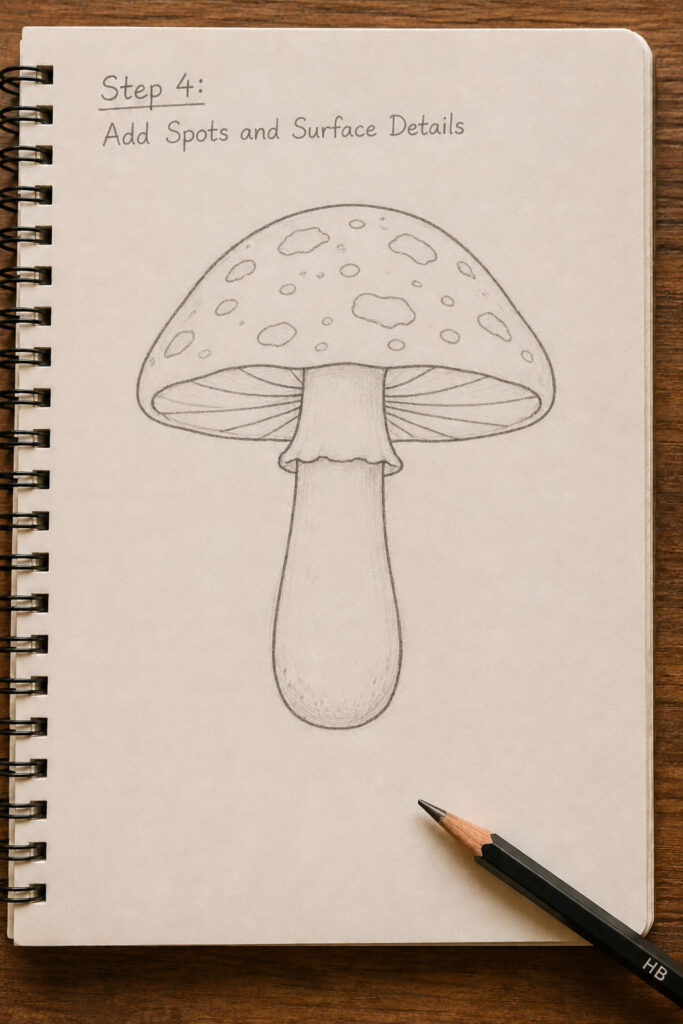
Step 4: Add Spots and Surface Details
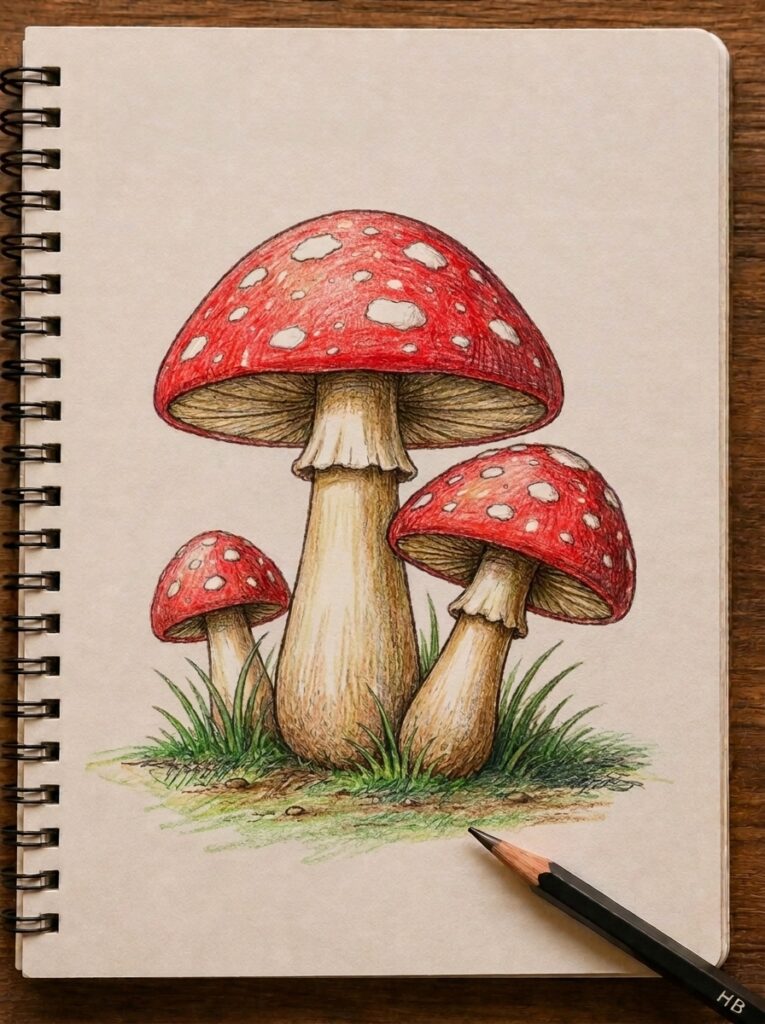
Now you can give the cap some personality. Add spots, small patches, stripes, or a little texture if they suit the mushroom you are drawing. Keep the details secondary to the overall shape. A strong silhouette matters more than covering the cap with decoration.
For spots, vary the size and shape instead of repeating neat circles. If you add lines or stripes, bend them around the cap so they reinforce its rounded form.
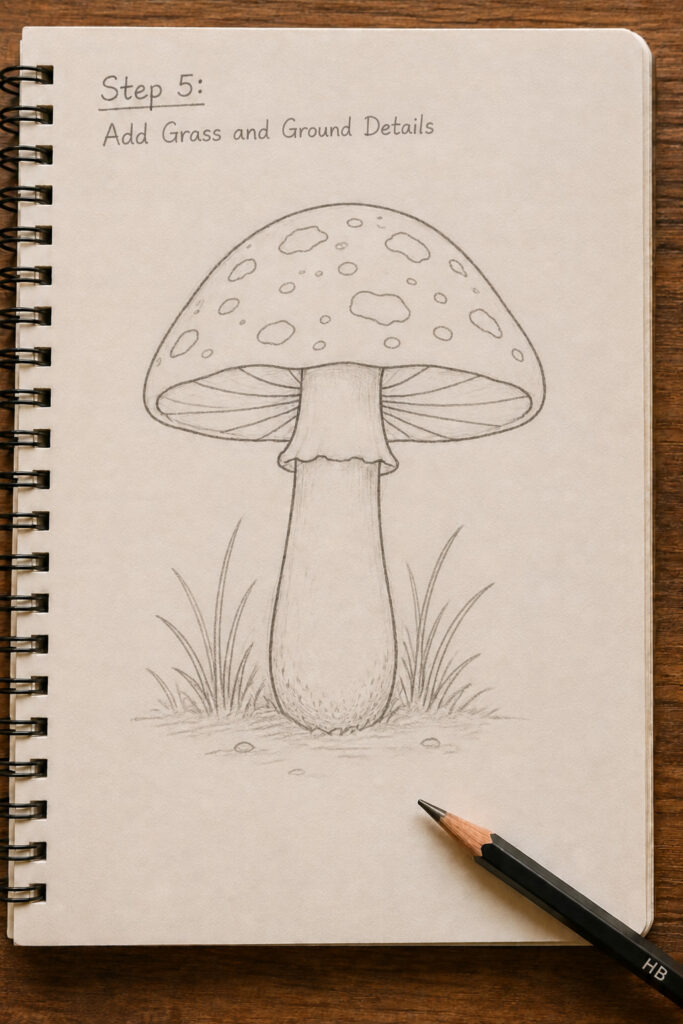
Step 5: Add Grass and Ground Details
A few blades of grass can make the mushroom feel planted rather than floating on the page. Draw short, curved strokes around the base and mix the heights and angles. You do not need many; a small cluster on either side is often enough.
If you want to turn the sketch into a little woodland scene, add a leaf, tiny flower, or a few pebbles around the base. These flower drawing ideas can give you more shapes to play with.
Step 6: Choose the Direction of Light
Before you shade, decide where the light is coming from. If the light is coming from the upper left, for example, keep that side of the cap and stem lighter and let the opposite side fall into deeper shadow.
This one decision keeps the drawing believable. It also tells you where the darkest area beneath the cap should sit and which direction the cast shadow should travel across the ground.
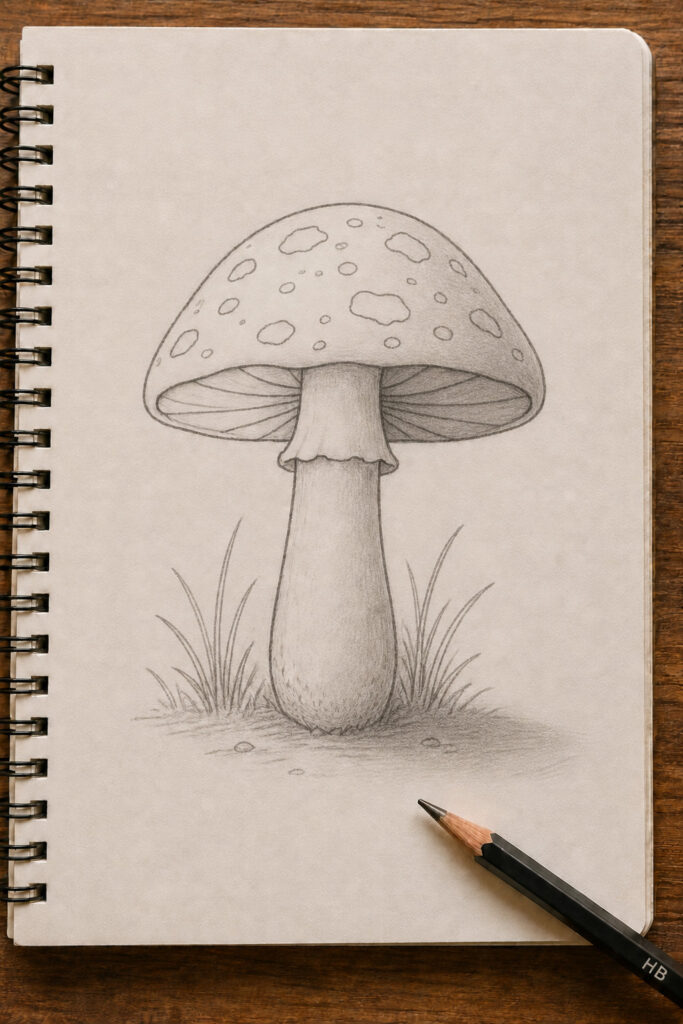
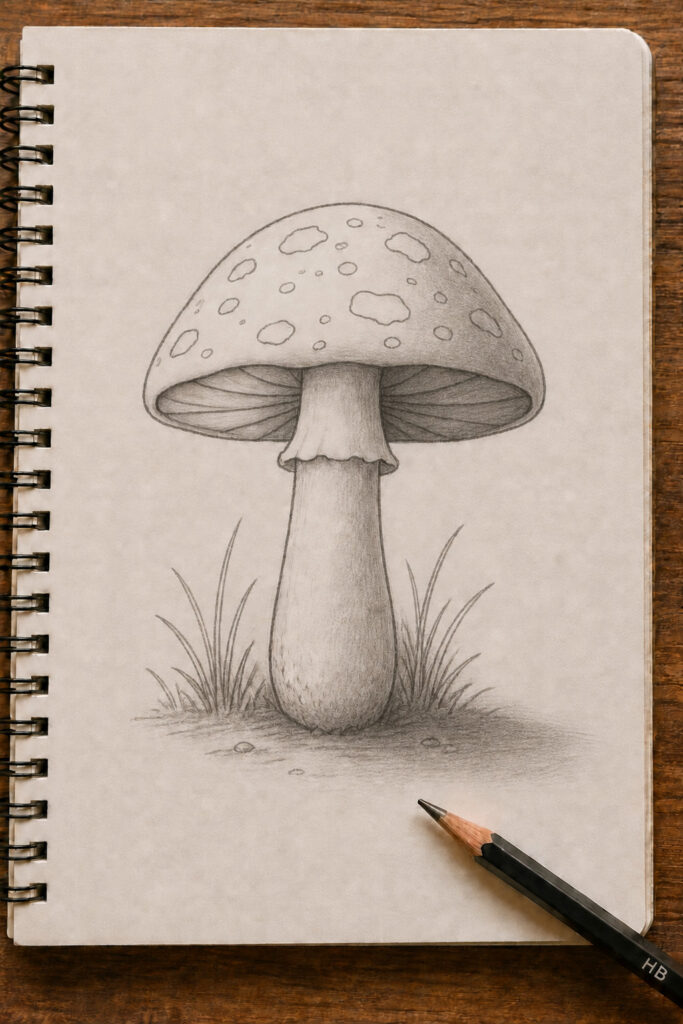
Step 7: Add Shading
Begin with light pressure. I prefer a slightly rounded HB pencil tip for soft shading because it lets me build tone without scratching hard lines into the paper. Work gradually and leave the lightest areas alone for as long as you can.
Use a sharper B or 2B pencil only where you need more contrast: beneath the cap, where two mushrooms overlap, and where the stem meets the ground. A small cast shadow beside the stem is often what finally makes the mushroom feel as though it is sitting on the page instead of hovering above it.
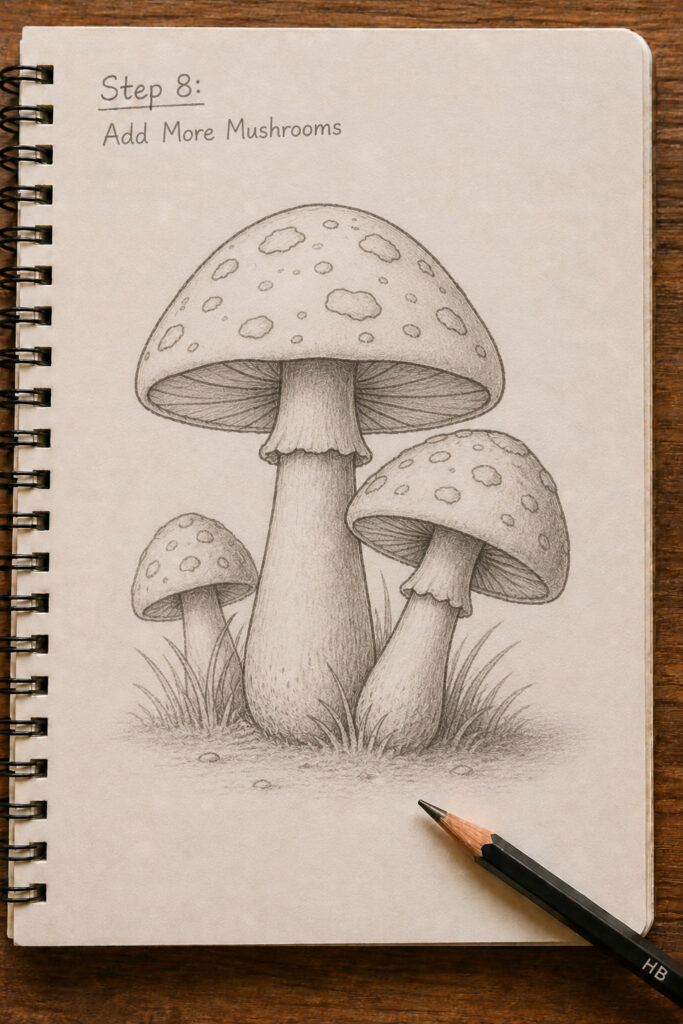
Step 8: Add More Mushrooms
Once the first mushroom works, try adding one or two more. Change the cap width, stem height, tilt, and overlap instead of copying the same mushroom again. A tiny mushroom tucked behind a larger one can make the whole composition feel more natural.
Keep the same light direction across the group. The mushrooms can cast shadows onto one another, so look for small darker areas where caps or stems overlap.
Step 9: Clean Up the Lines and Add Color
When the drawing feels right, erase the construction lines you no longer need. You can leave the sketch in pencil, or go over selected contours with a fineliner. There is no need to outline every single detail; a few crisp edges beside softer pencil marks can look much more natural.
How to Draw Mushroom Gills Without Making Them Look Messy
Mushroom gills look detailed, but you do not need to draw every one. The easiest approach is to use a few curved radial lines to establish the direction first, then add shorter lines between them where the underside needs more texture.
- Follow the perspective. Let the gills bend with the underside of the cap instead of drawing them as flat straight lines.
- Mix long and short lines. That variation creates depth and stops the underside from looking like a wheel.
- Use shadow as part of the detail. A soft darker value under the cap can suggest many gills without drawing each one.
- Keep the spacing slightly irregular. Perfectly even lines tend to look mechanical.
Common Mushroom Drawing Mistakes
- Making the cap too perfect. A slightly uneven dome usually feels more natural than a flawless circle or oval.
- Mixing two different perspectives. If you can see a lot of the underside, the cap and stem need to share that same viewing angle.
- Drawing every gill the same way. Vary the length, spacing, and darkness so the underside has depth.
- Shading before choosing the light. Pick the light direction first so the highlights, underside shadows, and cast shadow all agree.
- Forgetting the contact shadow. A darker touch where the stem meets the ground helps the mushroom feel anchored.
- Repeating the same mushroom in a cluster. Change the size, tilt, and overlap so the group feels collected rather than copied.
Want more easy things to draw? This one's free
Three Easy Ways to Change Your Mushroom Drawing
Simple Mushroom Drawing
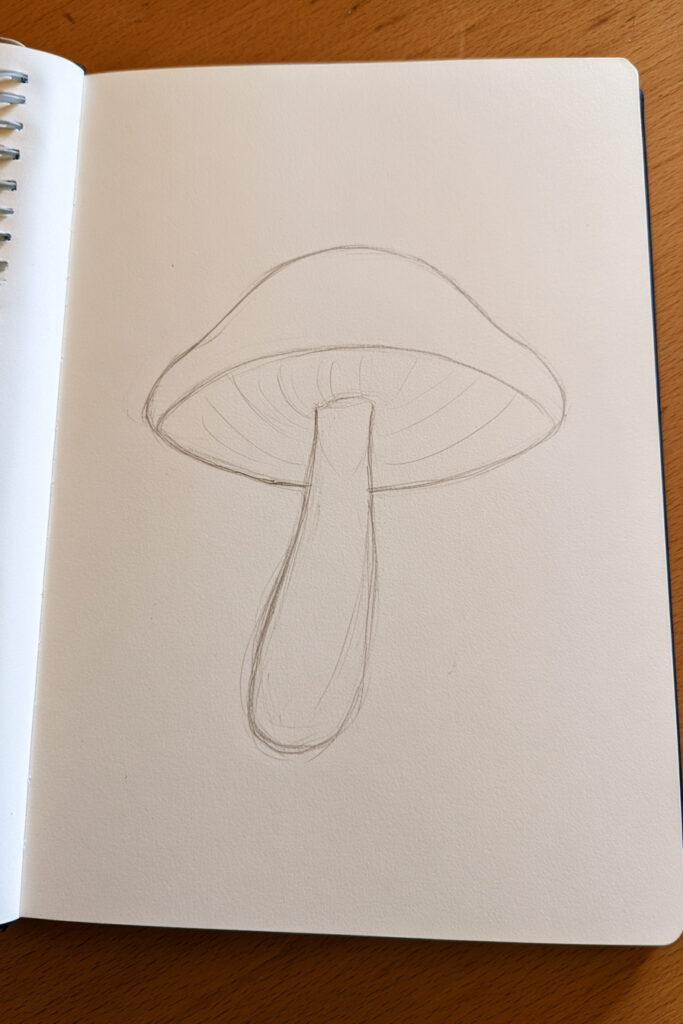
Keep the cap smooth, use only a few gill lines, and skip the detailed shading. A clean outline with one light side and one darker side is enough for a simple beginner sketch.
Cute Mushroom Drawing
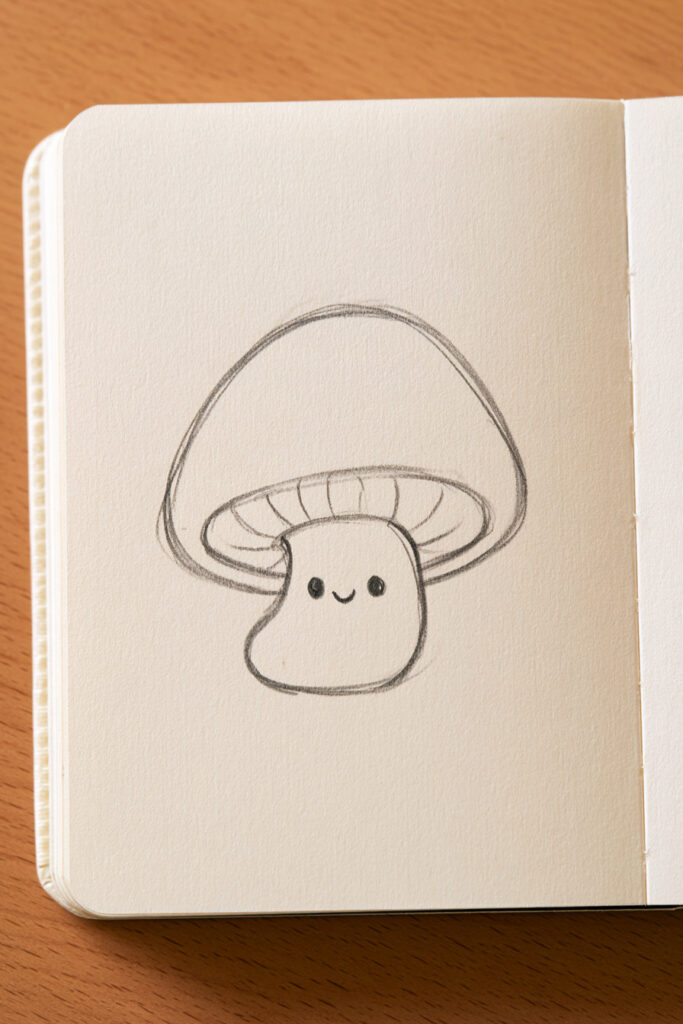
Round the cap and stem a little more, simplify the gills, and add a tiny face if you want a kawaii or doodle-style mushroom. For more little nature motifs, have a look at these cute cottagecore doodle drawings.
Woodland Mushroom Drawing
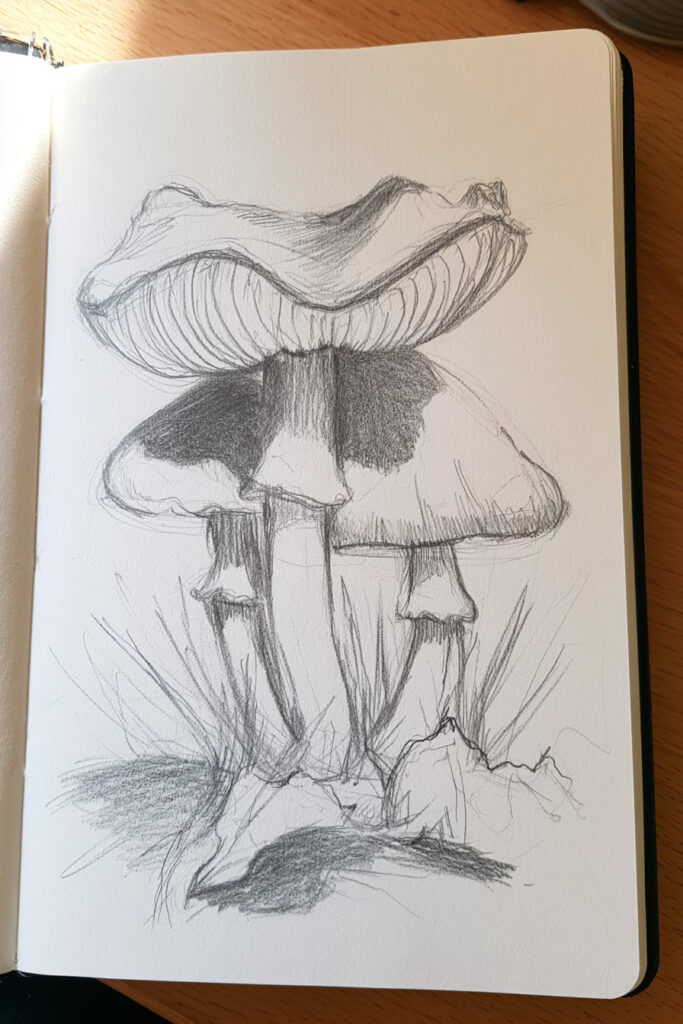
Use a more irregular cap, visible gills, stronger shadows, and a few bits of grass or leaves around the base. Add two or three mushrooms at different heights if you want the drawing to feel like a tiny forest-floor scene.
Keep Practicing With Different Mushroom Shapes
Once you can build one mushroom confidently, change just one thing at a time. Make the cap wider, tilt the stem, show more of the underside, or add a second mushroom behind it. Those small changes are a relaxed way to practise form and perspective without having to start with a completely different subject.
If you are looking for another easy sketchbook subject, try our guide to what to draw as a beginner or keep the woodland theme going with our cottagecore doodle ideas.
Frequently Asked Questions About Drawing Mushrooms
Is a mushroom easy to draw for beginners?
Yes. A mushroom can be reduced to a few simple forms: a cap, an underside, and a stem. Get those shapes in place first, then add the gills, texture, and shading only after the proportions feel right.
How do you draw mushroom gills without making them look messy?
Draw a few long gill lines first, following the curve of the underside, then add shorter lines between them. You do not need to fill every gap. A little shadow beneath the cap will suggest extra depth without turning the area into a mass of lines.
How do you make a mushroom drawing look 3D?
Show some of the curved underside, choose one light direction, and make the shadow side darker than the side facing the light. Finish with a small cast shadow at the base. Those choices create more depth than adding lots of tiny surface details.
What pencil is best for a mushroom sketch?
An HB pencil is a good all-round choice because it is light enough for construction lines but dark enough for most of the finished sketch. If you want deeper shadows, add a B or 2B pencil near the end.
Should you use a photo reference when drawing mushrooms?
A photo reference helps with proportions, gills, and lighting, especially when you want a more natural result. You do not have to copy it exactly. Use it to understand the structure, then change the tilt, surroundings, size, or color to make the drawing your own.
How can you make a mushroom drawing look cute?
Use a rounder cap, a shorter or chunkier stem, softer curves, and fewer realistic details. A simple face, rosy cheeks, tiny stars, or little flowers can push the drawing toward a cute doodle style without changing the basic mushroom structure.