
As with drawing eyes and hair, drawing the lips and mouth can be a challenge. Capturing that expression can seem an insurmountable task. Don’t worry, you can break the whole process down into a series of relatively simple steps.
The first thing to do is to look past the mouth, to the shapes and tones. It is these that will create both realism and emotion in your drawings.
All of us need inspiration at times and my first piece of advice would be to collect as many photographs and drawings of as many different mouths as you can.
Some Help And Inspiration
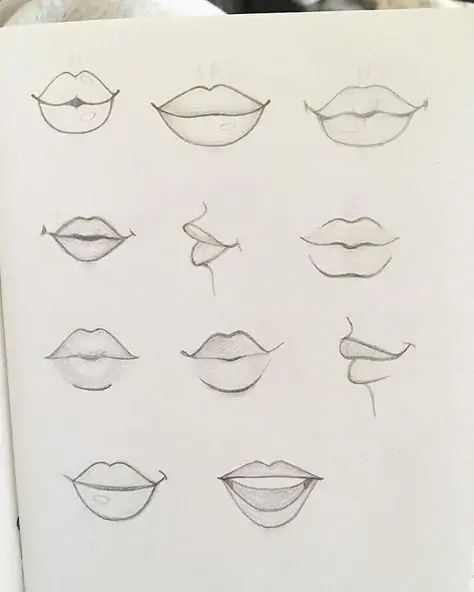
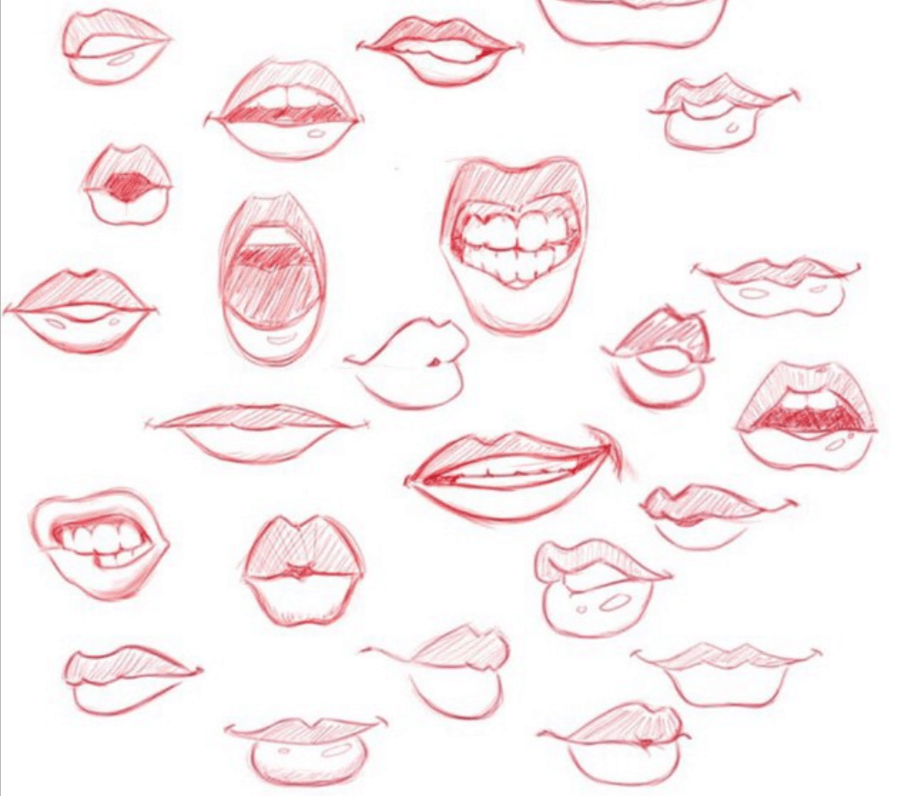
Here are 20 amazing lip and mouth drawing ideas for inspiration. I have also included some of the hints and tips I have learn’t over the years to try and help you improve the results of your drawing.
This is part of a series of tutorials to help you to draw faces better. We take a look at all the individual facial features as well as how to assemble those parts. They will all help and can make it much easier for you to draw any faces.

Don’t Get Overwhelmed
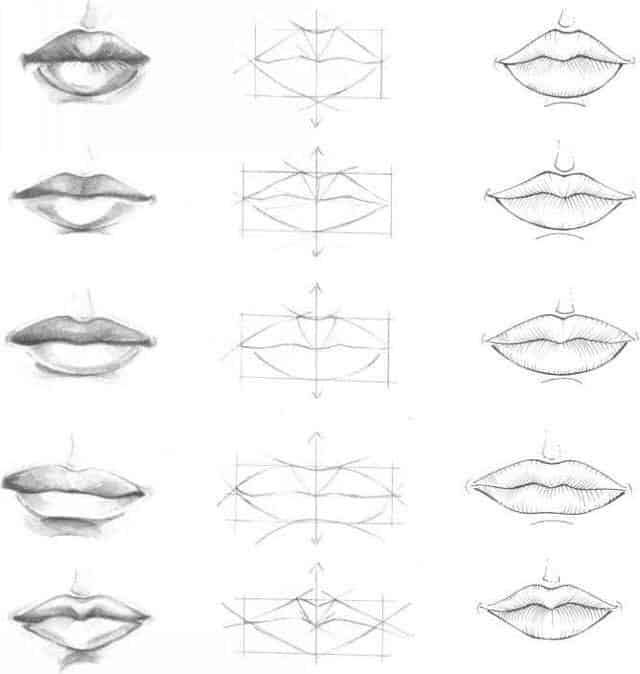
As you can see from the drawings, if you look at the final piece, it seems complex and very detailed. Instead of looking at the whole image, start to separate it into any basic shapes you can see.
I was once told by an old art teacher to try turning the picture I was trying to paint upside down, to look beyond the image itself. It worked remarkably well for me, it may work for you too.
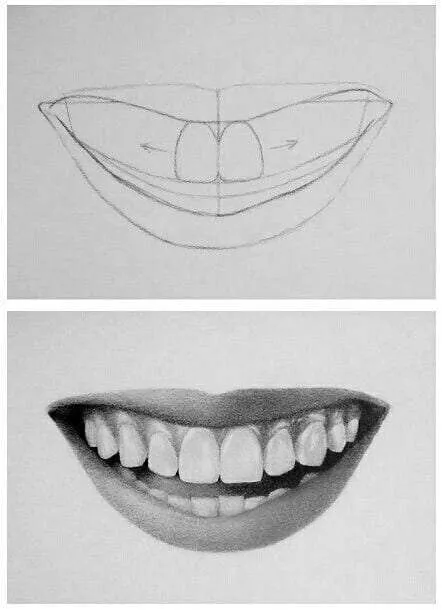
Drawing The Shape Of The Mouth
To start you need to capture the shape of the mouths opening. With a closed mouth this would be a single line, but with an open mouth it becomes 2 lines joined at the ends. This is just a preparatory sketch for now so don’t worry about mistakes.
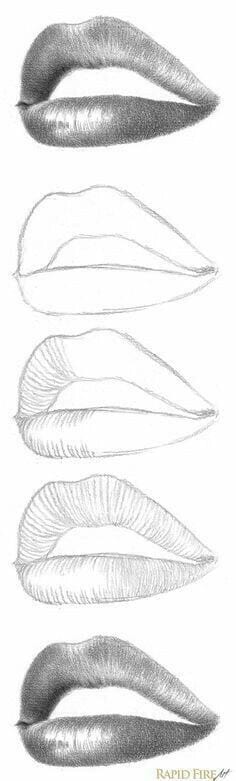
Drawing The Curve Of The Lips
Once you are happy with the curves that form the shape of the opening, you can look at how the upper and lower edges of each lip join to that shape. Look at how those curves fit together, widening from each end but following similar lines, to form the shape of the mouth.
Creating Depth
You can begin to create depth by emphasizing the curvature of the lips with light shading. By softening the upper and lower edges of each lip you emphasize the central opening. Create those shapes by drawing the contours of the lips.
Follow The Contours
The lines you draw should follow these contours, pick out the darkest areas and as you work you can gradually overlay the lighter areas of shading.
Keep it simple. Build up the shading to create the shapes you need. Introducing the curves and lines of any folds of skin around the mouth will give you chance to experiment with expression too.

Use The Light
Look at how the light creates shape with shadow. This will help give you the depth of expression you want in a drawing.
As you add any final shading around the mouth, look at the effect of the light source. This, and the shadows it creates, will help you bring the expression to life.
Use The Right Tools
You can see that at times I have used a very sharp pencil to emphasise the shape of certain parts of the image. Then, as the picture develops, I often use a much rounder (more blunt) pencil tip, to soften the image and create depth.
Using different pencil grades can help with this. In general I start with a fairly sharp HB grade. Then use a 3B to emphasise the darkest areas. Use a very sharp HB for detail like the lip line, and a much rounder tip HB and 2B to soften the image and create the gradient of tones within the shaded areas.

Conclusions
You will be amazed at the subtle differences in shape and tone that can help you create expression. As you look at, and draw, different eyes from the reference material you have collected, you will begin to see how those shapes can help you create more lifelike and expressive drawings.
This will bring your artwork to life. The mouth is the voice of the soul, and time spent here can make the rest of the drawing a pleasure.