Plate painting is one of those crafts that looks much harder than it needs to be. A blank ceramic plate gives you a built-in circle, a clear rim, and plenty of room for simple patterns, so even a few hearts, dots, flowers, or fruit can look finished and intentional.
These beginner plate painting ideas rely on simple shapes, repeating motifs, and designs that follow the edge of the plate. You do not need perfect drawing skills. A slightly uneven border or hand-painted flower often makes the finished piece feel more personal.
This collection focuses completely on plates, from tiny hearts and daisies to blue-and-white florals, fruit, bows, fall designs, and Halloween ideas. If you are choosing between plates, mugs, bowls, planters, and other ceramic shapes, the broader pottery painting ideas for beginners collection gives you more shapes to work with.
Save this post for later so you have a few designs ready for your next pottery-painting session.
Which Plate Painting Idea Should You Try?
If you are staring at a blank plate and cannot decide where to start, use this quick guide to narrow the list down.
| If you want… | Try… |
| The easiest design | Tiny Heart, Colorful Dot, Wavy Border |
| Cute and playful | Happy Daisy, Smiley Sun, Bow |
| Floral | Wildflower Meadow, Daisy Rim, Botanical Vine |
| Elegant | Delft-Inspired Floral, Cobalt Leaf |
| Mediterranean | Mediterranean Blue, Blue Lemon |
| Fruity | Cherry, Strawberry, Lemon |
| Trendy | Bow, Checkerboard and Bow, Mushroom |
| Autumn | Pumpkin Vine, Fall Wildflower, Acorn and Oak Leaf |
| Halloween | Cute Ghost, Black Cat and Moon, Celestial Halloween |
The ideas below are grouped by style, but you can mix elements freely. A cherry border can become a lemon border, a blue floral plate can be painted in burgundy and cream, and a Halloween moon design can easily become a year-round celestial plate.
Cute and Simple Plate Painting Ideas
Start here if you want a forgiving design with very little drawing. These ideas use basic shapes, repeated marks, or the plate rim itself as a guide.
1. Tiny Heart Plate
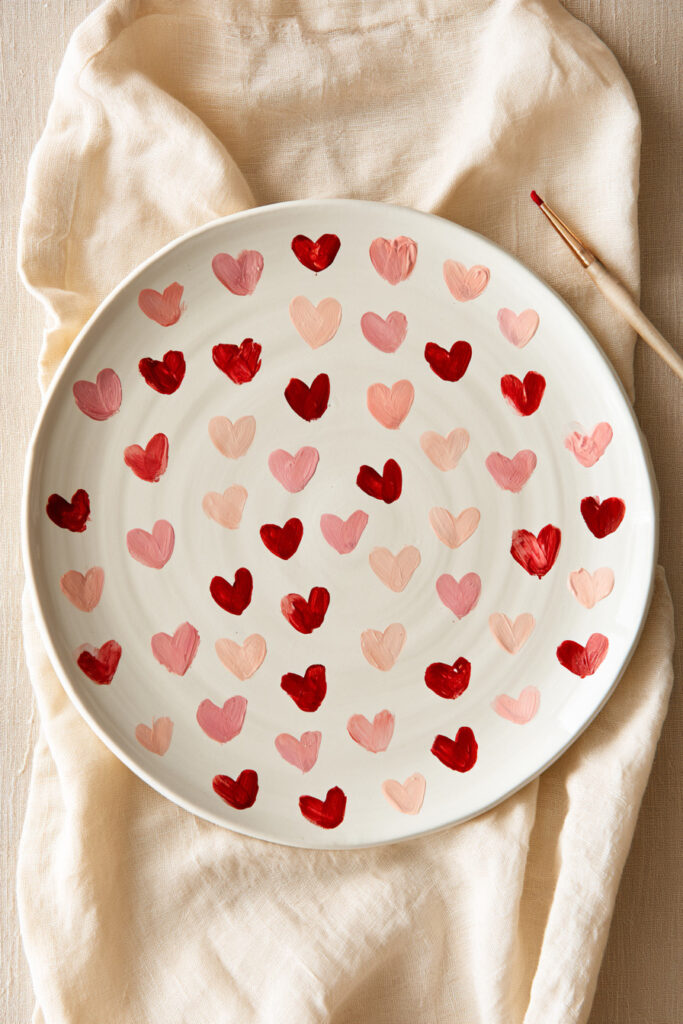
Difficulty: Very easy | Best placement: Full plate or rim | Technique: Repeating small motifs
Suggested palette: Red, pink, cream
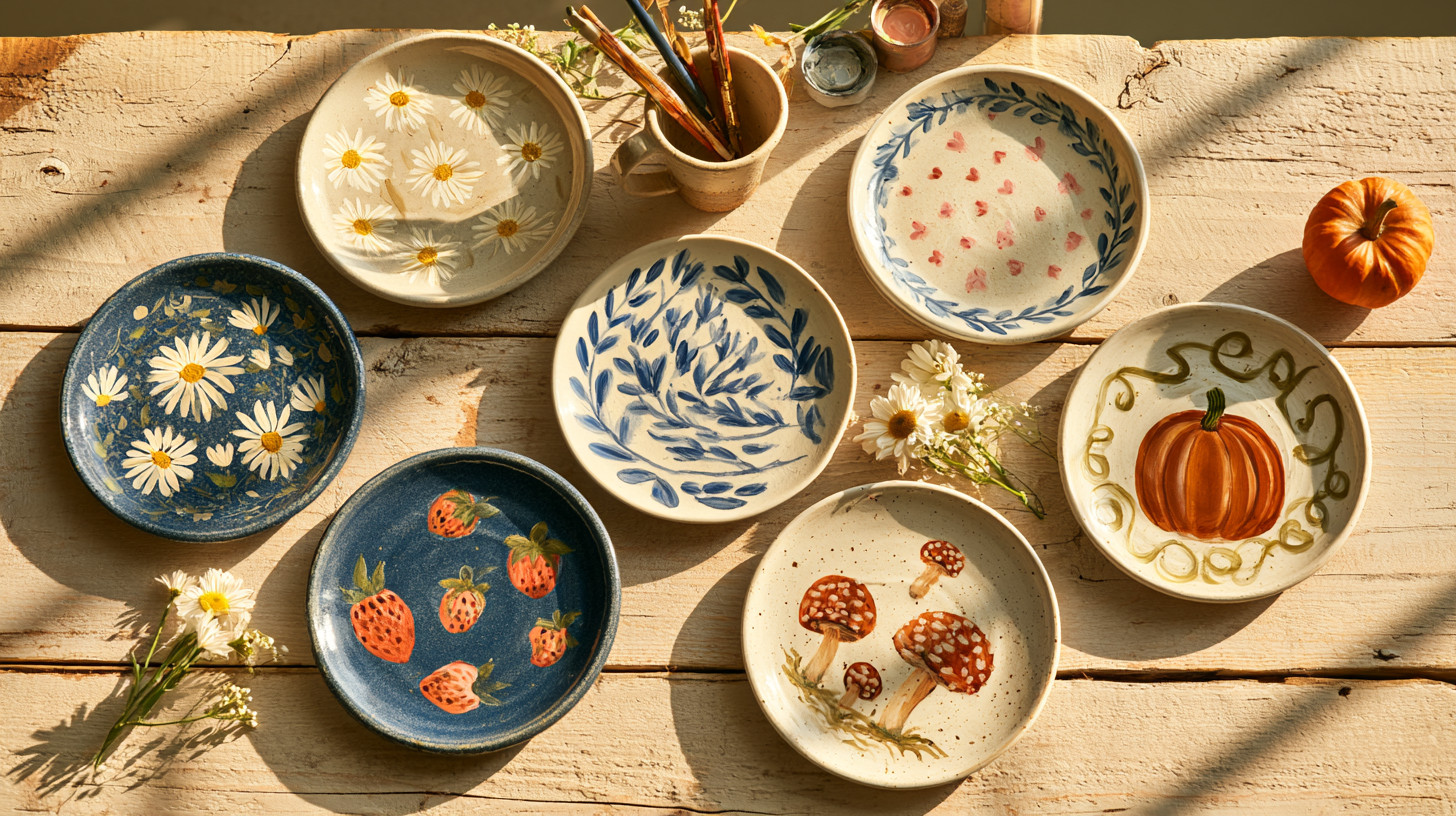
Scatter small hearts across the plate instead of trying to line them up perfectly. A loose arrangement looks charming, and small differences in size make the design feel intentionally hand-painted.
For an even simpler version, keep the center plain and paint a ring of hearts around the rim. Two colors are enough to make the pattern feel finished.
2. Happy Daisy Plate
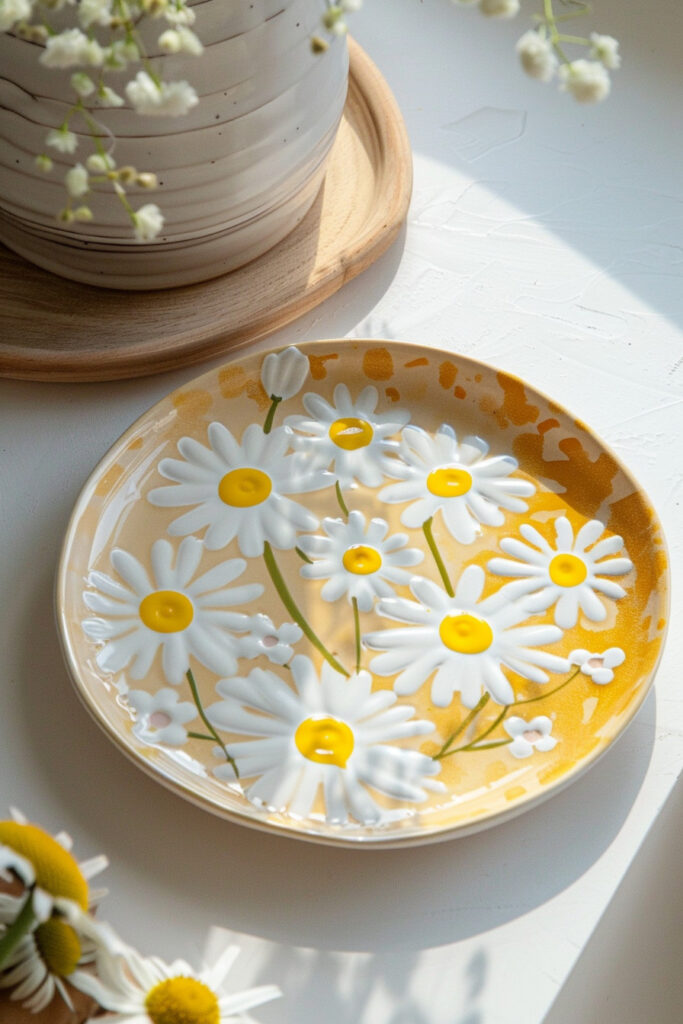
Difficulty: Easy | Best placement: Center | Technique: Simple flower shapes
Suggested palette: White, yellow, green
Paint one oversized daisy in the center and add a tiny smile to the yellow middle. The large petals are easy to block in, and the face gives the plate a playful personality without adding much extra detail.
If you prefer a cleaner look, skip the face and add a thin green stem or a few small leaves instead.
3. Scalloped Edge Plate
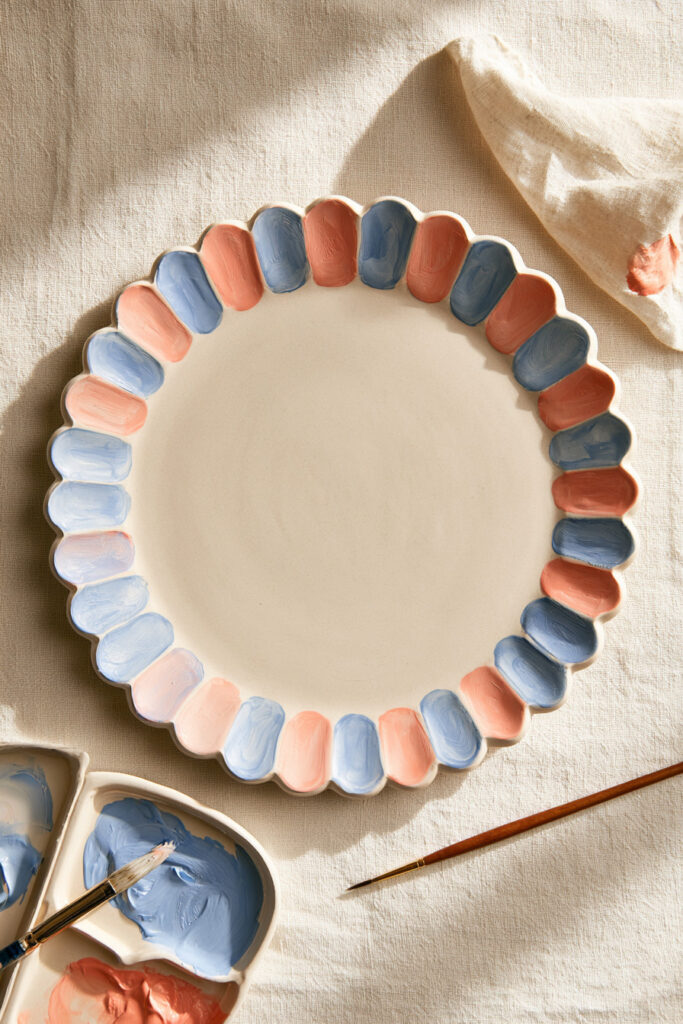
Difficulty: Very easy | Best placement: Rim | Technique: Repeating curved border
Suggested palette: Blue and cream, pink and red, or green and white
Use the rim as your guide and paint a chain of rounded scallops all the way around. This works especially well on plates with a clearly raised edge because the shape naturally keeps the pattern contained.
Leave the center white for a crisp minimalist plate, or add one small flower, fruit, or initial in the middle.
4. Wavy Border Plate
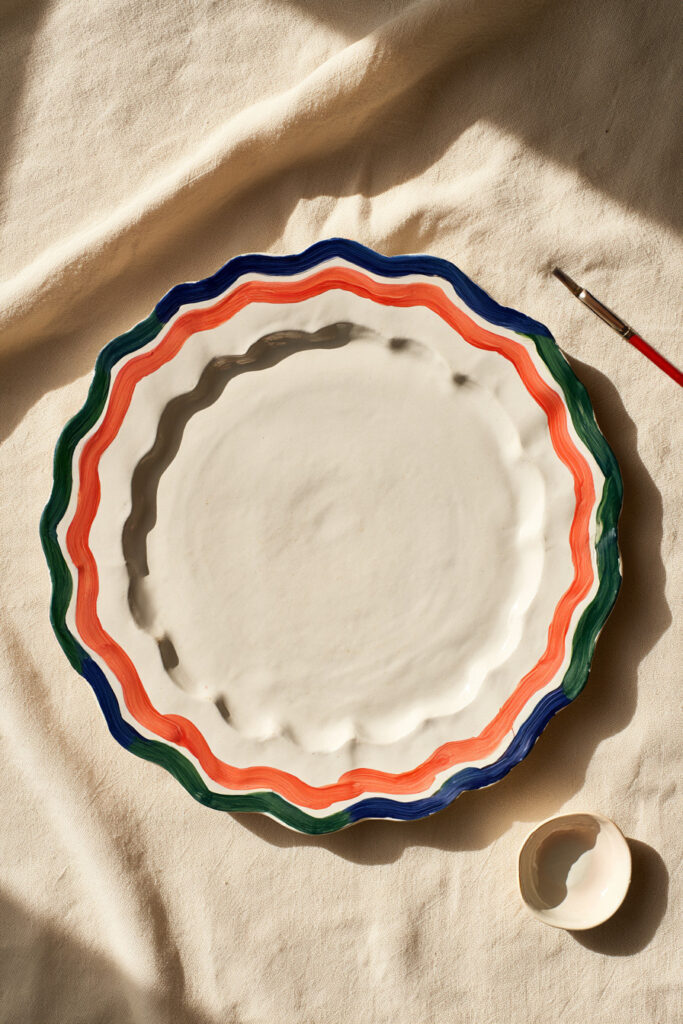
Difficulty: Very easy | Best placement: Rim | Technique: Continuous line
Suggested palette: Cobalt blue, coral, green, or rust
A loose wavy line is one of the easiest ways to decorate a plate without worrying about symmetry. Follow the edge of the plate and let the line rise and fall naturally.
Try a second thinner wave just inside the first for more movement, or alternate two colors for a playful border.
5. Smiley Sun Plate
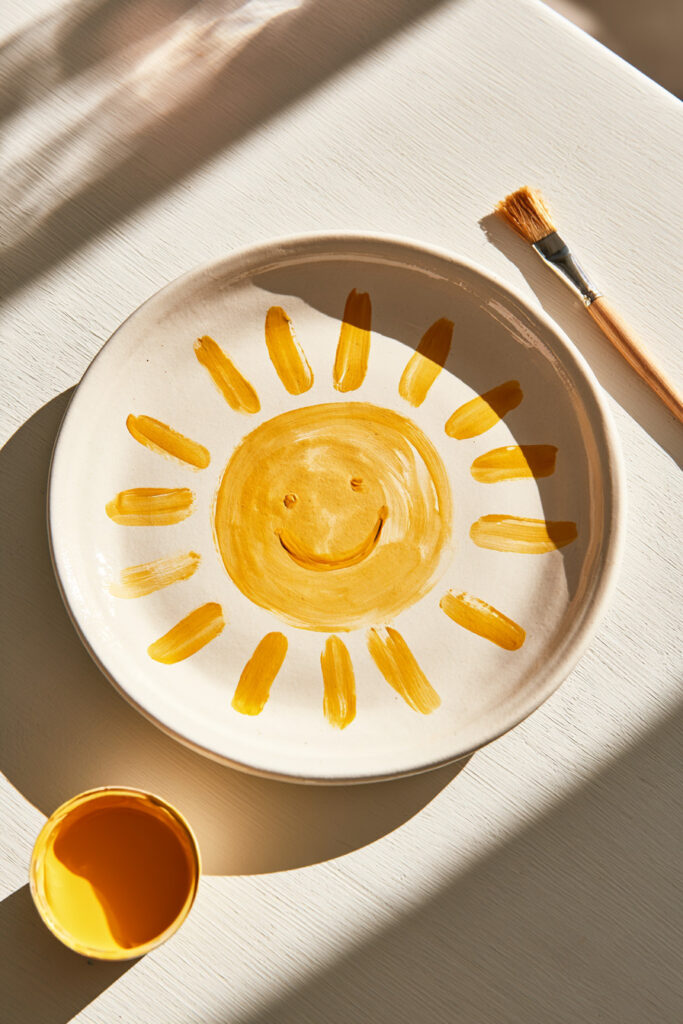
Difficulty: Easy | Best placement: Center | Technique: Large central motif
Suggested palette: Golden yellow, orange, cream
Let the circular plate do most of the composition work by turning the center into a simple sun. Paint a round face, add short rays around it, then finish with two eyes and a small curved smile.
For a softer look, use muted mustard and terracotta instead of bright yellow and orange.
6. Colorful Dot Plate
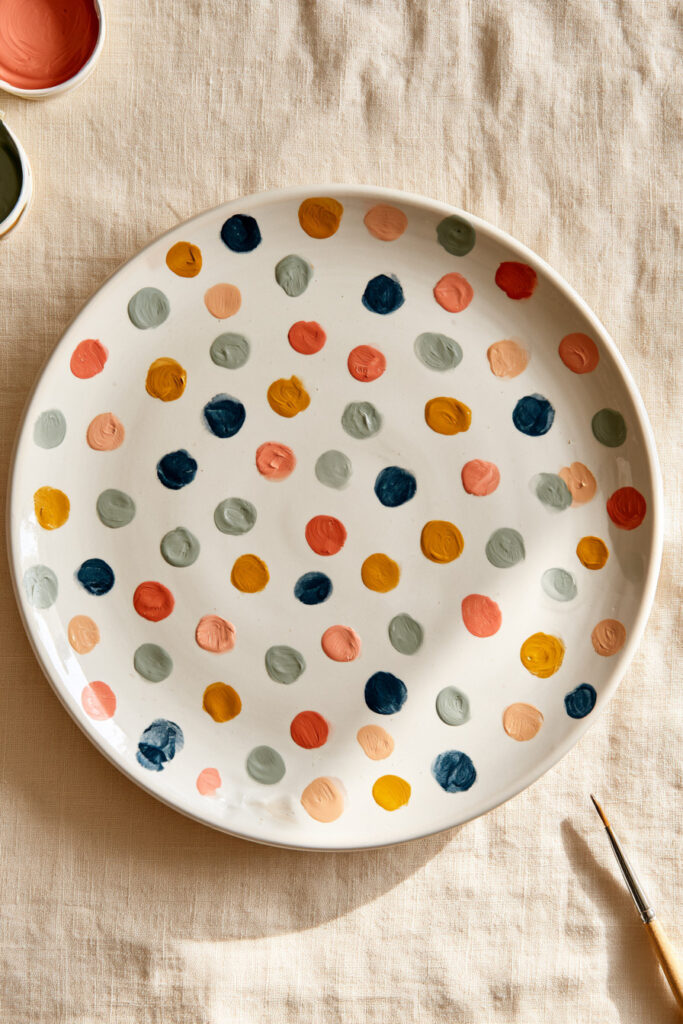
Difficulty: Very easy | Best placement: Full plate or border | Technique: Dotting
Suggested palette: Choose four to six colors
Dots are ideal when you want color without drawing. Space larger dots first, then fill awkward gaps with smaller ones so the pattern feels balanced rather than rigid.
You can keep the dots around the rim, create a confetti effect across the whole plate, or arrange them in loose rings around the center.
Floral Plate Painting Ideas
Flowers work beautifully on round plates because stems can curve around the rim while larger blooms sit naturally in the center. Keep the shapes simplified and they stay beginner-friendly.
7. Wildflower Meadow Plate
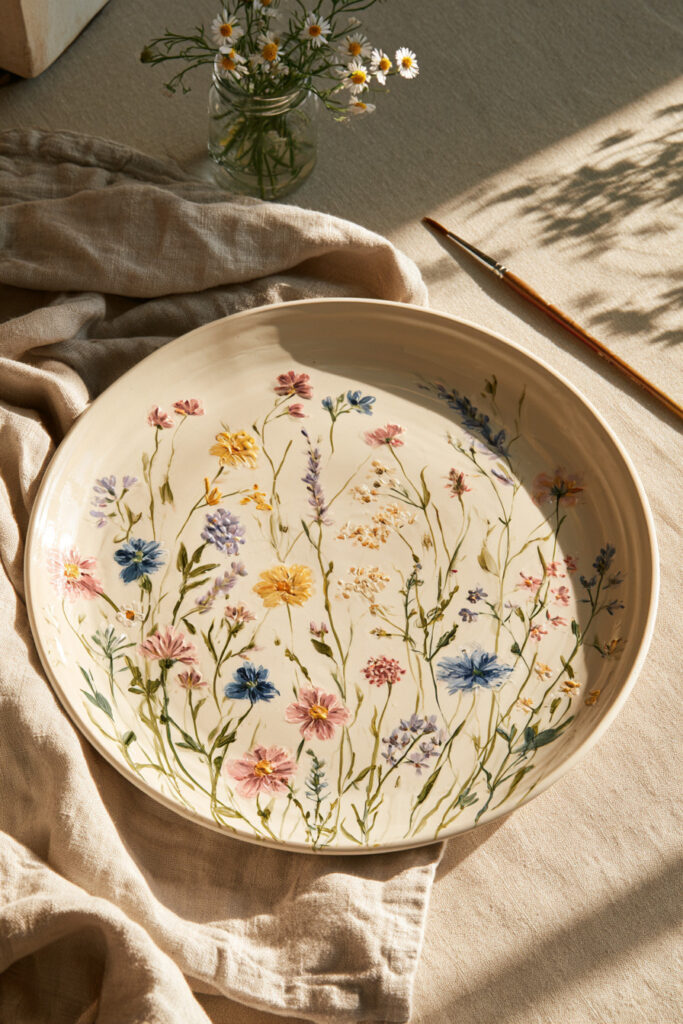
Difficulty: Easy | Best placement: Lower edge or sweeping across plate | Technique: Loose stems and small flowers
Suggested palette: Pink, yellow, blue, green
Paint a handful of thin stems rising from one side of the plate, then add tiny dots, petals, and leaf shapes along them. The flowers do not need to match, which makes this style forgiving.
Keep more empty space toward the top so the design feels airy rather than crowded.
8. Daisy Rim Plate
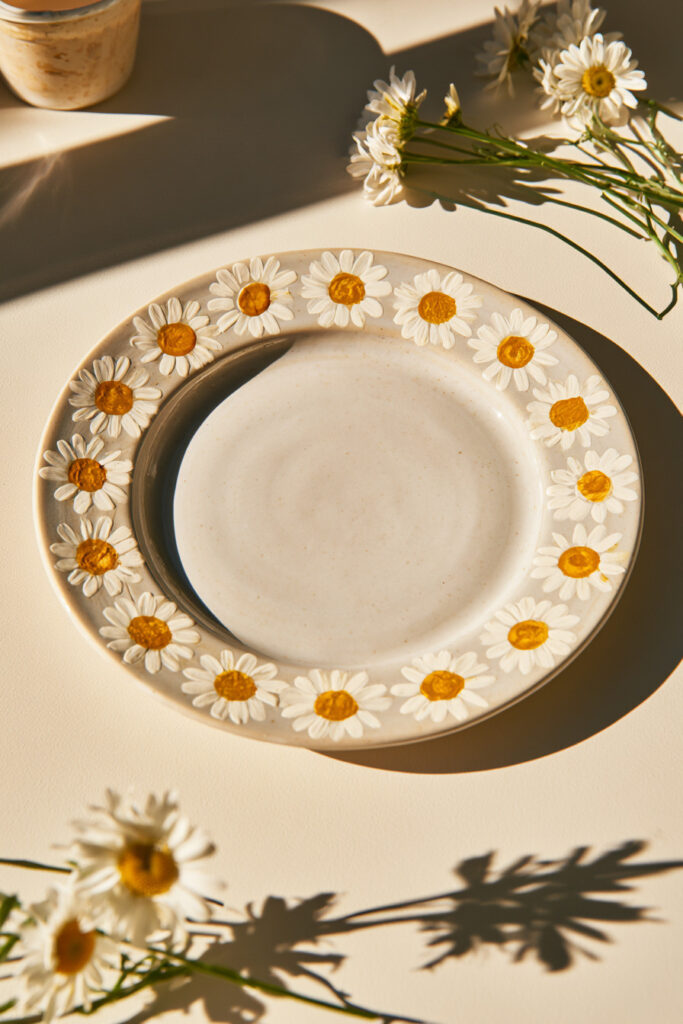
Difficulty: Easy | Best placement: Rim | Technique: Repeating flowers
Suggested palette: White, yellow, green
Place simple daisies around the rim and connect them with small leaves or short green stems. The circular edge makes spacing easier, and repeating one flower keeps the design cohesive.
If a full ring feels too busy, paint daisies along only the bottom third of the plate.
9. Retro Flower Plate
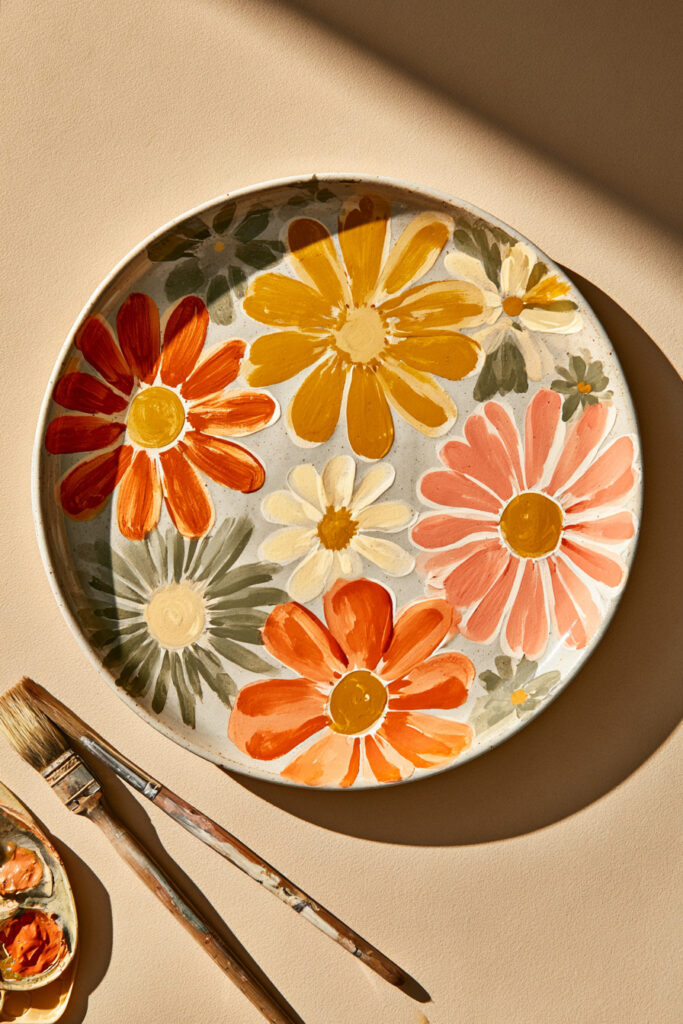
Difficulty: Easy | Best placement: Full plate | Technique: Large simplified flowers
Suggested palette: Orange, pink, mustard, cream
Use oversized rounded petals and bold centers to create a cheerful retro pattern. Larger flowers are actually easier than tiny detailed ones because you can work with broad shapes.
Leave narrow gaps between blooms so the background still shows through and the plate does not feel too heavy.
10. Botanical Vine Plate
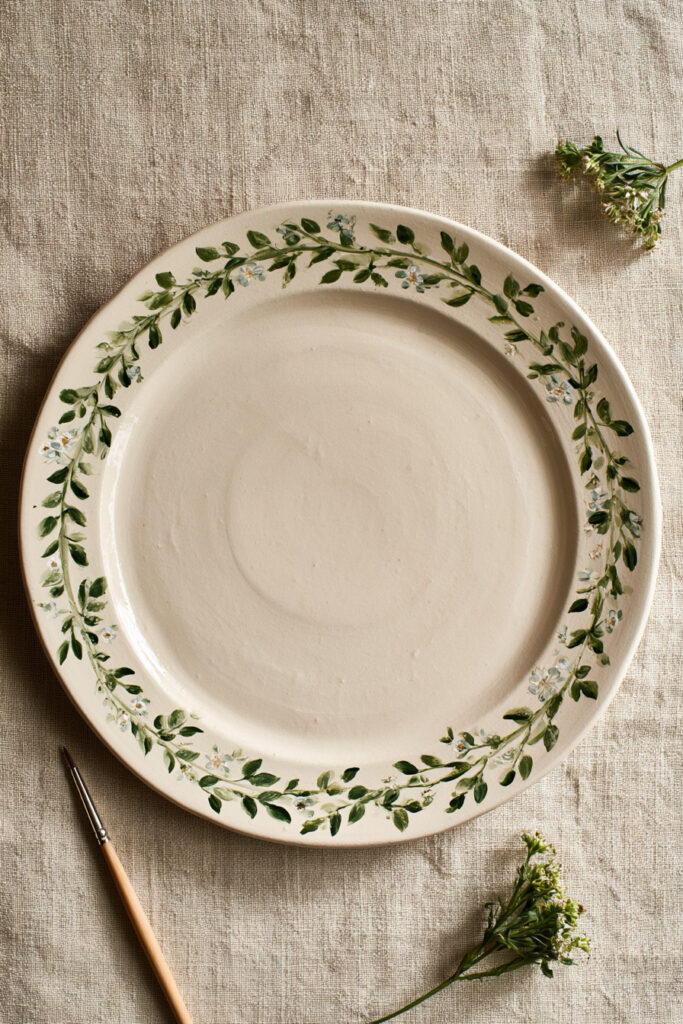
Difficulty: Easy to medium | Best placement: Rim | Technique: Continuous vine with leaves
Suggested palette: Forest green, sage, cream
Paint one thin curved line around the rim, then add pairs of simple leaves along it. The repetition makes the design feel polished even when each leaf is slightly different.
Add a few tiny berries or flowers if you want a second accent color.
11. Folk-Art Floral Plate
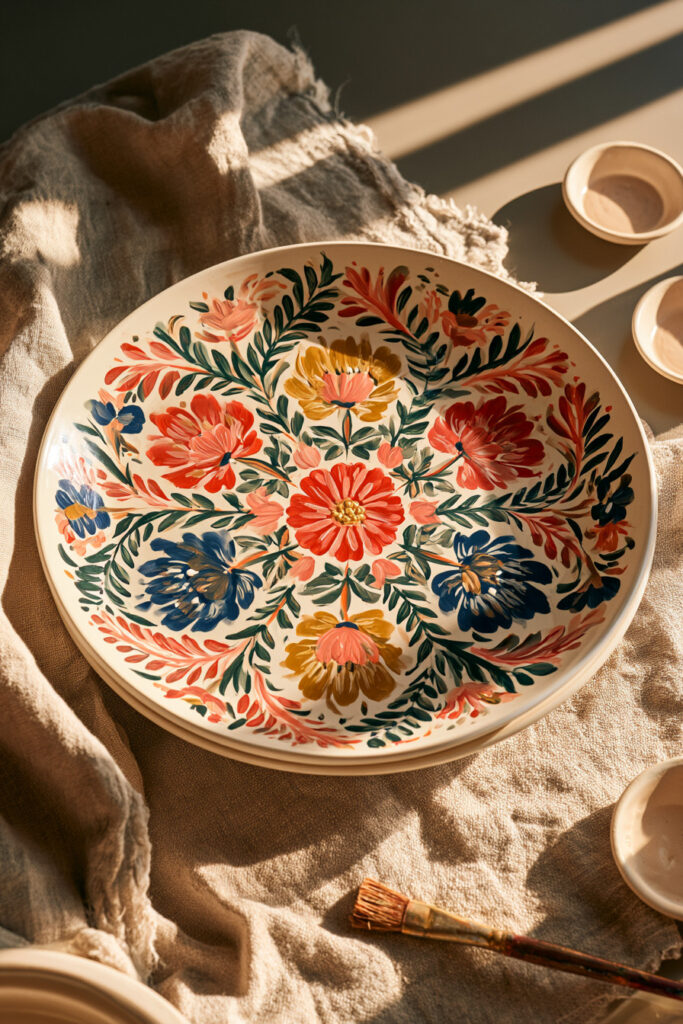
Difficulty: Medium | Best placement: Center and border | Technique: Symmetrical simplified florals
Suggested palette: Red, blue, yellow, green
Build the design from a central flower, then mirror leaves, petals, and small decorative marks on either side. Folk-art florals look best when the shapes are bold and simplified rather than realistic.
Sketch the main symmetry lightly first if you want a more balanced result, then paint over the guide.
Blue and White Plate Painting Ideas
A limited blue-and-white palette makes even simple brushwork look coordinated. These designs range from easy leaf motifs to more detailed Delft-inspired florals.
12. Delft-Inspired Floral Plate
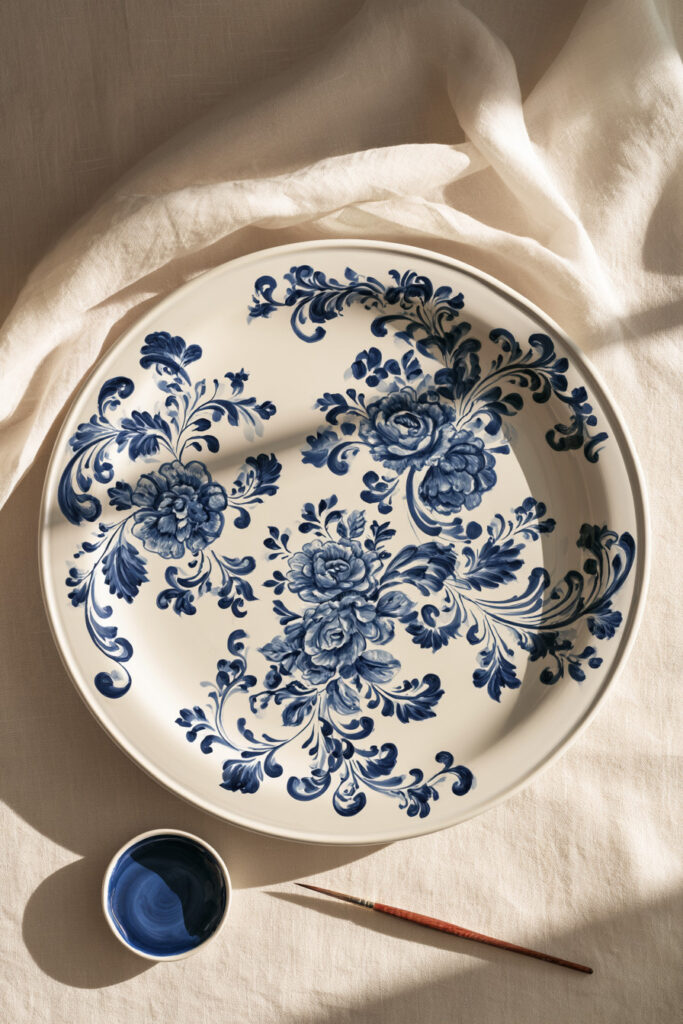
Difficulty: Medium | Best placement: Center and rim | Technique: Fine floral brushwork
Suggested palette: Cobalt blue and white
Paint a loose central flower with smaller leaves and buds branching outward, then echo the same blue around the rim. Keep the shapes original and use Delftware as inspiration for the blue-and-white mood rather than trying to copy a historic pattern exactly.
Varying the amount of blue on the brush can create lighter and darker marks without introducing another color.
13. Cobalt Leaf Plate
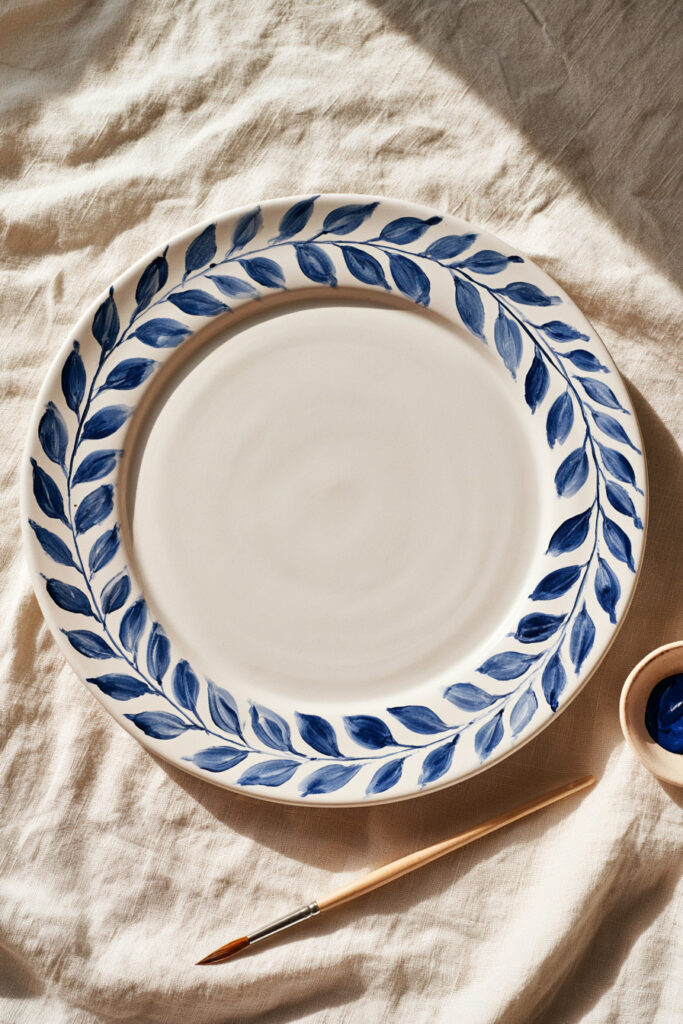
Difficulty: Easy | Best placement: Rim or radial | Technique: Simple leaf shapes
Suggested palette: Cobalt blue and white
Arrange pairs of cobalt leaves around the rim, or point them inward like a wreath. Because every leaf can be painted with one or two brushstrokes, the pattern looks detailed without being difficult.
A small blue dot between each pair of leaves can help even out the spacing.
14. Mediterranean Blue Plate
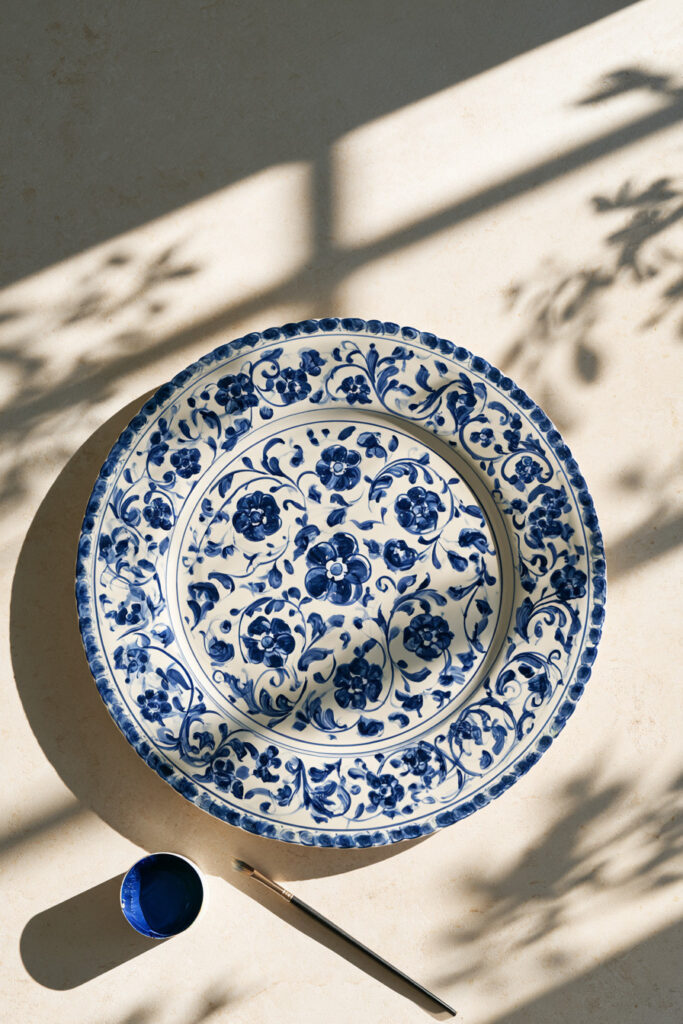
Difficulty: Medium | Best placement: Border and center motif | Technique: Repeating geometric and botanical shapes
Suggested palette: Deep blue, mid blue, white
Combine a bold blue border with simple geometric marks, leaves, or a small center motif. Repetition matters more than perfect geometry, so choose two or three shapes and reuse them around the plate.
Keep the center less detailed than the rim so the design has somewhere for the eye to rest.
15. Blue Lemon Plate
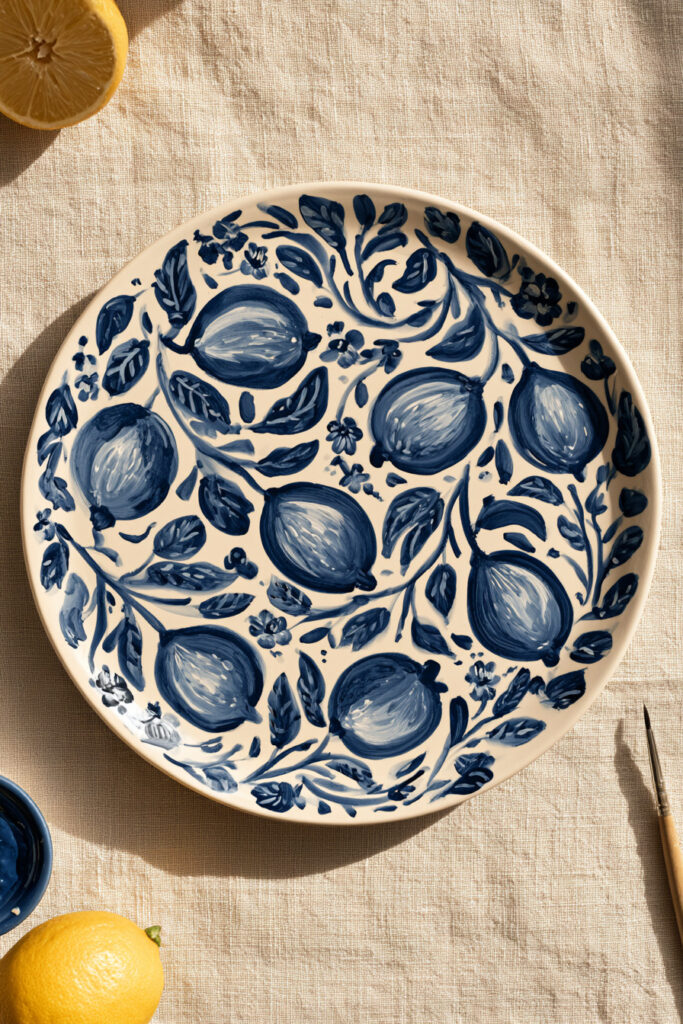
Difficulty: Easy to medium | Best placement: Center or scattered | Technique: Fruit motif with leaves
Suggested palette: Cobalt blue, white, optional yellow accent
Paint lemons as simple oval shapes and add small pointed leaves. Keeping the entire design blue gives the plate an illustrated, tile-like feel, while a tiny yellow accent can make one lemon stand out.
This is also a good design for practicing a limited palette before trying more complex color combinations.
Fruit Plate Painting Ideas
Fruit is a natural fit for plates, and the shapes are simple enough for beginners to repeat. Cherries, strawberries, and lemons also work well as rim patterns or all-over motifs.
16. Cherry Plate
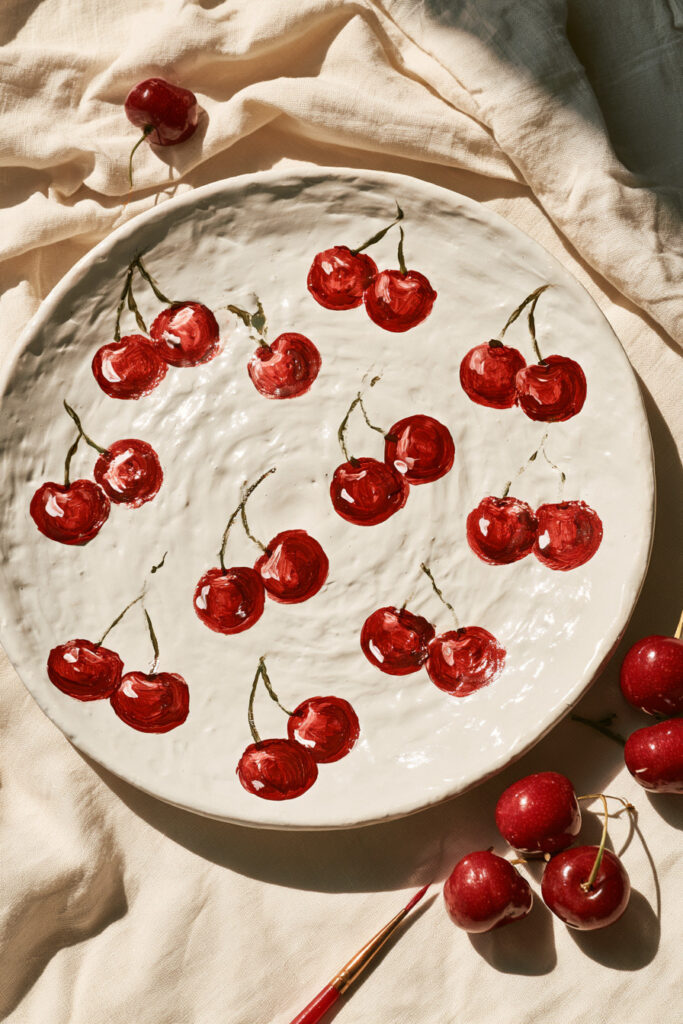
Difficulty: Very easy | Best placement: Scattered | Technique: Dots and thin stems
Suggested palette: Cherry red, leaf green, cream
Start with pairs of red dots, then connect them with thin green stems and add one or two tiny leaves. The cherries do not need to face the same direction, which keeps the pattern relaxed.
Leave plenty of space between each pair for a cleaner, more modern look.
17. Strawberry Plate
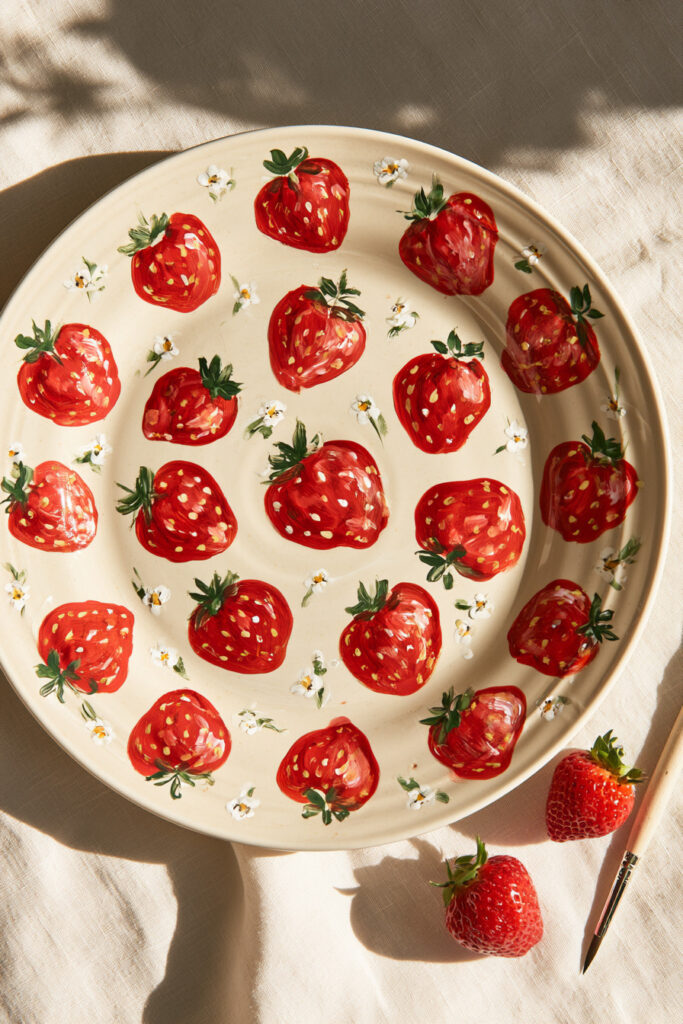
Difficulty: Easy | Best placement: Scattered | Technique: Repeated fruit shapes
Suggested palette: Red, green, cream
Use rounded heart-like shapes for the berries, add small green tops, then finish with a few tiny seed marks. A mix of whole strawberries and smaller half shapes adds variety without making the design harder.
For a softer palette, swap bright red for muted coral or dusty pink.
18. Lemon Plate
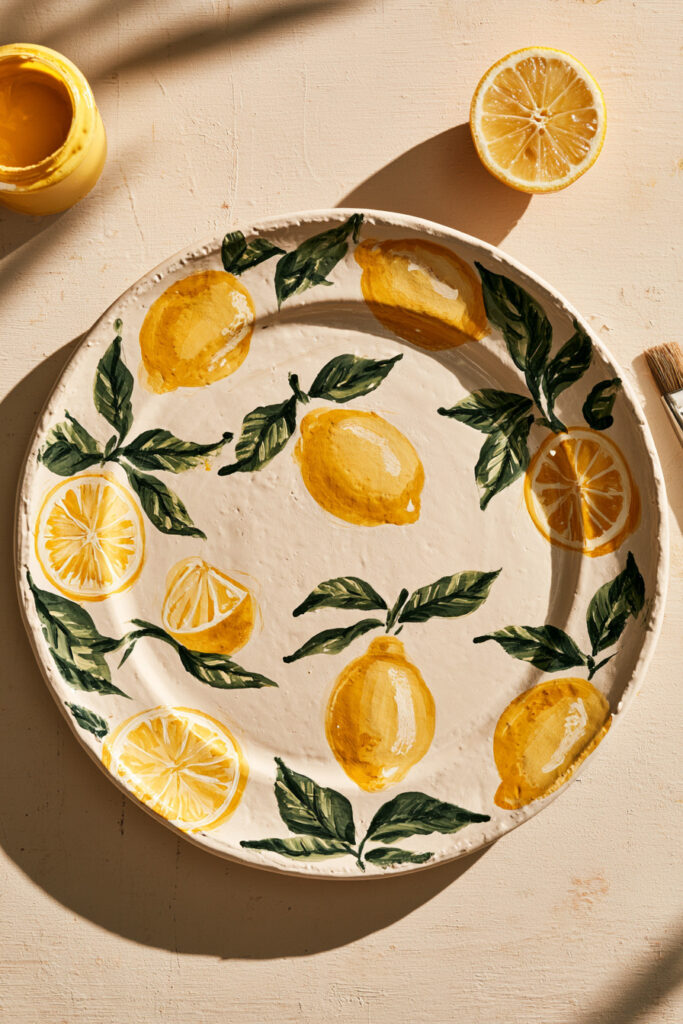
Difficulty: Easy | Best placement: Rim or center | Technique: Oval fruit and leaves
Suggested palette: Yellow, green, white
Paint whole lemons around the rim with small green leaves tucked between them. The repeated oval shape follows the plate edge naturally, so you do not need to plan a complicated composition.
You can also add one or two lemon slices in the center by dividing a circle into simple wedge shapes.
19. Mixed Fruit Plate
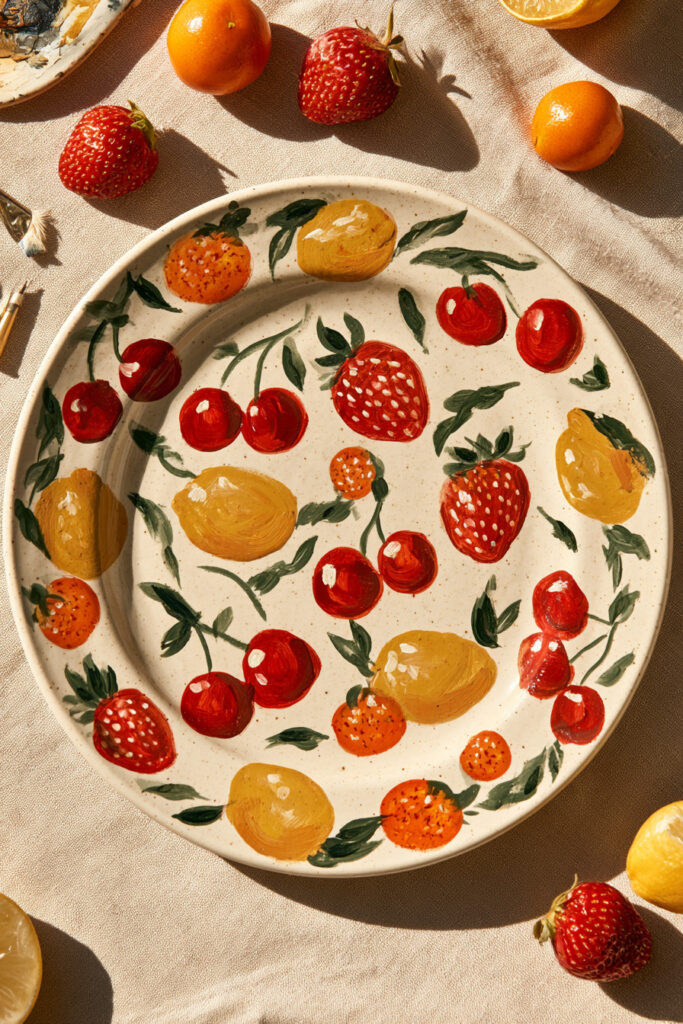
Difficulty: Medium | Best placement: Full plate | Technique: Repeating fruit motifs
Suggested palette: Red, yellow, orange, green, cream
Mix a few simple fruits rather than trying to paint every kind you can think of. Cherries, lemons, strawberries, and oranges give you enough variety while keeping the shapes recognizable.
Repeat each fruit at least twice so the plate feels like a pattern rather than a collection of unrelated drawings.
Trendy Plate Painting Ideas
If you want something playful and decorative, these ideas lean into bows, checkerboards, and mushrooms while still keeping the shapes manageable for a beginner.
20. Bow Plate
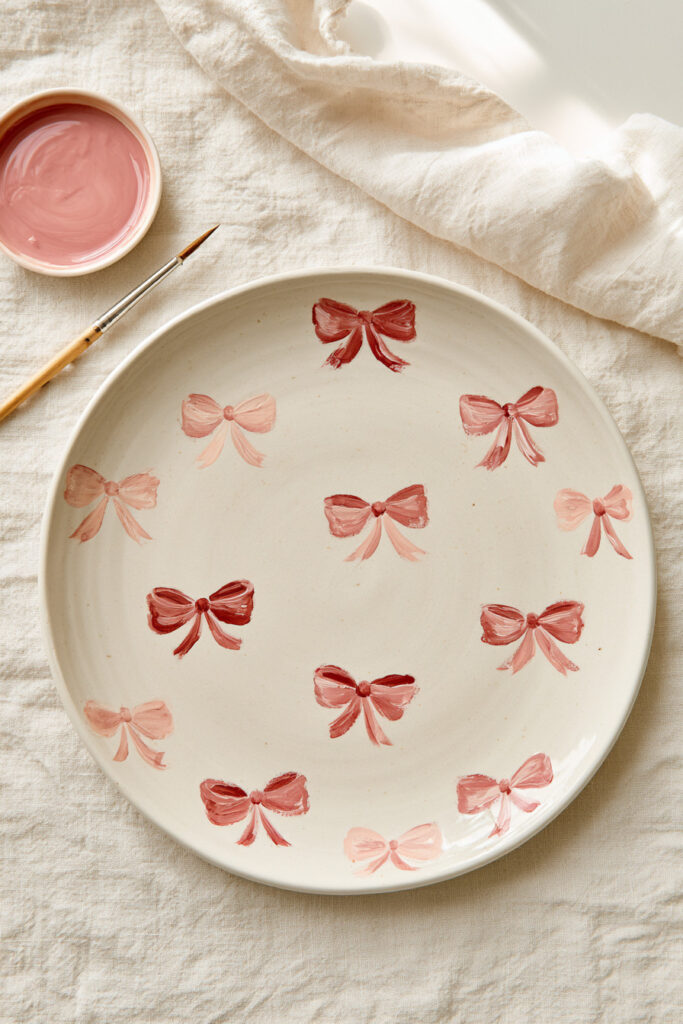
Difficulty: Easy | Best placement: Center or scattered | Technique: Simplified bows
Suggested palette: Pink, red, blue, cream
Paint one large bow in the center or scatter smaller bows across the plate. Think of each bow as two loops, two tails, and a small center knot rather than a complicated drawing.
A monochrome bow pattern can look surprisingly elegant if you want something less sugary.
21. Checkerboard and Bow Plate
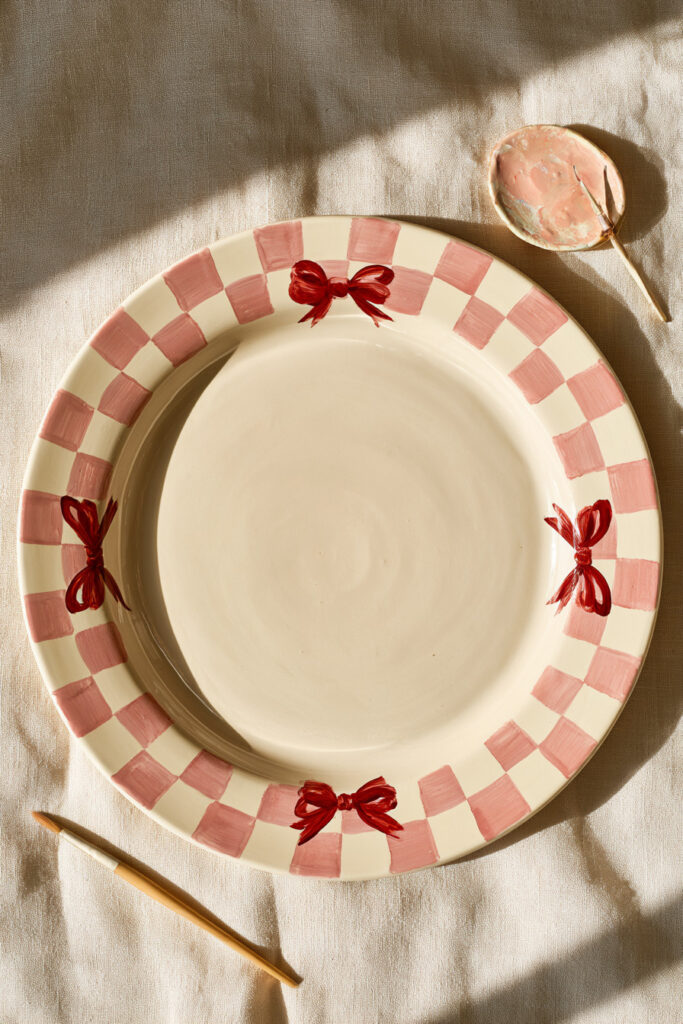
Difficulty: Medium | Best placement: Full plate | Technique: Geometric grid and central motif
Suggested palette: Two-tone checkerboard plus one accent color
Create a simple checkerboard background, then place one contrasting bow in the center. The mix of a structured pattern and a soft bow shape makes this plate feel bold without requiring detailed illustration.
Use painter’s tape or lightly sketch the grid first if straight lines make you nervous.
22. Mushroom Plate
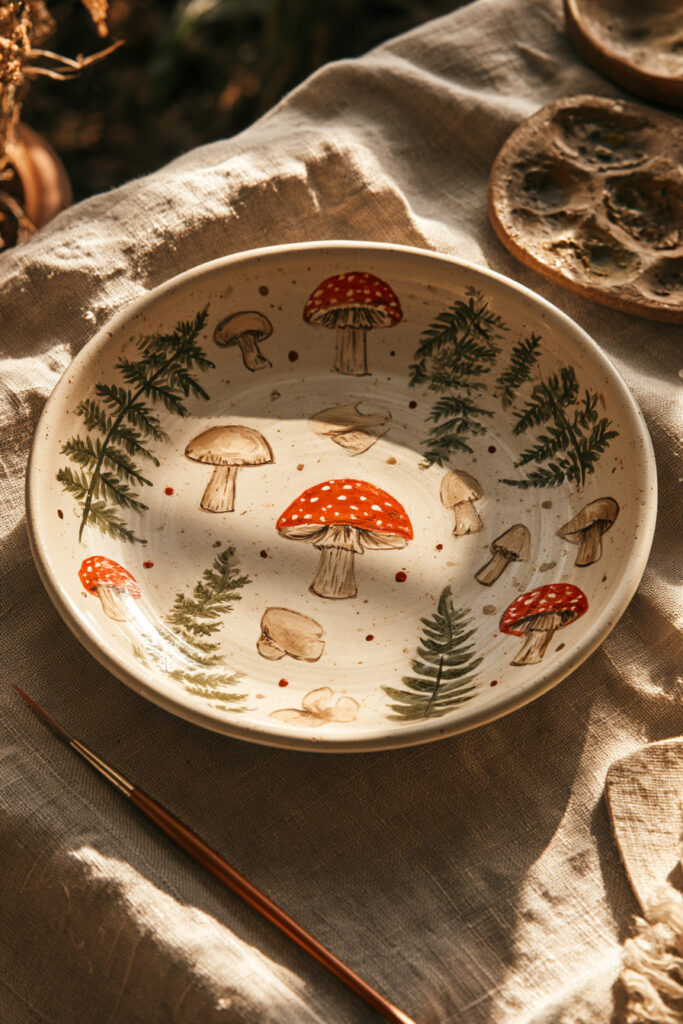
Difficulty: Easy | Best placement: Center or scattered | Technique: Rounded shapes and dots
Suggested palette: Rust red, cream, green, brown
Mushrooms are forgiving because the cap and stem can be simplified into basic shapes. Paint one large mushroom as the focal point or repeat tiny mushrooms with grass and dots around the plate.
Muted rust, olive, and cream make the same idea feel more woodland than cartoonish.
Fall and Halloween Plate Painting Ideas
Seasonal plates are perfect for bringing out in autumn, and many of these designs still feel stylish enough to display year after year. The first five lean cozy and harvest-inspired; the last three move into Halloween.
If you want to carry the spooky theme onto mugs, bowls, trinket dishes, and other ceramic pieces, these Halloween pottery painting ideas offer plenty more inspiration.
23. Pumpkin Vine Plate
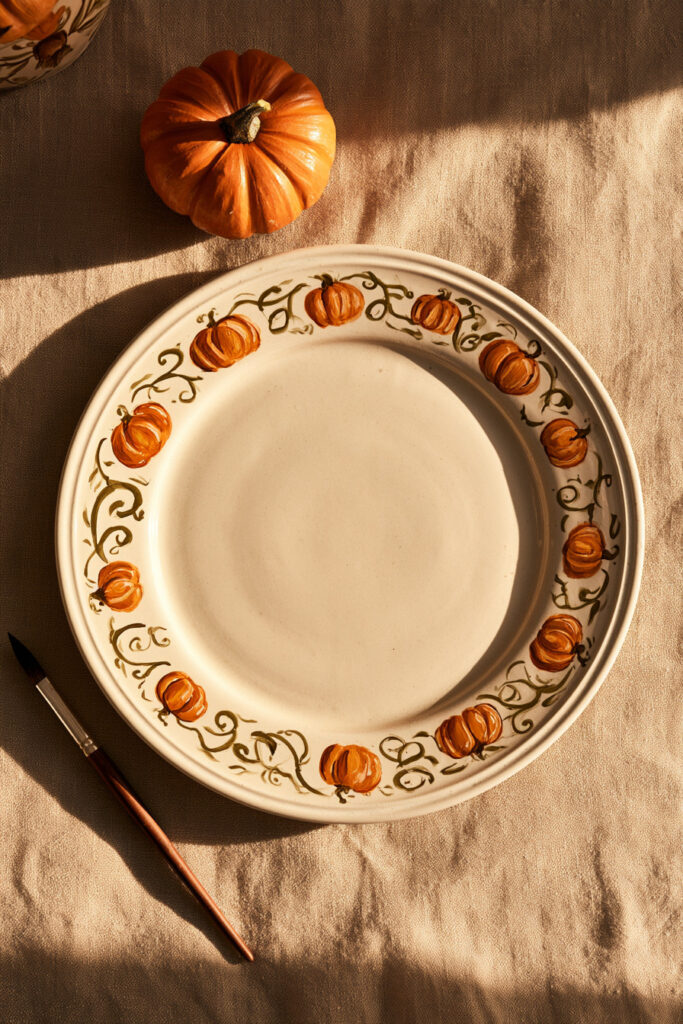
Difficulty: Easy | Best placement: Rim | Technique: Repeating pumpkins connected by vines
Suggested palette: Pumpkin orange, green, cream
Paint small pumpkins around the rim and connect them with curling green vines. Keeping the pumpkins small makes spacing easier and gives you room to add leaves between them.
For a softer fall palette, mix orange with terracotta, muted peach, and olive green.
24. Autumn Leaf Border Plate
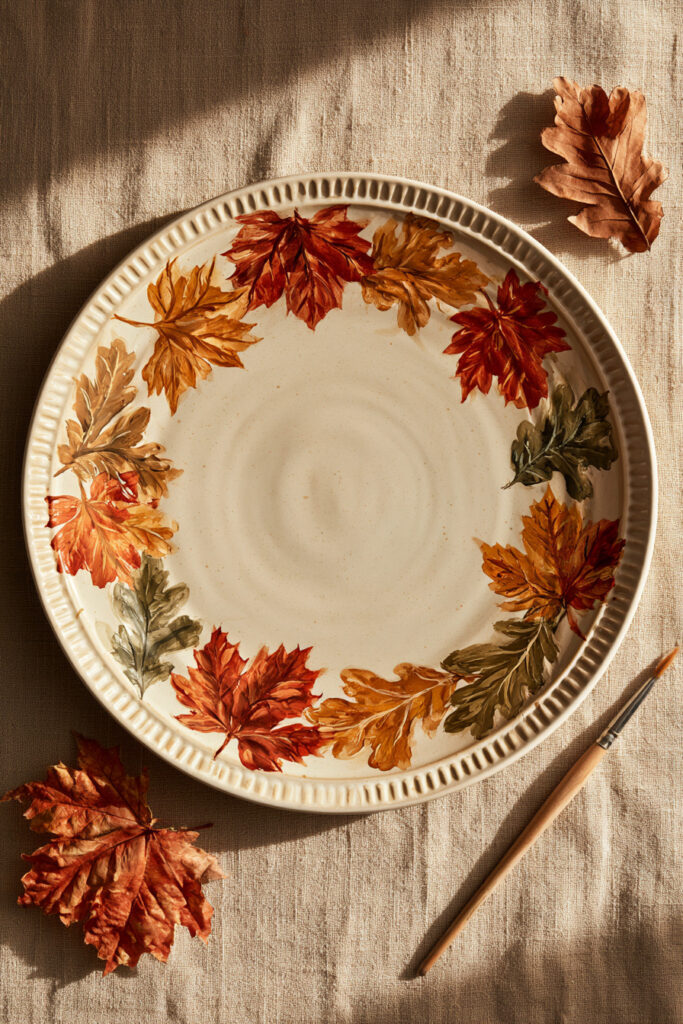
Difficulty: Easy | Best placement: Rim | Technique: Repeating leaf shapes
Suggested palette: Rust, mustard, burgundy, brown, olive
Alternate simple maple- and oak-inspired leaves around the edge of the plate. You can vary the colors from leaf to leaf so the pattern feels natural even if the shapes are not identical.
A thin brown line or scattered dots between the leaves can help connect the border.
25. Fall Wildflower Plate
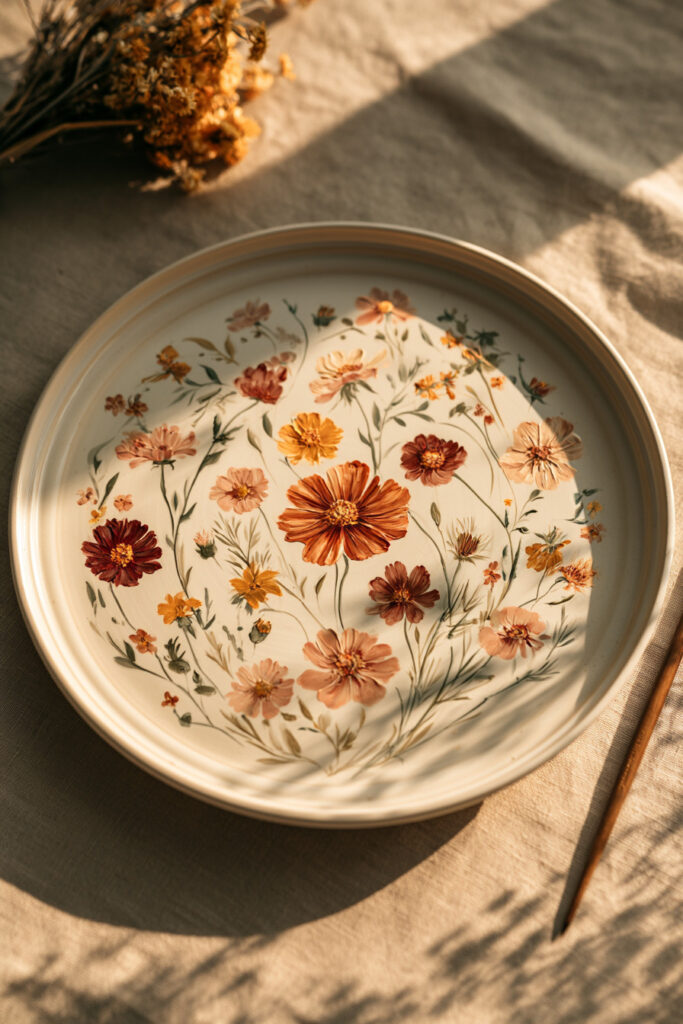
Difficulty: Easy | Best placement: Border or meadow | Technique: Loose small florals
Suggested palette: Mustard, rust, burgundy, cream, muted green
Use the same loose wildflower approach as a spring plate, but shift the palette toward mustard, rust, burgundy, and cream. This gives you an autumn piece without relying on pumpkins or Halloween motifs.
Keep the stems fine and let some flowers overlap slightly for a natural meadow effect.
26. Apple Harvest Plate
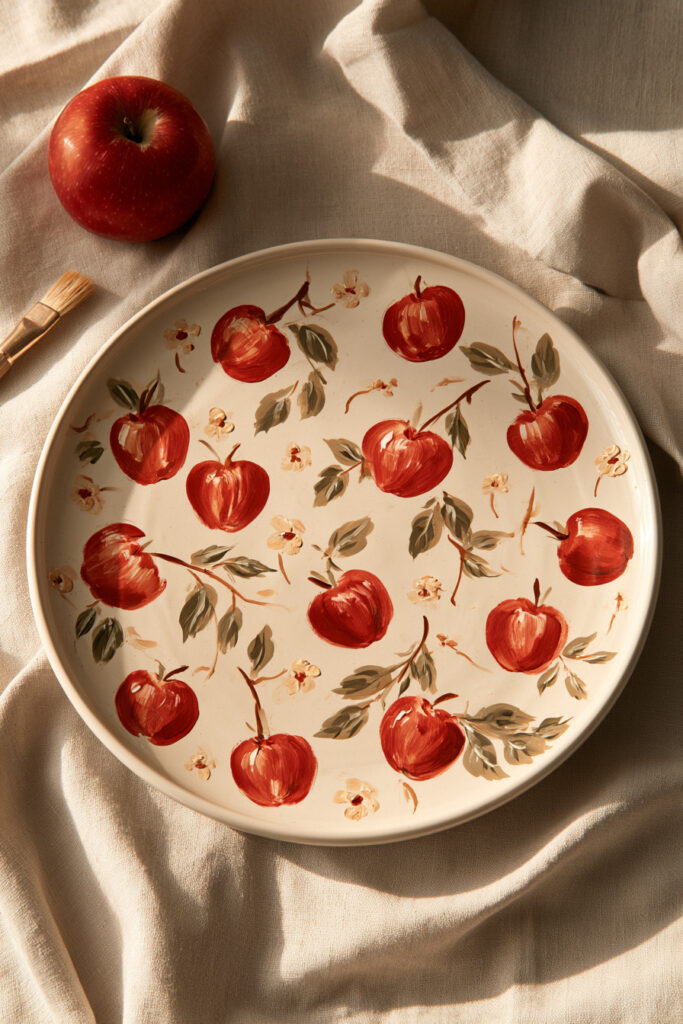
Difficulty: Easy | Best placement: Scattered | Technique: Fruit, leaves, and small blossoms
Suggested palette: Apple red, green, cream
Paint small red apples across the plate, then add leaves and a few tiny blossoms to break up the pattern. Simple circles or slightly uneven apple shapes work perfectly well.
Use a deeper red and muted green if you want the plate to feel more traditional and less playful.
27. Acorn and Oak Leaf Plate
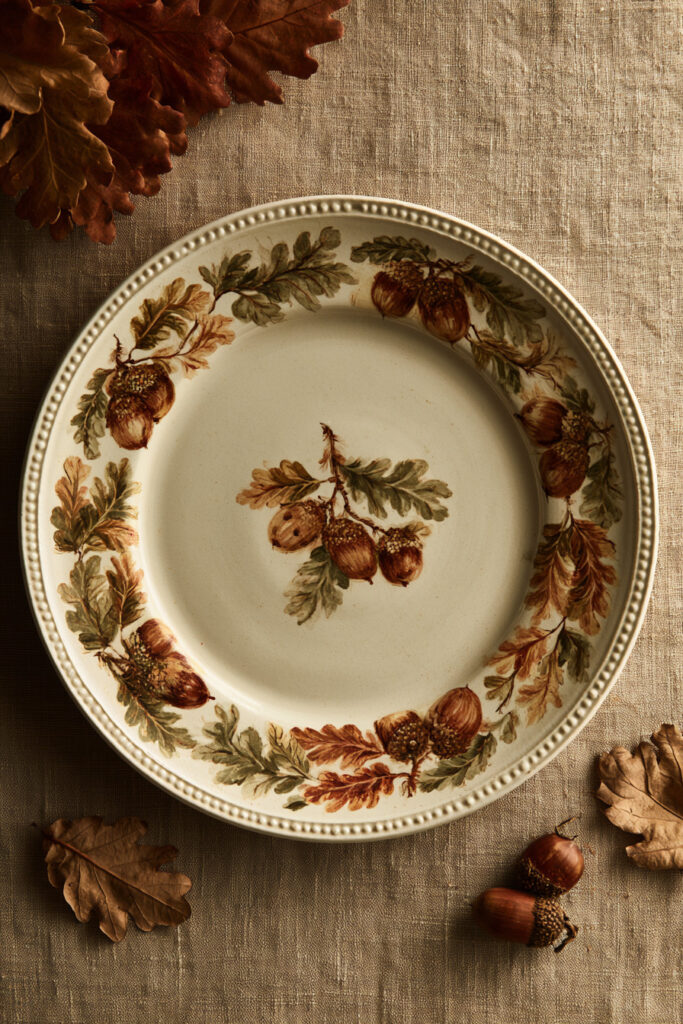
Difficulty: Easy to medium | Best placement: Rim | Technique: Repeated natural motifs
Suggested palette: Brown, olive, ochre, cream
Alternate acorns and oak leaves around the rim for a classic autumn design. This one works especially well in earthy colors and does not need any bright seasonal orange.
Keep the acorns slightly larger than the leaves so the border has a clear repeating rhythm.
28. Cute Ghost Plate
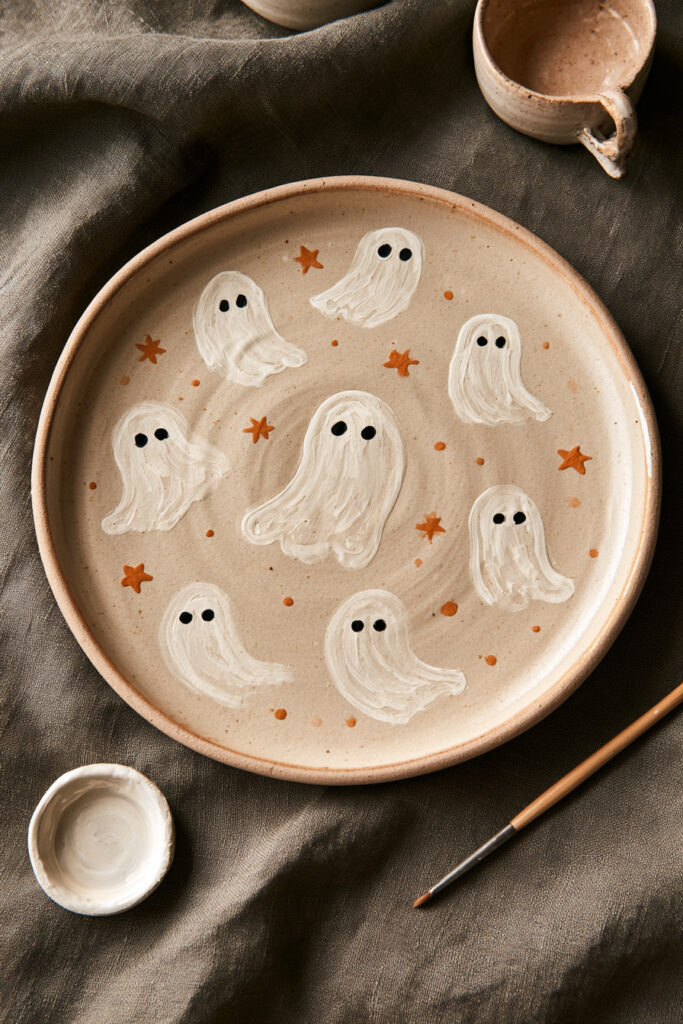
Difficulty: Very easy | Best placement: Scattered | Technique: Simple silhouette shapes
Suggested palette: White with orange, black, or warm neutral background
Paint small rounded white ghosts across a colored plate, then add two dots for eyes. The uneven shapes are part of the charm, making this one of the easiest Halloween designs in the collection.
Add tiny stars or dots between the ghosts if the empty spaces feel too large.
29. Black Cat and Moon Plate
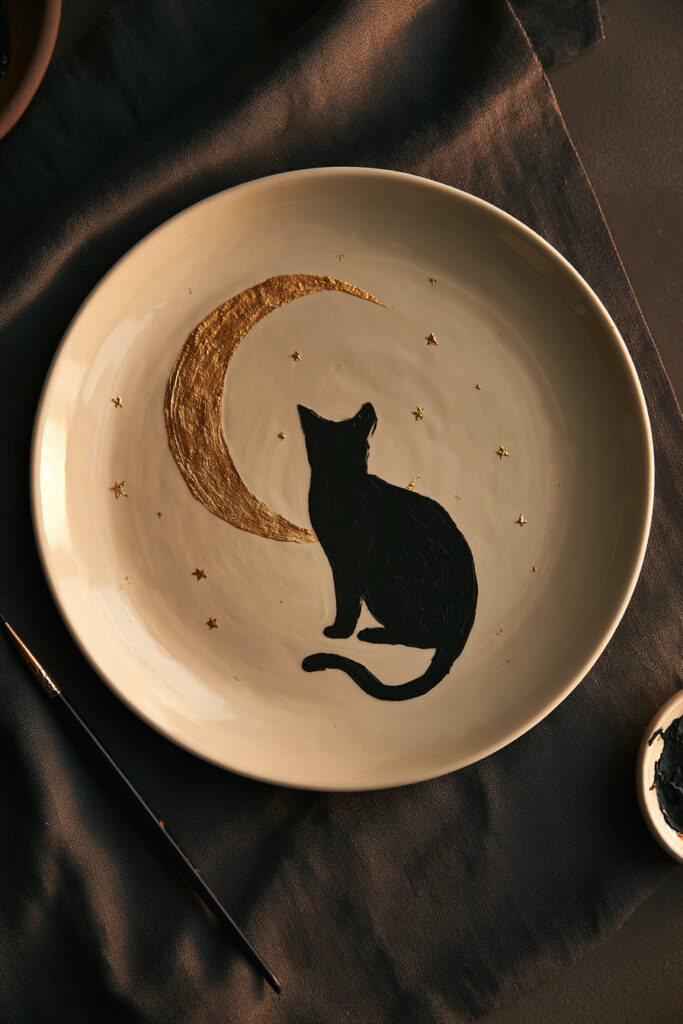
Difficulty: Easy to medium | Best placement: Center | Technique: Simple silhouette
Suggested palette: Black, cream, muted gold, deep blue
Use a black cat silhouette as the main shape and place a crescent moon behind or above it. You can keep the cat simple with a curved back, pointed ears, and a long tail instead of trying to paint fur or facial details.
A deep navy background with small cream stars makes the design feel atmospheric rather than overly childish.
30. Celestial Halloween Plate
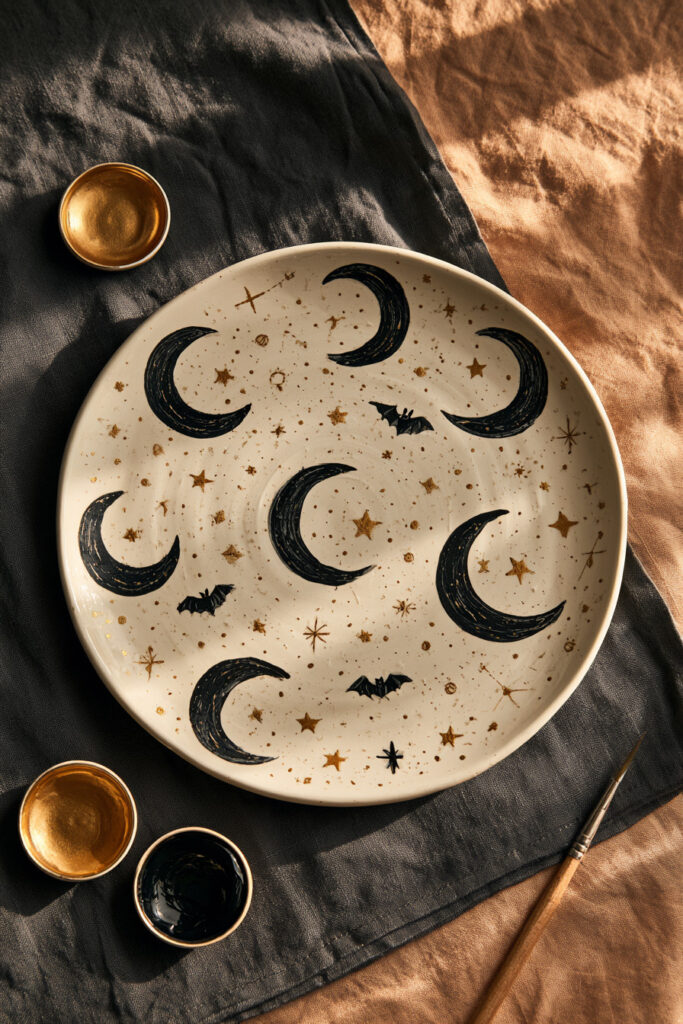
Difficulty: Easy | Best placement: Full plate | Technique: Repeating moons, stars, and bats
Suggested palette: Black, deep navy, cream, muted gold
Scatter crescent moons, simple stars, and tiny bat silhouettes across the plate. Because every motif is small and repeated, there is no single drawing that has to be perfect.
Remove the bats and the same design becomes a year-round celestial plate.
How to Choose a Plate Painting Design
Choose a plate painting design based on where you want the decoration to sit: around the rim, in the center, or across the whole plate. Rim patterns are easiest for repeating motifs, center designs suit one large focal image, and full-surface patterns work well for dots, fruit, hearts, stars, or checkerboards.
Paint Around the Rim
Rim designs are beginner-friendly because the circular edge gives you a built-in guide. Scallops, dots, vines, daisies, fruit, leaves, waves, and small pumpkins can all repeat around the plate without needing a complicated sketch.
Use One Large Center Design
A single focal point works well if you prefer less repetition. Try a sun, flower, bow, cat and moon, folk-art motif, or one oversized piece of fruit. Start with the largest shape, then add smaller details around it only if the plate needs them.
Fill the Plate With a Repeating Pattern
Hearts, cherries, strawberries, mushrooms, dots, stars, and checkerboards work well across the full plate. Exact spacing is not always necessary. In many hand-painted designs, small differences make the finished plate feel warmer and more natural.
How to Choose Colors for Your Plate
A small palette is usually easier to control than ten unrelated colors. Start with two or three main colors plus the background, then repeat those colors across the design. If you want to understand why some combinations feel calmer or more energetic, BrighterCraft’s color theory explained guide breaks down harmony, contrast, value, and saturation in more detail.
You can also create a more personal palette by mixing your own shades instead of using every color straight from the bottle. The principles in this guide to mixing colors for painting apply whenever you want to soften a green, warm up a red, or build a coordinated set of colors.
How to Paint a Plate as a Beginner
The exact process depends on whether you are painting bisque at a pottery studio or decorating a finished plate at home, but the creative part follows the same simple order.
- Choose the correct plate and paint system. At a pottery studio, use the underglazes and materials the studio provides. At home, use a ceramic or porcelain product designed for the surface you are decorating.
- Clean and prepare the surface. Follow the product or studio instructions so dust, grease, or residue does not interfere with the finish.
- Plan the placement. Decide whether your design belongs on the rim, in the center, or across the full plate. Lightly sketch only if the material and process allow it.
- Paint the largest shapes first. Block in flowers, fruit, checkerboard sections, or the main center motif before adding tiny lines and dots.
- Add smaller details. Once the larger areas are settled, add stems, leaves, faces, outlines, seeds, stars, or decorative marks.
- Finish the piece exactly as directed. Curing, baking, glazing, and kiln firing are not interchangeable. Use the instructions for your specific product or ask the pottery studio to handle the finishing process.
What Paint Should You Use on a Plate?
For a paint-your-own-pottery studio project, the simplest option is to use the studio-approved underglazes or colors on bisque ceramic and let the studio handle glazing and kiln firing. That keeps the materials and firing temperature matched to the piece.
For a decorative finished plate at home, use a ceramic or porcelain paint or marker that is specifically designed for that surface. Regular craft acrylic can work for decorative objects; BrighterCraft’s guidance on using acrylic paint for decorative projects can help with general handling and technique, but ordinary acrylic is not the best choice for a plate that will be washed frequently or used for serving food.
| Food-contact note: Dishwasher-safe does not automatically mean that a decorated surface is suitable for direct food contact. Pébéo’s Porcelaine 150 guidance says only surfaces not intended to contact food should be decorated with that product, while Mayco’s dinnerware-safety guidance separately distinguishes food-safe fired glaze from a dinnerware-safe finished surface. Follow the exact manufacturer or pottery-studio instructions for the materials you use, especially if the plate will hold food. |
If you are unsure, keep decorative paint on the outer rim, underside, or display-only plates rather than assuming a baked or cured paint is automatically suitable for eating surfaces.
Simple Tips for Better Plate Painting Results
- Use the plate edge as a guide. Borders are easier to space when you follow the existing rim instead of measuring every motif.
- Start simple, then add detail. A clean two-color design often looks better than a complicated idea that becomes crowded.
- Repeat shapes instead of chasing perfection. If one flower is slightly larger than the next, repeat that looseness throughout the design so it feels intentional.
- Work from larger shapes to smaller marks. Big forms establish the composition; tiny leaves, dots, outlines, and stars should come later.
- Test your palette first. If you are unsure about colors, make a quick paper swatch or test tile before committing to the plate.
- Follow the finishing instructions exactly. Studio underglaze, kiln-fired glaze, porcelain paint, and ceramic markers all have different curing or firing requirements.
Pick One Plate and Start Simple
The best plate painting idea is not necessarily the most detailed one. It is the design that makes you want to sit down, choose a few colors, and start painting. A ring of hearts or dots can be just as satisfying as a detailed floral pattern if the finished piece feels like yours.
If you want to keep exploring, browse more painting ideas and techniques across BrighterCraft, or return to the broader pottery collection when you are ready to try mugs, bowls, planters, and trinket dishes.
Choose one plate from this list, keep the first version simple, and let the next one get a little more ambitious. That is how a blank white plate turns into a piece you actually want to keep.
Plate Painting Ideas: Quick Questions
What are the easiest plate painting ideas?
Dots, tiny hearts, wavy borders, scallops, cherries, simple daisies, and repeating rim patterns are some of the easiest options. They use basic shapes and do not depend on realistic drawing or perfect symmetry.
What should a beginner paint on a ceramic plate?
Choose one simple motif and repeat it. A ring of daisies, scattered cherries, a single sun, or a dotted border gives you a clear plan without making the plate feel empty.
Can I use acrylic paint on a plate?
Ordinary acrylic paint is best kept to decorative plates rather than surfaces used for eating. For finished ceramic or porcelain, use a product designed for that surface and follow its curing and food-contact instructions. For pottery-studio pieces, use the studio-approved underglaze and firing process.
What can I paint around the edge of a plate?
Scallops, leaves, daisies, dots, waves, cherries, lemons, pumpkins, acorns, and simple vines all work well around a plate rim. Repeating motifs are especially useful because the edge acts as a natural spacing guide.