

Understanding how to use perspective is one of the most important things in any painting. similar sized objects will appear smaller the further away they are in the painting. Objects that are closer will always appear larger.
Whether you realise it and do it consciously or not, you use perspective in any painting or drawing that shows any depth. It is one of those subjects which although simple as a concept can be difficult to visualise and apply to a painting.
Table of Contents
The basic concept of perspective
Perspective is a big term, not only does it apply to the concept that the same object at a different distance will appear as a different size, it also describes the different appearance of an object viewed from different angles.
The angle of view
Thinking about the angle of view can get a little confusing, but really it is a similar concept. The angle you are viewing an object from, means certain areas of the object are closer than others. It is this difference that changes the shape and composition of the object within a painting as well as the painting itself.
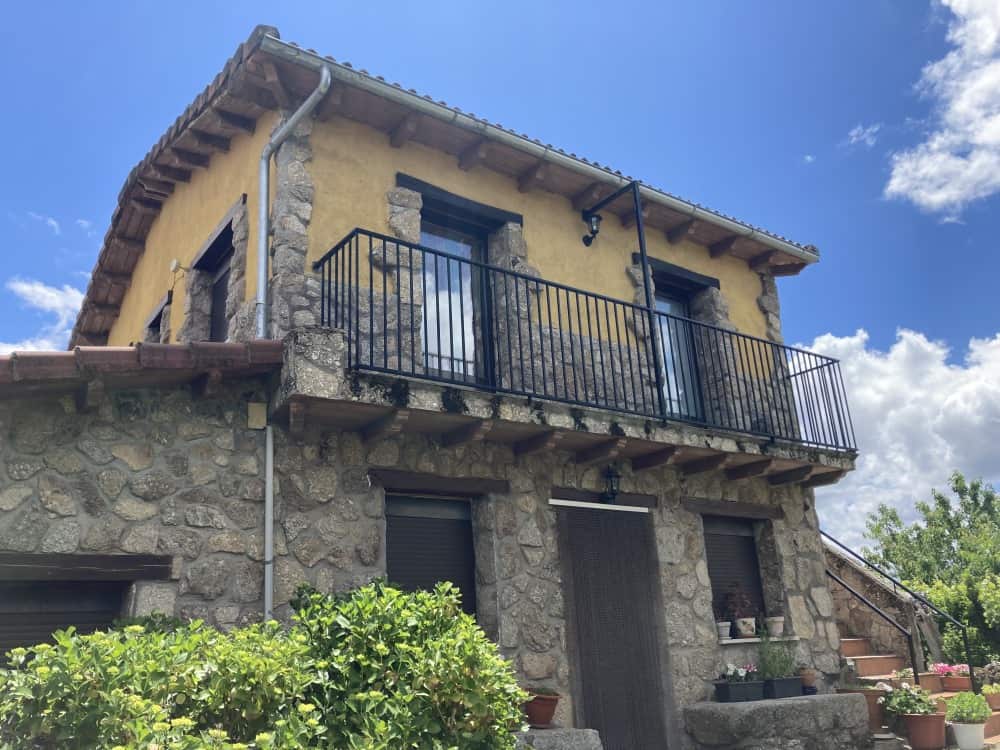
In the photograph below you can see that the picture is taken from below. The base of the house appears wider and the horizontals show a clear vanishing point on the right hand side. The upright edges of the walls gradually converge towards the top. The corner closest to the camera appears significantly larger than the rest of the picture too.
Putting it simply
In simple terms, if you view someone’s face from above, the top of the head and forehead will appear larger. The eyes will not be quite as large in comparison and the nose, mouth and chin will all appear gradually smaller. However, if you are looking at them from below, their chin and mouth will appear larger than the top of their head.
If you are doing a portrait, and the subject has the left side of their face closest to you, the ear on that side of the face will appear to be larger. All the parts of the image closer to you will just look slightly bigger.
Using distortion
This may sound like a distorted image, but that distortion helps your brain make sense of the painting. Your brain will create depth and shape from that distortion. The size differences put the viewer at exactly the point you want them to be looking at the painting from. The closer the point of view is to the object being viewed the more extreme those distortions become.
Our expert artist’s opinion

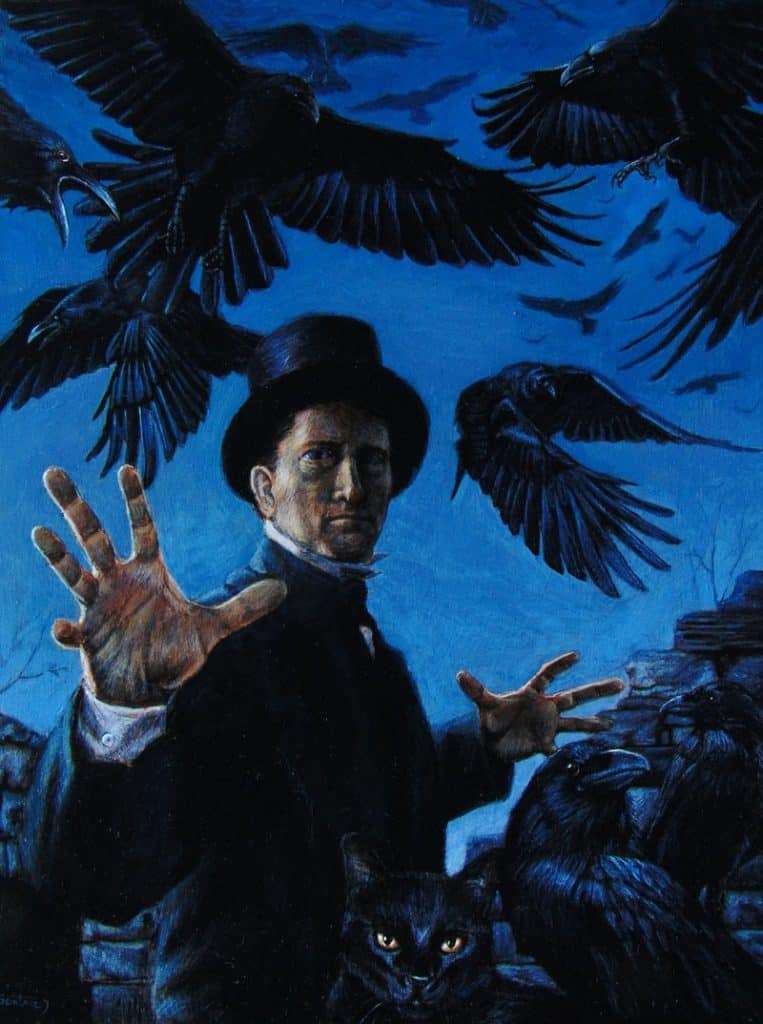
Chris Semtner is a visual artist and author. He has been Curator of the Edgar Allan Poe Museum for over 15 years now. Chris has curated and designed critically acclaimed exhibits for museums and galleries across the country.
In his painting above, An Unkindness of Ravens, the hand outstretched toward the viewer is significantly larger than the other one. This produces the impression that the forward hand is closer to you.
How to use perspective
Applied to a building perspective makes the part of the building closest appear largest. The size will gradually decrease as parts of the building get further away. In a painting this can again be emphasized or minimised by changing the place the painting is viewed from.
You can see in the bridge below, that using diagonals will help you create the illusion of distance. Also, as the gaps of the arches and the pillars that support the bridge get further away they both get smaller too. This all emphasises the depth in the image.

Emphasising characteristics
If you view a big building from below, its height will be emphasized. The base of the building will be larger, and there will be a gradual narrowing of all the angles and shapes as the height increases. As the various parts of the image get further away they will always appear smaller. A great example is the way a line of windows will gradually get smaller as they recede into the distance.
Perspective in landscapes
In landscape paintings perspective can be used in many ways. The obvious one will be tree’s that are closest will appear much larger and more defined than similar tree’s in the distance. However it can also help you to show the shape of valleys, houses, rivers and other points of interest within the landscape.
Compare the size of each part in relation to its position within the painting. If you paint a building in the distance too large, it will suddenly appear to move forward in the painting.
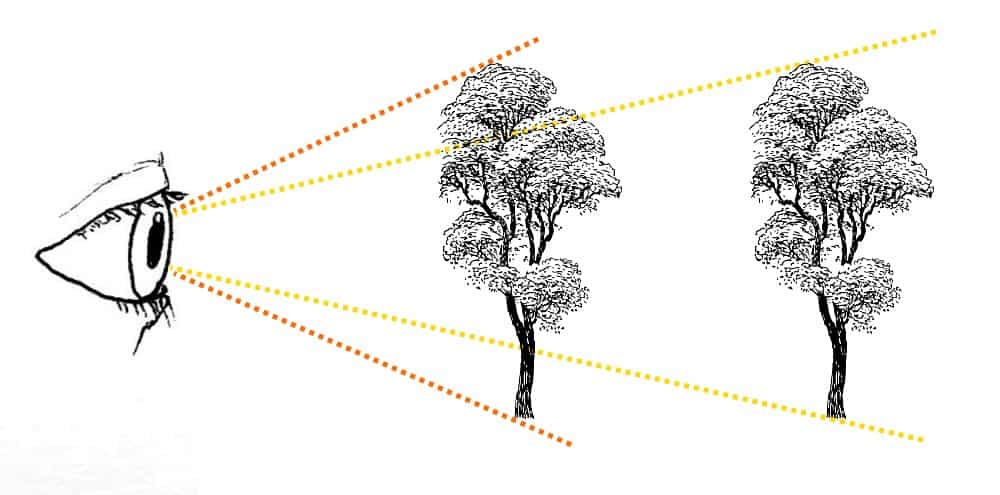
In the image below I have tried to illustrate this difference. The same tree viewed from close by will be much larger than the tree that is further away. It is all about the way our brain percieves an image.
What is a vanishing point
A vanishing point involves the use of diagonal lines to help you create comparative sizes for objects in your painting. It is probably easiest explained in relation to a painting of a building. It is the point in the painting where the size of the building becomes irrelevant because it is so far away, it simply disappears.
Using triangulated lines can help you stick to the basic rules. To do this you first need to choose where you want the vanishing point to be. When you have draw two lines gradually getting further apart from that point.
Then, as you start to draw you need to gradually increase the size of building to reach the two lines you have drawn. Imagine you are stood looking along a long row of similar houses. The roof line will get higher as the buildings get closer. The windows will get gradually smaller as they get further away. Even similar sized chimneys will get larger and more defined as they get closer. You will see more of the detail in each one when compared to the ones further away.
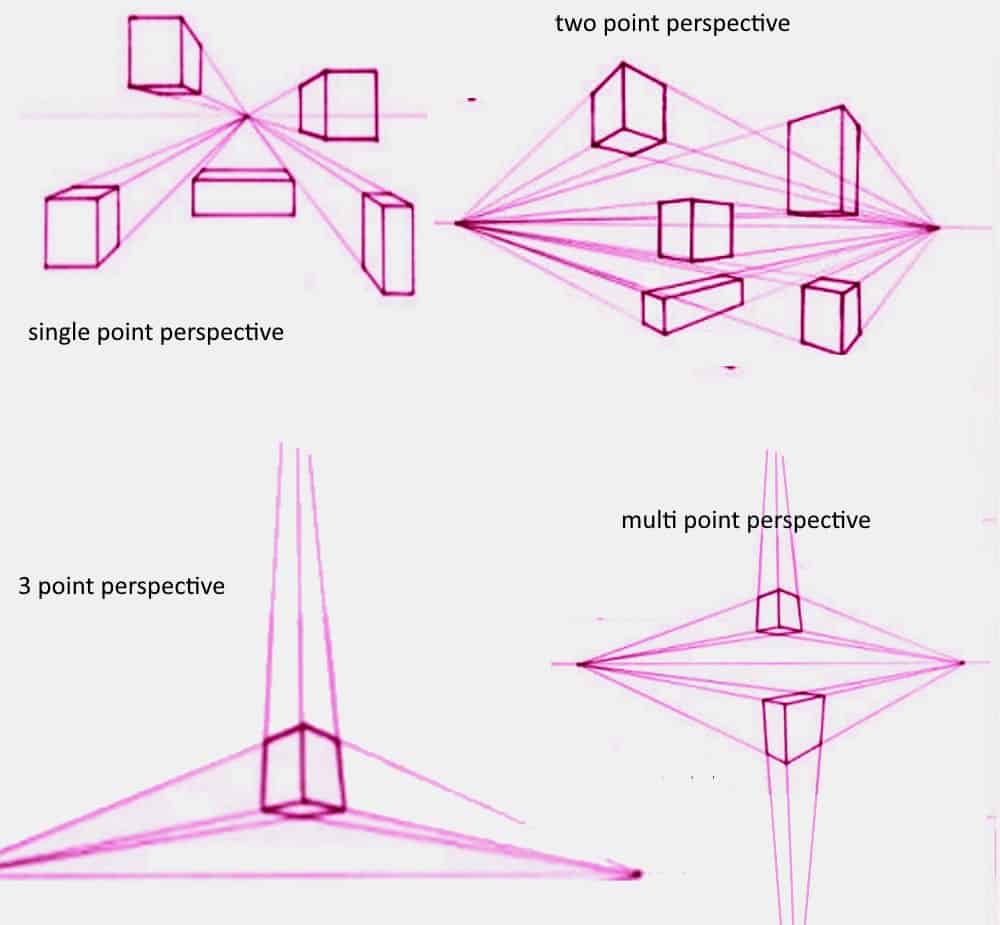
The image below shows different kinds of perspective with various vanishing points. With a single point perspective you have one vanishing point. A two point perspective with have 2 distinct vanishing points that shape the objects. A three point perspective is probably used more than any other, but with a multi point perspective (here I have shown 4 vanishing points) you can really capture the three-dimensional aspect of any shape. I will talk more about this below.
Another experts advice

Frederic P. Lebeuf, Owner and founder of Bombing Science and accomplished Graffiti Artist describes using diagonals for perspective in a different way.
“When you’re painting, perspective can be tricky to grasp. Without it your artwork can seem flat or two-dimensional. This prevents people from “feeling” what you are trying to express in the painting.
When you look at a scene or object,, pick a point that you want to paint, then pick another point. It can be anywhere, but it needs to be somewhere on the line that connects the two points you picked.
Then draw a line from the farthest point of the object to the farthest point you drew on the line before. This will give you a size guide for everything in the painting and creates the illusion of depth.
Understanding multi-point perspectives
Multi point perspectives can be more complicated to grasp. If you imagine a big rectangular warehouse viewed from near one corner it may help. Think of it simply as a rectangle. It will have one longer side getting smaller as it gets further away in one direction. However, it will also have another side that gets smaller as it gets further away. Then, as it gets higher, the top will appear narrower than the base.
This means in this example you will have three distinct vanishing points. One to the left, one to the right, and one towards the top or bottom of the painting. Each will be joined by two diverging lines and will give you an overall shape that makes the painting appear more solid and realistic.
Some people may call this an Isometric perspective, but personally I think that title complicates the issue. I try to keep my wording as simple as possible.
The S-Curve
The S-curve is another aspect of perspective used by many painters. It is best explained by the image of a meandering river winding into the distance. If the bends in the river are of a fairly even width, as the river gets closer, the distance between the widest parts of the banks will get further apart. It really is that simple.
Final thoughts
Try to visualise and use both single and multi point perspectives. Remember, practice makes perfect. As you become more comfortable with the subject you will see those perspectives in every object you look at.
As you begin to recognise it more you will understand it more too. You will see many ways it can be used to add life and depth to your pictures.
I hope this helps you understand and begin to use the wonderful world of perspective. As always your grasp of the subject will improve with time and practice.
Enjoy your journey into this fascinating world.

")
