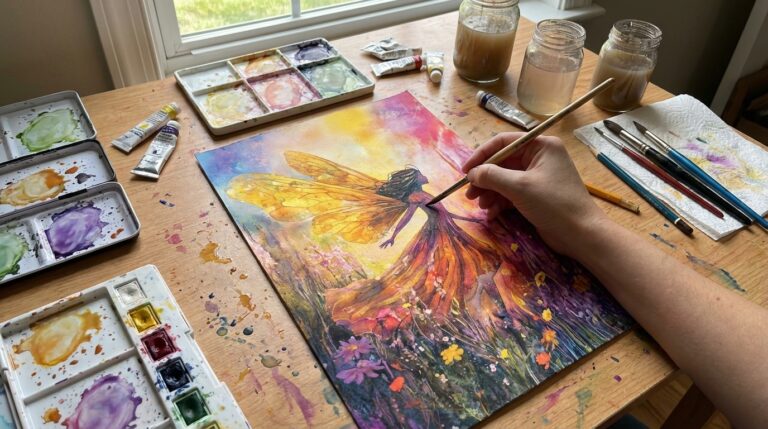
Choosing whether to outline your watercolor paintings or not is a very personal choice. It will work better for some paintings than others. You also have a choice of several different ways you can use the outlines within a painting. One thing is certain, you will need the right tools.
You can simply use a good quality pencil if you want to create some sharp defined lines in the painting. However, if you want dark, black, long lasting outlines, you need to use good quality archival ink pens.
The ink in archival ink pens is completely waterproof, so will be unaffected by the water in the paint. If the ink is not waterproof it is easy to end up with a stained mess instead of a colorful painting.

Do I outline the painting before or after I paint with watercolor paint?
This is a choice you will make over and over again. Each painting may need a different approach.
Many people will draw first before they start any painting and if you have good drawing skills it is a great way to get the layout of the painting right before you begin using paint. However, other people may have better painting skills. If this sounds like you, it may be that painting first, allowing the painting to dry, and then drawing in the ink or pencil lines will give you the results you want.
Each way has its advantages, and it may well be that you use both, even in the same painting. It is very common for an artist to draw the initial lines of the painting in a light pencil then paint the watercolors and last of all draw in the defined lines with ink or darker pencil. This is what I did with the sketch of the Hare above
If you do add lines after the watercolor paint, you do need to let the paper dry thoroughly first. The water softens the surface of the paper so it is easy to damage. Whether you use pencil or ink, the tip can easily penetrate the surface of the paper and ruin a painting you have spent hours on. It is possible that even archival ink will spread more on damp paper too, so the lines will not be as defined as they would be if the paper was properly dry.
Outlining your painting with a pencil
Pencil lines will not last forever like archival ink, but they can create a more natural looking image. You can use different grades of pencil to make the lines lighter or blacker, but use a good quality pencil for the best results.
We all have our own style and preferences but I personally use a standard HB grade pencil for most of the drawing. At the beginning I use very light strokes of the pencil to create feint lines I can easily follow when painting. Then, at the end, I will draw over any of the lines I want to define using firmer strokes of the pencil.
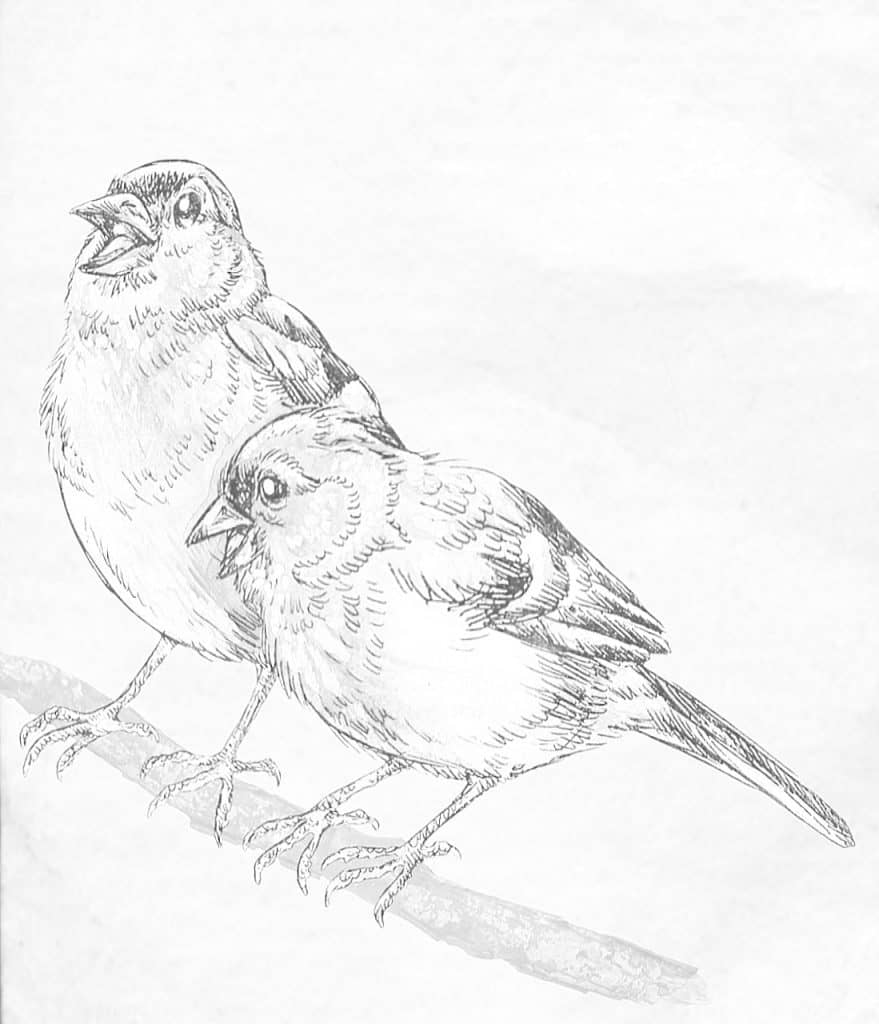
Keep the pencil tip sharp at all times and it will help you to make the lines more consistent. If you do want darker lines you can use softer, darker B grade pencils. However, remember that the softer the pencil is the more often it will need sharpening. The sketch below of the 2 birds was all done with a standard HB pencil.
It is easy to smudge the softer B grade pencils too, so practice keeping your hand from resting on the paper. You can use a support like a Mahlstick if you need to. They are available from any good artist suppliers, but you can easily make one.
If you have an old long handled brush you can use that, but any piece of round, smooth dowel rod will work. A piece about 12” or 30cm is ideal for most work. Wrap a soft rag tightly around one end and tape any loose bits to the shaft so they don’t drag and you instantly have a home made Mahlstick.
Outlining your painting with ink
There is no better way to get smooth, black, defined lines than by using good quality archival ink pens. You can buy different tip widths to suit the painting and it will make it easy to get lines of a consistent width.
Some artists like to draw in the defined ink outline first, then paint to the lines. Others will paint first and then draw in the ink lines. There is no correct way to do it. The choice is yours, and your decisions may well change from painting to painting.
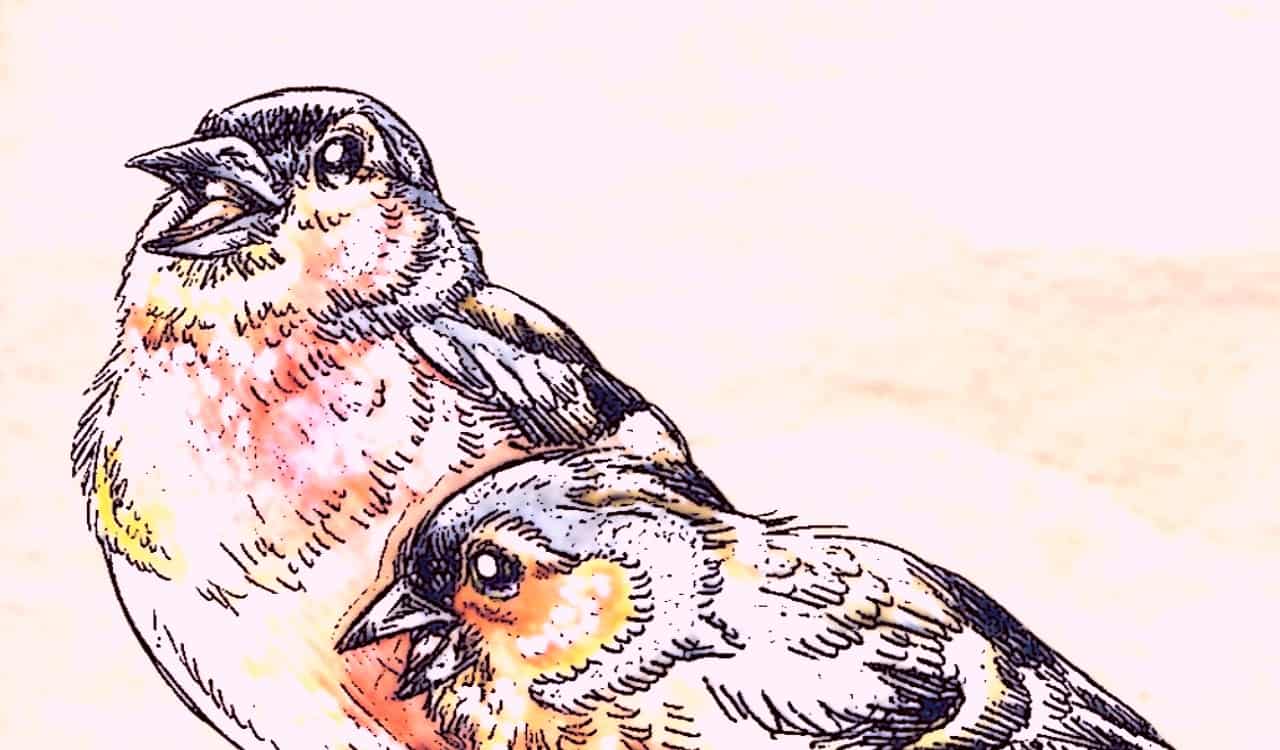
Below you can see how I took the original pencil sketch and went over the lines with a fairly thick archival ink pen. I then added splashes of thin watercolor washes and then finally added a few finer ink lines after the painting had dried.

Choosing the right pen
There are multiple brands out there, some much more expensive than others. Remember, good quality ink is not cheap, so if the pens are, it may be that the ink is just not as good. Acid free ink should be standard but it is best to check.
There are 2 main factors that define a good pen for me.
- The first is that the ink should flow freely and consistently, without flaws.
- The tip of the pen should be smooth and hard so it wears slowly and evenly.
Poor quality ink will not flow as consistently, and a soft tip can wear unevenly very quickly unless you constantly rotate the pen as you use it. Both these things can result in flaws in the lines where they get narrower or wider. This can make the painting look unprofessional and ruin what you had thought was a great painting.
Brand awareness
I have used many brands and one thing I have come to recognise is that even the quality of the same brand can vary over time. There are brands that I once considered great quality that over time have become less good. There are also often new brands that appear that might be unknown, but some of these can be great quality.
There are some brands that seem to stand the test of time and I usually stick with these. Sakura have become my usual choice and they are great value and good quality, but Rotring, Micron and others will give you equally good results. It often comes down to personal choice.
The waterproof, acid free ink in archival pens is designed specifically to withstand both water and the passage of time. They don’t fade or spread and are resistant to smudging and bleeding, even if you are painting watercolor washes after you have drawn the lines.
How to choose the right tip sizes of your pens
Most manufacturers will have a whole range of tip sizes for you to choose from and they will often sell them in sets. To begin with it is good to get a fairly small set. The standard range tends to run from 0.05mm to 0.8mm, but you don’t need every size. A good starting point would be a 0.1mm, a 0.4mm and a 0.7mm tip. If you want to you can add more different ones later.
Remember, every company will try to convince you that you need every pen in the range. It is in their interest to sell you as many as possible. Don’t be fooled. You don’t need them all.
The thinner the tip is the more accurate your line work will need to be. I still find using a 0.05mm tip difficult unless the lines are short. Thin tips can show up any small discrepancy in your drawing. I find it much easier to get consistent lines with a slightly thicker tip. A 0.2mm tip is great for a lot of what I do, but it really is down to personal choice and how easy you find it.
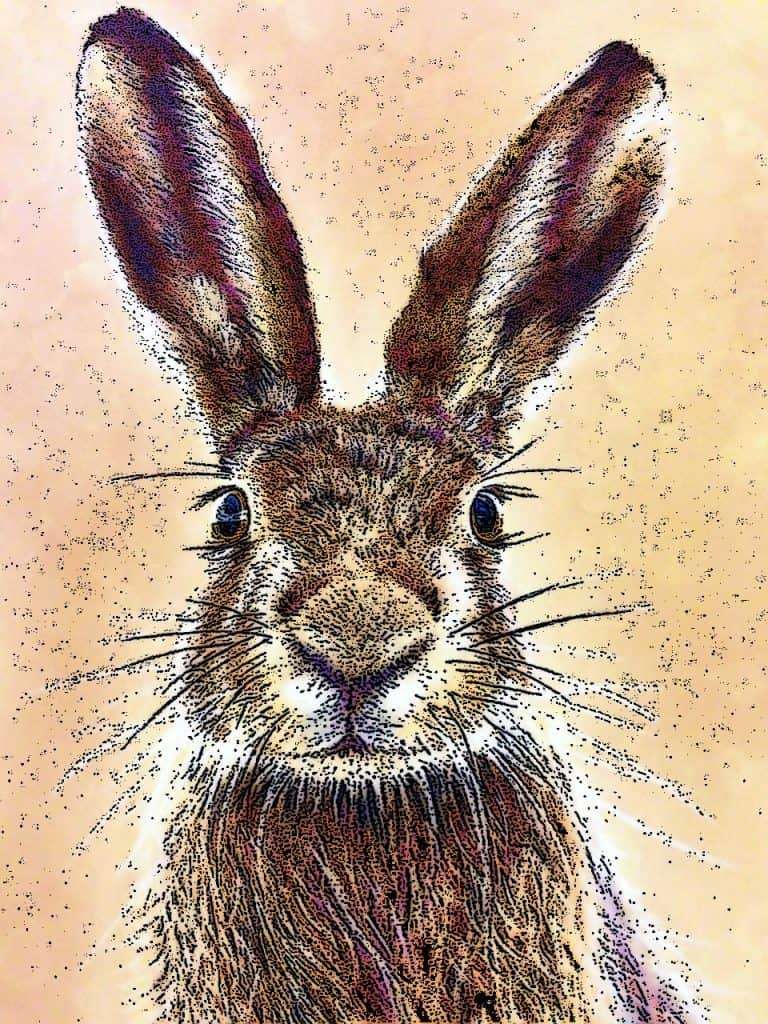
You can see below how using a thicker ink line can change a painting quite dramatically. I took a copy of the Hare drawing I had done and added much more ink lines and a little more color. There were some parts of the original drawing I wasn’t 100% happy with and using the thicker ink lines and darker watercolors I was able to cover all the bits I wasnt so happy with.
Mistakes and solutions
Like it or not we all make mistakes at times. In a watercolor painting this can be a real problem. It isn’t easy to lift off a pencil line you don’t want. If you can’t then look carefully and try to work out a way you can define the line rather than trying to erase it. This can give remarkable results. A poor or smudged pencil line can be covered with a smooth, even ink outline that will transform your work.
Remember, every mistake is an opportunity to find a solution.
Final words
Whether you use ink or pencils, outlining some of your watercolor paintings can add a whole new dimension to your art. Allow your creativity to guide you. The contrast of dark defined lines and soft washes of watercolor can create dramatic effects if used well.
Altering the thickness of the lines within a painting can help you create depth really easily too. The lines closer to you will always appear thicker than the lines that are further away in the painting.
Enjoy experimenting. I have created endless doodles and then added watercolor to them afterwards and have had some surprising results. Watercolor suits cartoon and animal drawings too. Whether you define a watercolor painting with bold ink lines or color in a drawing you have done with watercolor paints there is literally no limit to what you can achieve.
Happy painting everyone.