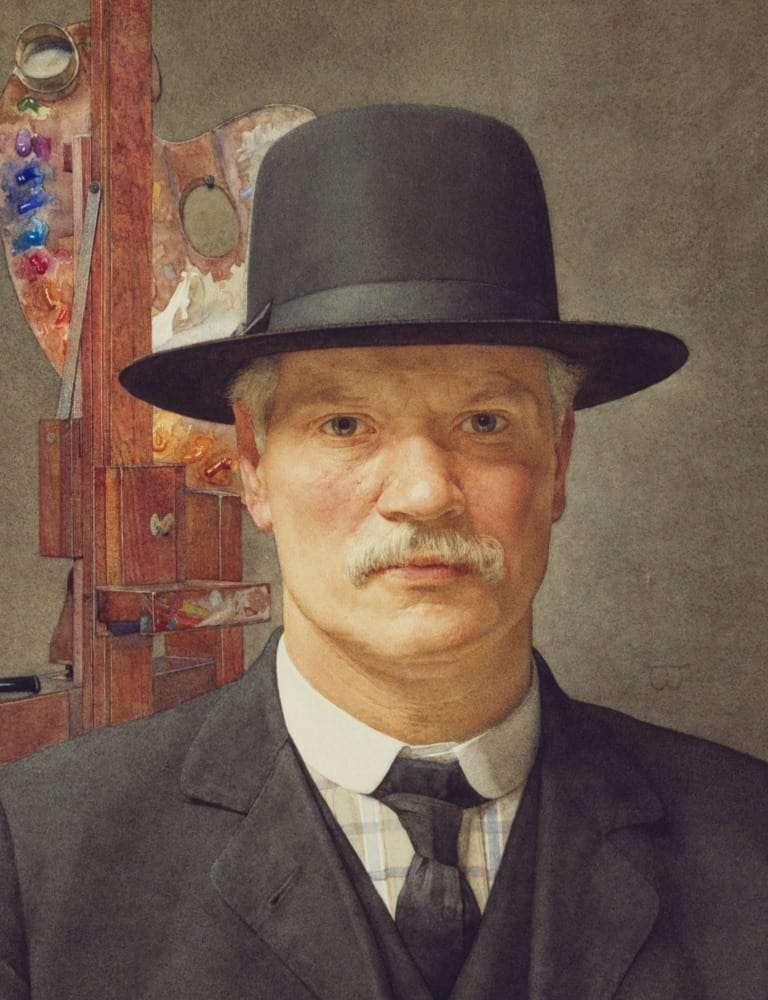

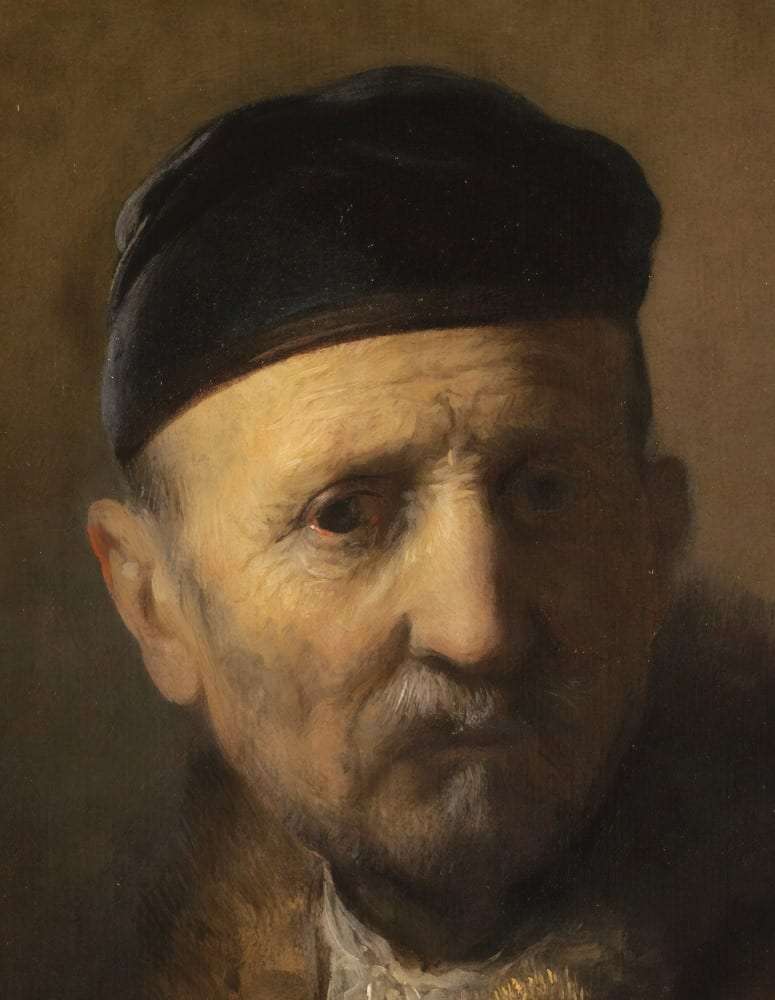
Making skin color paint can be challenging. There are so many different skin tones that there is no one answer to this question. I have a portrait of Einstein as an old man that I painted below. The amount of different shades and tones involved was quite mind-blowing.
Of course there are no two people who will have the exact same skin tone. But I hope my tips will help you achieve any skin color you may need. There is also never only one combination of colors that will make the exact color you want.
A Good Place To Start
As an example, you could mix a Naples yellow with a cadmium red hue and you would get a peach color. You could make exactly the same color using yellow ochre and Vermillion. You may need to add a little white, but it is perfectly reasonable to mix the same color both ways.
White peoples skin is never white and black peoples skin will never be completely black. We are all shades in between.
One standard flesh tone can be made using yellow ochre with a tiny amount of Vermillion. Then use white or ivory black to adjust the tone. However, you should really study the color you are trying to recreate. There is usually a better color combination than starting with a standard flesh tone.
Dark Skin Tones are Never Black
With someone of African descent who has very dark skin tones, adding burnt umber to the yellow ochre will give you a darker base color that you can work from. Look carefully at the options though. Some very dark skin has dark blue or even purple tones within it. Skin is never one flat color.
White Skin Tones are Never White
For a pale white skin tone, add some titanium or zinc white to the standard flesh tone of yellow ochre and Vermillion. This will give you a great base color to paint from. If you study the subjects skin you may see some pale blues or possibly some redder areas too. Try to look beyond the overall color which is what you will see at first.

A Practical Example
In my portrait painting of Albert Einstein above you will see that there are blues, greens and deep reds in places. These colors show the veins and arteries below the skin. As white people grow older their skin becomes more translucent, showing the colors underneath the skin more.
The colors I used for the base skin tone in this portrait were lemon yellow, red ochre and zinc white. This gave me an initial color that showed the effect of the earthy color of the clothes and background. Adding the zinc white paint meant I could show how pale the skin was really easily too.
I had to add the other colors slowly and carefully to show the variety of tones in the skin. It was a slow process but definitely worth it. Adding a tiny amount of color and blending where needed I was able to create a realistic skin tone that fits with the subject and the whole painting.
Using Different Paints
With oil paint the best way to mix colors is on the canvas, but starting with a base color can make things easier. Blending colors into the base color will help you get smooth gradual changes in tone.
If you use acrylics getting the base skin color right is much more important. As always you will need to work faster with acrylics because they dry more quickly. You can use thin washes or dry brushing to get the tonal shading done afterwards.
Watercolors offer a different challenge again. The white of the paper will form the key to your highlights so add pigment slowly and always work from the darker areas to the lighter ones.
6 Tips for Painting the Best Skin Tones
Start with some good photographs so you have the reference colors you want close at hand. Being able to refer to the pictures whenever needed will always help. You can enlarge any areas that look particularly challenging.
Work from Light to dark and be careful not to add too much of any dark colors first. It is always easier to make something darker than it is to make it lighter. This is even more important when using watercolor paint.
Avoid areas of flat color. None of us have one skin tone. There are always gradients of color in anyones skin. This is accentuated by the lighting and reflections from the surroundings too.
Avoid preconceptions. Look at the colors you actually see rather than what your brain thinks you should see. Our brain often tries to take over from our eyes and will reinforce preconceptions so observation is vital. Look really closely at the different areas of skin to see what the underlying colors really are.
Avoid using black. Being honest this is something i do in most paintings, especially with oil paints. Black paint is often very high pigment content paint and can easily overwhelm the lighter colors. It is also a very unnatural color. In nature if you look closely the colors that appear black rarely are, and the light and surroundings will reflect more in black anyway so even if you are painting something that is black you would see the reflections more.
Remember we are natures creation. Use natural colors in your base skin tones. This will help you achieve a natural skin tone much more easily.
Think About the Effect of Reflections
Any surface will show reflections of the world around it too. If the subject is stood in a blue room that blue will show up in the painting. If it is a sunny day the light of the sun will reflect on the skin giving it a warmer glow.
Adding Shadows and Highlights
The shadows and highlighted areas can require extra work to get right. Dark brown’s like burnt umber will give a warm shadow, but a dark blue can give a deep cold shadow. Choose the colors that help you achieve what you want to.
Highlights can often be seen as white, but they rarely are. Adding a little white will create the highlight but consider the strength and color of any light source. If the light source is the sun you will have more warmer yellows in it. If the light source is a fluorescent lamp there will be more cool blues in the final painting.
The color of the world around your subject does have a significant effect too. It will affect what what you see in the color and tone of the skin of any person you are painting.
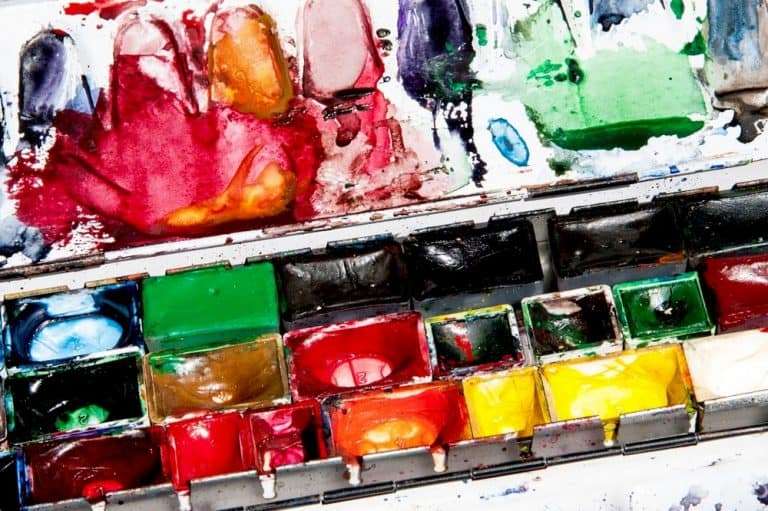
Some good color combinations to try
As I have said there is no one combination of colors that suits every subject and every artist. As an artist we all have our favourite reds and yellows that we use more. This inevitably affects the colors we are likely to start with. It also means we will know the effect those colors have when mixed with another color. By starting with colors we know and love it can make to process of mixing the right color easier.
Below the color chart I have listed a few of what I think are the best color combinations to mix good skin tones. I have used some generalisation but remember, Even two brothers will have slightly different skin tones. Treat every portrait as different from the start and always remember to look beyond the colors you first see.
Naples yellow and cadmium red hue
Naples yellow and cadmium red hue will give you a peachy color. If you add a little zinc white it will give you a good Caucasian skin tone.
Yellow ochre and Vermillion
Yellow ochre and Vermillion will give you a very similar color. Adding zinc white will make it paler, adding a little burnt umber will give a more tanned effect.
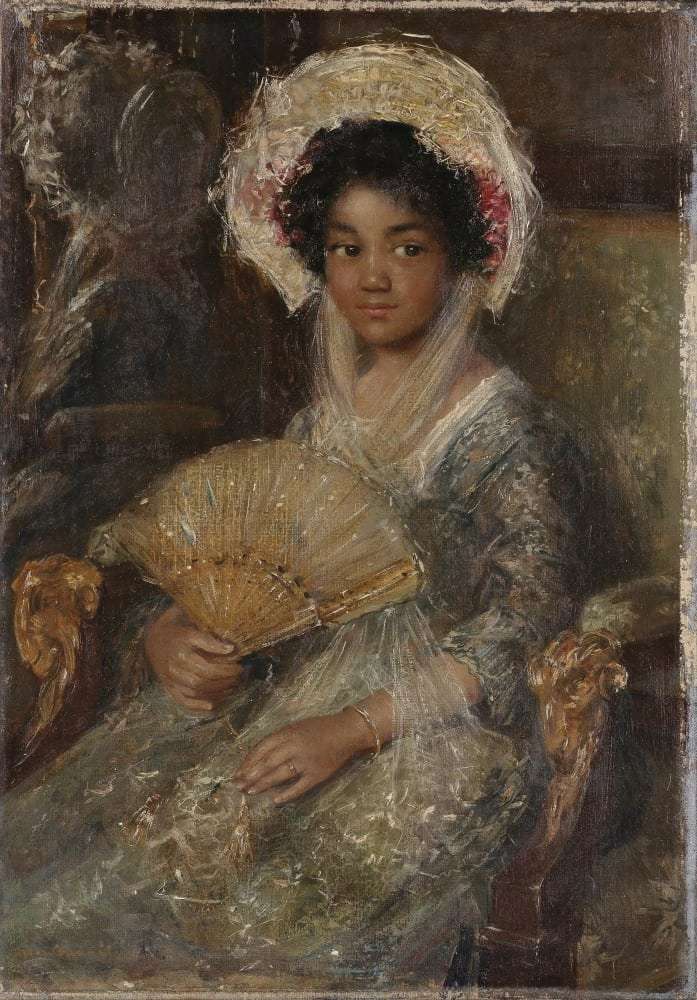
Lemon yellow and red ochre
Lemon yellow and red ochre when mixed give a slightly darker base color skin tone. It is good for tanned skin and can work for some Asian or Arabic skin tones. In the portrait below you can see the effect. The darker earthy red actually comes through more as the color is lightened. In other areas the blue tones from the lemon yellow give a more olive skin tone perfect for this Turkish man.
Burnt umber and cadmium yellow
Burnt umber and cadmium yellow will give you a warm brown skin tone. If you add zinc white it can be really useful for lighter Asian or Spanish skin tones. Adding a little raw umber will make it darker and more earthy but adding a small amount of lemon yellow, or cadmium blue and white, will give a more olive skinned effect.
Burnt sienna and Naples yellow
Burnt sienna and Naples yellow are both strong high pigment colors. They will give you a really flexible combination. Adding white it is easy to get lighter skin tones and adding a little burnt umber will give you a good base for some darker skin types. Because both colors have a lot of pigment you can thin them down a lot and layer the skin up with washes to get the exact color balance you want.
Venetian red and pale yellow hue
Venetian red and pale yellow hue is a combination that can help you to get a really good Latino skin tone. You can add a little zinc white for lighter tones. If you need darker tones a little burnt umber can be useful.
Cadmium red, lemon yellow and Prussian blue
Cadmium red, lemon yellow and Prussian blue will give you a rich dark skin tone. You wont need much cadmium red to give the yellow a warm glow. The blue should be added slowly because it is a high pigment color. Remember if it gets too dark you can always add a little zinc white to get the perfect color.
Red ochre, raw sienna and cobalt blue
Red ochre, raw sienna and cobalt blue will give a dark rich skin tone. I found it really hard to get the dark heavily tanned skin of a Sri Lankan man right until I discovered this combination. I started with a good blob of the raw sienna and gradually mixed in the other colors in very small amounts until I got it right.
Lemon yellow, ultramarine blue and burnt sienna
Lemon yellow, ultramarine blue and burnt sienna is another combination perfect for darker skin. The cooler lemon yellow balances the warmth of the burnt sienna really well and the ultramarine blue darkens the color mix without making the skin tone too cool,
Final Thoughts
Do remember, these color combinations and tips are just a guide to help you. Explore and discover new, different ways to mix natural looking skin tones. Every portrait will be different for many reasons.
I think careful observation is vital when painting a portrait. Painting what you see rather than what you think you see is something that can be difficult. Look beyond any preconceptions you have and try to see the real colors of the subjects skin.